
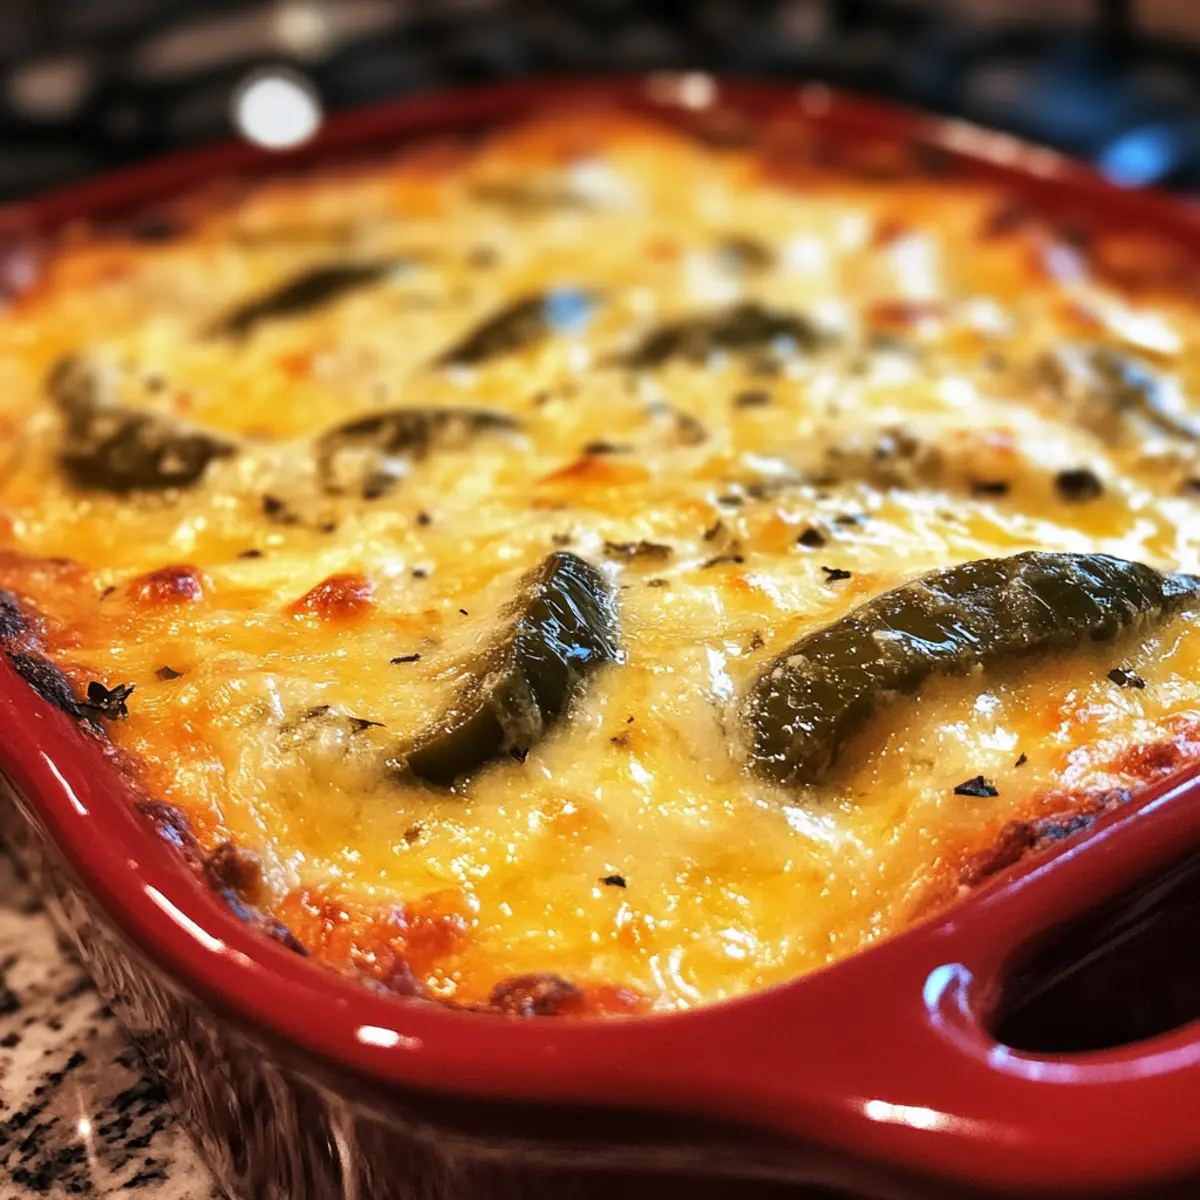
As the fragrance of roasted green chiles fills the kitchen, I can't help but smile at the thought of sharing a slice of my Easy Chile Rellenos Casserole with friends and family. This cozy vegetarian bake transforms the beloved traditional dish into a simple, oven-ready meal that’s perfect for any occasion. What's better? It’s not only budget-friendly but also incredibly customizable, allowing you to adapt it to your taste preferences without any fuss. Imagine serving a delightful casserole that’s suitable for breakfast, lunch, or dinner, all while being a hit with your loved ones. Intrigued? Let’s dive into the delicious details of how to make this comforting dish come to life!

Why Is Chile Rellenos Casserole Irresistible?
Comforting and Cozy: With its warm, cheesy goodness, this casserole embodies the essence of comfort food, making it a perfect choice for cozy gatherings or family dinners.
Quick and Easy: This recipe is simple to whip up, requiring minimal prep time, ideal for busy weeknights when you want something delicious but don’t have hours to spend in the kitchen.
Customizable: Want to switch things up? You can easily incorporate various proteins or veggies, tailoring this dish to your family's preferences. Consider adding a side of black beans for breakfast or pairing with tangy salsa for dinner!
Budget-Friendly: Satisfying flavor without breaking the bank! This vegetarian recipe uses affordable ingredients, making it an economical choice for every home cook.
Make-Ahead Option: Prepare this ahead of time, store it in the fridge, and bake it fresh when you’re ready—perfect for those looking to streamline meal prep. Try it alongside our Cornbread Breakfast Casserole for a delightful brunch spread!
Indulge in the delectable flavors of this Chile Rellenos Casserole, your new go-to dish!
Chile Rellenos Casserole Ingredients
For the Casserole
• Roasted Green Chiles – The heart of the dish; they bring smoky, mildly spicy flavor. Substitution: Canned fire-roasted chiles for convenience.
• Monterey Jack Cheese – Adds creaminess and exceptional meltability. Substitution: Use mozzarella or Pepper Jack for extra spice.
• Eggs – Create the custard-like texture of the casserole. Note: Beat until pale yellow for the best results.
• Whole Milk – Contributes richness to the dish. Substitution: Half-and-half for a richer flavor or unsweetened almond milk for dairy-free options.
• All-Purpose Flour – Helps to bind the ingredients. Substitution: A gluten-free flour blend works well too.
• Salt and Pepper – Essential for savory flavor enhancement.
Optional Extras
• Cooked Sausage or Shredded Chicken – Adds heartiness; perfect for meat lovers.
• Zucchini or Spinach – For those looking to boost nutrition and flavor depth.
Step‑by‑Step Instructions for Chile Rellenos Casserole
Step 1: Preheat the Oven
Begin by preheating your oven to 350°F (175°C). This temperature is essential for achieving that golden, bubbly top on your Chile Rellenos Casserole. As the oven warms up, you can prepare your ingredients and enjoy the anticipation of that delightful aroma filling your kitchen soon.
Step 2: Whisk the Egg Mixture
In a large mixing bowl, whisk together the eggs, whole milk, all-purpose flour, salt, and pepper. Aim for a smooth, pale yellow mixture that will create a custard-like texture for your casserole. This step takes just a few minutes—about 2-3 minutes of vigorous whisking will ensure everything is well combined and ready to pour.
Step 3: Layer the Chiles
Grease an 8x8 or 9x9 baking dish to prevent sticking. Layer half of the roasted green chiles evenly across the bottom of the dish, creating a vibrant base for your casserole. You should be able to see the green chiles peeking through, which sets the stage for the bold flavors to come in this Chile Rellenos Casserole.
Step 4: Sprinkle the Cheese
Next, sprinkle half of the shredded Monterey Jack cheese over the layer of chiles. This will add a creamy, melty texture that beautifully complements the smoky flavor of the chiles. Make sure to distribute the cheese evenly so every slice of your casserole will be cheesy and satisfying.
Step 5: Pour the Egg Mixture
Carefully pour half of the prepared egg mixture over the layered chiles and cheese. This will soak into the layers, binding everything together while it bakes. Pour slowly and evenly to ensure that the egg mixture settles nicely throughout the casserole, creating a deliciously cohesive dish.
Step 6: Repeat the Layers
Now it's time to repeat the layering process! Add the remaining roasted green chiles on top of the first layer, followed by the rest of the Monterey Jack cheese. The second layer adds depth and flavor, bringing the essence of traditional chile rellenos into this easy casserole.
Step 7: Finish with the Egg Mixture
Pour the remaining egg mixture over the final layer of cheese and chiles. Again, ensure an even distribution for a beautifully baked casserole. At this stage, the dish should look colorful and inviting, just waiting to be transformed in the oven.
Step 8: Bake the Casserole
Place the baking dish in the preheated oven and bake for 35 minutes. The casserole is done when the top is golden and a knife inserted into the center comes out clean. This step is vital for achieving that perfect texture, so keep an eye on it as the time approaches.
Step 9: Cool Before Serving
Once baked, remove the Chile Rellenos Casserole from the oven and allow it to cool slightly for about 5-10 minutes. This resting period will make it easier to cut and serve. You'll find that this casserole not only looks delicious but also smells heavenly, creating the perfect atmosphere for any meal.

What to Serve with Chile Rellenos Casserole
Elevate your meal experience by pairing vibrant flavors and complementary dishes with your delightful casserole creation.
- Warm Tortillas: Soft, warm tortillas are perfect for scooping up the casserole, enhancing the authentic Mexican experience while adding a delightful texture contrast.
- Tangy Salsa: Whether homemade or store-bought, a zesty salsa provides a burst of freshness that brightens each bite and complements the rich flavors beautifully.
- Black Beans: Offering a hearty, protein-packed side, seasoned black beans bring richness and bold flavor, pairing well with the creamy casserole. Enjoy them warm, with a squeeze of lime!
- Light Salad: A crisp garden salad tossed with a tangy vinaigrette offers a refreshing contrast to the warm casserole. The crunchiness brings a delightful texture balance that energizes your meal.
- Guacamole: Silky, creamy guacamole provides a cooling touch against the heat of the chiles. Serve it on the side for easy dipping or spreading atop the casserole.
- Mexican Rice: Fluffy Mexican rice seasoned with herbs and spices brings a comforting touch that rounds out the meal, lending just the right base to scoop with the casserole.
- Avocado Toast: For a delicious breakfast pairing, consider creamy avocado toast on the side, adding healthy fats that enhance the overall taste experience.
- Grilled Vegetables: Charred and smoky grilled vegetables, drizzled with lime juice, provide a lovely earthy flavor contrast while adding vibrancy to your plate.
- Flan or Tres Leches Cake: To wrap up your meal on a sweet note, serve traditional Mexican desserts like flan or tres leches cake, which will add a delightful ending to your culinary fiesta.
Make Ahead Options
These Chile Rellenos Casserole preparations are perfect for busy home cooks! You can assemble the entire casserole up to 24 hours in advance; simply cover it tightly with plastic wrap or foil and refrigerate. This allows the flavors to meld beautifully while you save precious time. For best quality, avoid adding the cheese topping until just before baking, as this prevents it from becoming overly soft. When you’re ready to enjoy your casserole, preheat the oven and bake it straight from the fridge—just increase the baking time by about 5-10 minutes to ensure it cooks thoroughly. With these make-ahead options, serving a delicious meal has never been easier!
Expert Tips for Chile Rellenos Casserole
-
Prep Ahead: Consider assembling the Chile Rellenos Casserole the night before, covering it with plastic wrap, and refrigerating. This makes for an easy bake in the morning or a stress-free dinner.
-
Egg Whisking: Make sure to whisk the eggs thoroughly until pale yellow. Skipping this step can lead to uneven texture in your casserole, so take a few extra moments to ensure it's smooth.
-
Cheese Choices: Feel free to experiment with different cheese types. Using a mix of cheeses, such as Monterey Jack and Pepper Jack, can boost flavor and spice in your casserole.
-
Layering Technique: Layering properly is key. Distributing chiles, cheese, and egg mixture evenly will guarantee the meatangle of flavors in each delectable bite!
-
Spice It Up: If you prefer more heat, try using hotter chiles or mix in some diced jalapeños. Tailoring the spice level allows your Chile Rellenos Casserole to fit your taste buds perfectly.
How to Store and Freeze Chile Rellenos Casserole
Fridge: Store leftover Chile Rellenos Casserole tightly covered in the refrigerator for up to 4 days. Ensure it's well-wrapped to maintain its flavor and texture.
Freezer: For long-term storage, freeze portions of the casserole for up to 2 months. Be sure to place them in airtight containers or wrap them tightly in plastic wrap and aluminum foil.
Reheating: When you're ready to enjoy, thaw the casserole overnight in the fridge. Reheat gently in the oven at 350°F (175°C) until heated through, about 20-30 minutes to bring back the creamy texture.
Make-Ahead Tip: You can also prepare and store the casserole unbaked in the fridge overnight. Just pop it in the oven the next day for a fresh, warm meal!
Chile Rellenos Casserole Variations & Substitutions
Feel free to get creative and make this Chile Rellenos Casserole your own with these delightful options!
-
Spicy Twist: Add diced jalapeños to the egg mixture for an added kick. Feel the heat with every rich, cheesy bite, perfect for spice lovers!
-
Cheese Variety: Swap Monterey Jack with a Mexican cheese blend for a unique flavor profile. This twist enhances the overall taste while keeping the dish delightful and cheesy.
-
Flavor Boost: Incorporate fresh herbs like cilantro or green onions for an aromatic finish. These ingredients brighten the dish and add a fresh note that elevates every serving.
-
Protein Packed: Add cooked chorizo or black beans for added heartiness. This makes the casserole even more filling and delicious, creating a satisfying meal any time of day.
-
Nutty Texture: Toss in some toasted pine nuts or sunflower seeds for a delightful crunch. This unexpected twist can create a lovely contrast to the creamy texture of the casserole.
-
Vegetable Medley: Substitute some chiles with zucchini or bell peppers for added nutrition. Incorporating extra veggies not only boosts health benefits but also enhances the vibrant colors on your plate.
-
Egg-Free Version: Use a chickpea flour mixture or tofu scramble instead of eggs for a vegan version. The flavors will still be satisfying, ensuring everyone can enjoy this comforting dish.
-
Dairy-Free Option: Opt for a dairy-free cheese alternative and almond milk for a lactose-free adaptation. You’ll still savor the creamy goodness without worry, making it perfect for all dietary needs.
Don’t forget to pair your casserole with a fresh salad or a side of tangy salsa for a perfect meal! To explore more heartwarming recipes, consider trying our Sweet Potato Casserole or a flavorful Spicy Miso Casserole. You’ll discover countless ways to lift your dining table!
Chile Rellenos Casserole Recipe FAQs
How do I select the best roasted green chiles?
Absolutely! When choosing roasted green chiles, look for those that are vibrant in color and free of dark spots or blemishes. The chiles should feel firm to the touch. If you're opting for canned chiles, select fire-roasted varieties for maximum flavor—these are often found in the international aisle of supermarkets.
What is the best way to store leftovers?
Very! Leftover Chile Rellenos Casserole can be stored in an airtight container in the refrigerator for up to 4 days. Make sure to cover it well to prevent drying out. For added longevity, you can pop it in the freezer for up to 2 months. Just wrap it tightly in plastic wrap and aluminum foil or place it in a freezer-safe container.
Can I freeze and reheat this casserole?
Absolutely! To freeze, let the casserole cool completely, then portion it out in slices or keep it whole in an airtight container. To reheat, thaw it overnight in the fridge, then bake at 350°F (175°C) for about 20-30 minutes until heated through. This method helps restore that delicious creamy texture.
What should I do if my casserole doesn’t set properly?
If your Chile Rellenos Casserole doesn’t set and remains too watery, it’s likely due to insufficient egg whisking or not enough baking time. Ensure that your egg mixture is whisked to a smooth consistency before layering. Additionally, make sure to bake until the top is golden and a knife inserted comes out clean—this indicates it’s fully cooked.
Are there any dietary considerations for this recipe?
Definitely! This casserole is vegetarian but can be adjusted to fit various dietary needs. For a gluten-free version, simply substitute all-purpose flour with a gluten-free blend. If you're cooking for someone with dairy allergies, feel free to use almond milk and dairy-free cheese alternatives. Just keep track of any specific ingredients based on your guests' needs!
Can I prepare this casserole ahead of time?
Absolutely! You can assemble your Chile Rellenos Casserole the night before. After layering all the ingredients, cover it tightly with plastic wrap and refrigerate overnight. On the day you're ready to bake, remove the wrap and pop it in the oven. It’s a fantastic make-ahead option that keeps meal prep simple!

Savor the Comfort of Easy Chile Rellenos Casserole Today
Ingredients
Equipment
Method
- Preheat your oven to 350°F (175°C).
- In a large mixing bowl, whisk together the eggs, whole milk, all-purpose flour, salt, and pepper until smooth and pale yellow.
- Grease an 8x8 or 9x9 baking dish. Layer half of the roasted green chiles evenly across the bottom.
- Sprinkle half of the shredded Monterey Jack cheese over the layer of chiles.
- Pour half of the prepared egg mixture over the layered chiles and cheese.
- Add the remaining roasted green chiles on top of the first layer, followed by the rest of the Monterey Jack cheese.
- Pour the remaining egg mixture over the final layer of cheese and chiles.
- Place the baking dish in the preheated oven and bake for 35 minutes until golden and a knife inserted comes out clean.
- Remove from the oven and let cool for about 5-10 minutes before serving.


Leave a Reply