
As I opened my pantry door, the scent of cookie butter wafted out, pulling me into a world of sweet nostalgia. Instantly, I was inspired to create a dessert that perfectly balances indulgence with ease—the No-Bake Cookie Butter Cheesecake Cups. These delightful little wonders combine velvety cheesecake mousse with a crunchy cookie crumb base, making them the perfect no-bake dessert for any occasion. Not only are they a crowd-pleaser that'll wow your guests, but they also offer a quick solution to satisfy your sweet tooth without the hassle of baking. With a luscious swirl of cookie butter and customizable toppings, each cup is a delightful treat that beckons you for just one more. Ready to whip up a dessert that’ll steal the show? Let’s dive into this irresistible recipe together!
Why are these dessert cups irresistible?
No-Bake Convenience: These Cookie Butter Cheesecake Cups are incredibly easy to whip up—no oven required! Perfect for busy days or spontaneous gatherings.
Decadent Flavor: Infused with rich cookie butter, the smooth cheesecake filling harmonizes beautifully with the crunchy cookie base, creating a divine taste experience.
Customizable Toppings: Feel free to get creative! Whether it's sprinkles of extra cookie crumbs or mixed toppings, you can tailor these treats to suit any celebration.
Crowd-Friendly: Ideal for parties or dinner socials, these cups are sure to impress both guests and family alike, offering a delightful ending to any meal.
Make Ahead Magic: Prepping these cups in advance means less stress and more time to enjoy with loved ones, fitting effortlessly into your entertaining plans.
Feel free to pair these with other delightful recipes like Eggnog Cookies Soft for a sweet spread that will leave everyone smiling!
Cookie Butter Cheesecake Cups Ingredients
For the Crust
- Biscoff or Speculoos Cookie Crumbs – Creates a buttery cookie crust; you can substitute with gingersnap crumbs for a spicier twist.
- Melted Butter – Binds cookie crumbs together for a firm crust, ensuring every bite is satisfying.
For the Cheesecake Filling
- Cream Cheese (8 oz, softened) – Provides a rich and creamy base for the cheesecake filling; be sure it’s at room temperature to avoid lumps.
- Powdered Sugar (¾ cup) – Sweetens the filling without adding graininess, keeping it smooth and delightful.
- Cookie Butter (½ cup plus extra for drizzling) – Adds flavor and creaminess; best to use cookie butter for optimal taste, enhancing that irresistible sweetness.
- Vanilla Extract (1 tsp) – Enhances the overall flavor profile, giving the filling a rounded taste.
For the Topping
- Heavy Whipping Cream (1 cup) – Whipped to soft peaks, this adds lightness and creamy texture to the cheesecake filling.
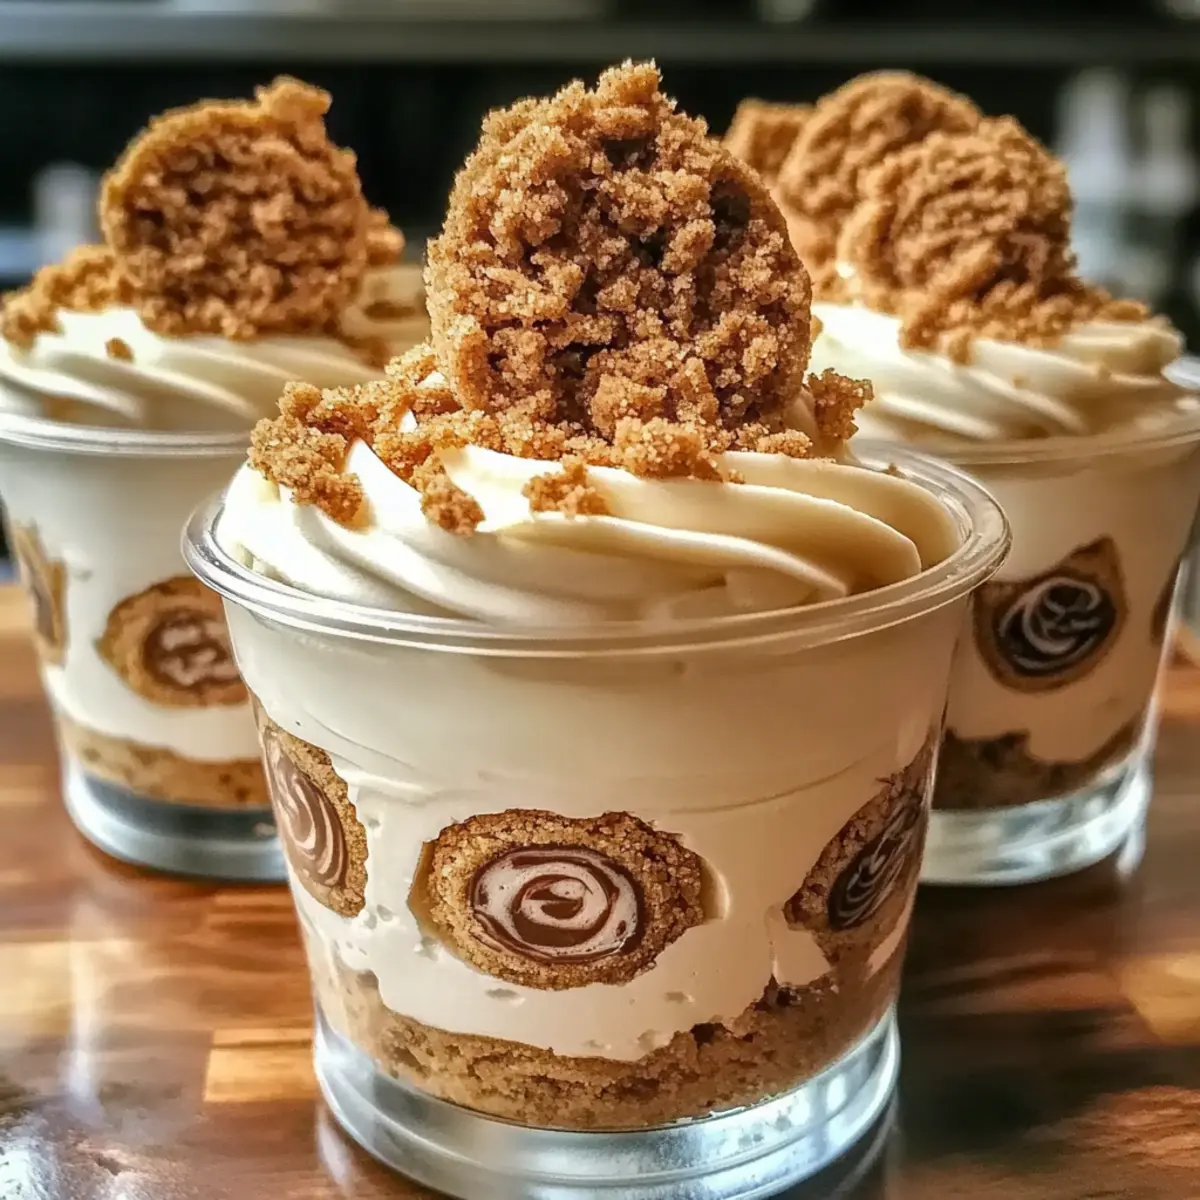
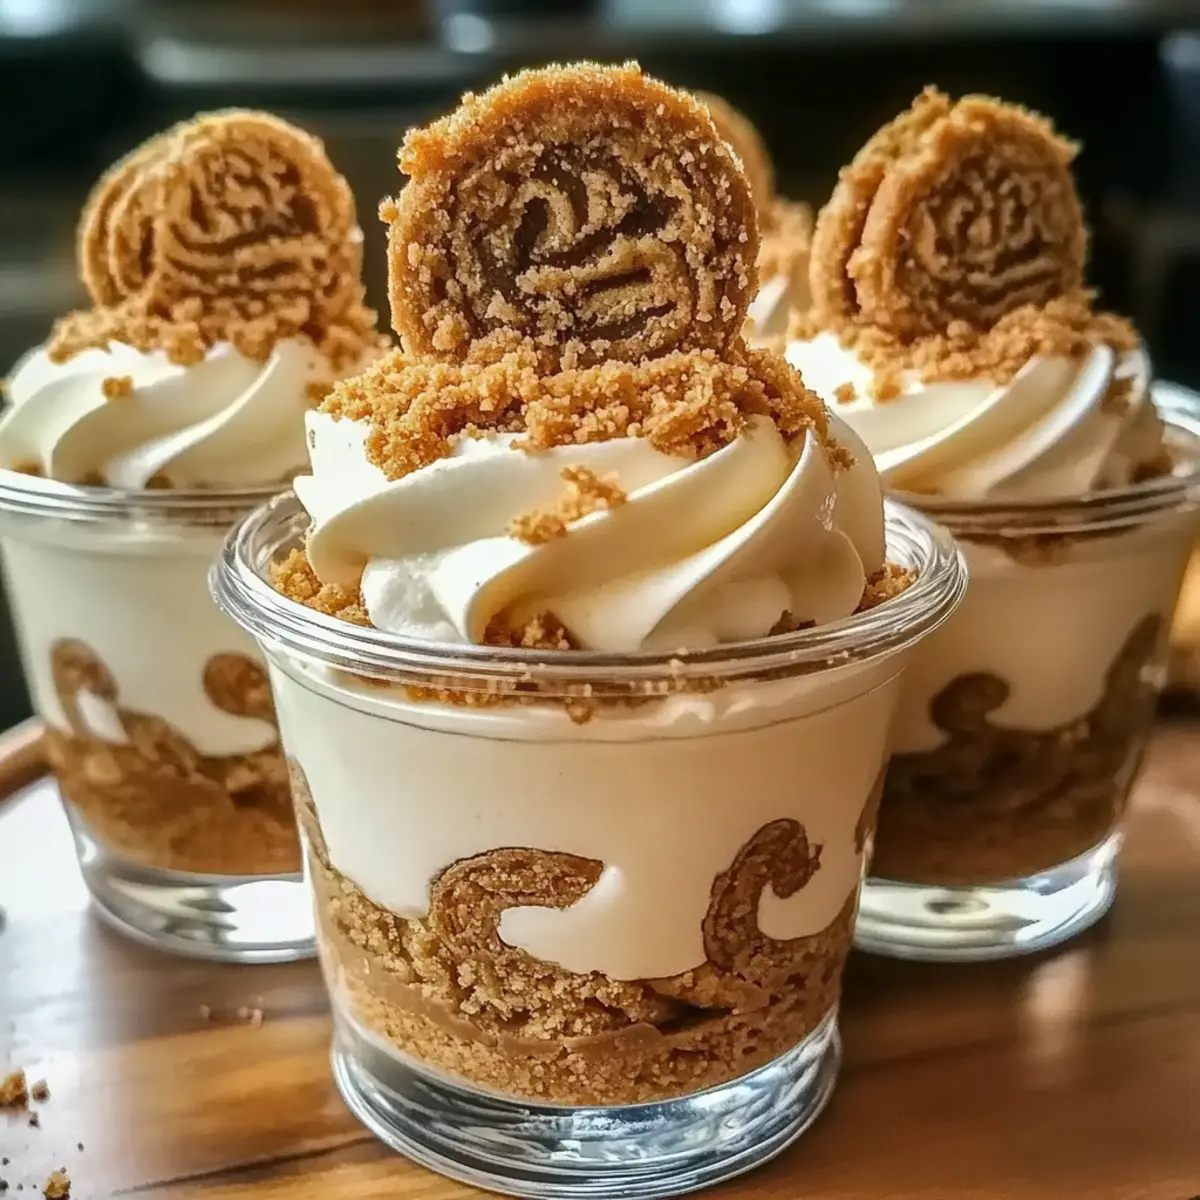
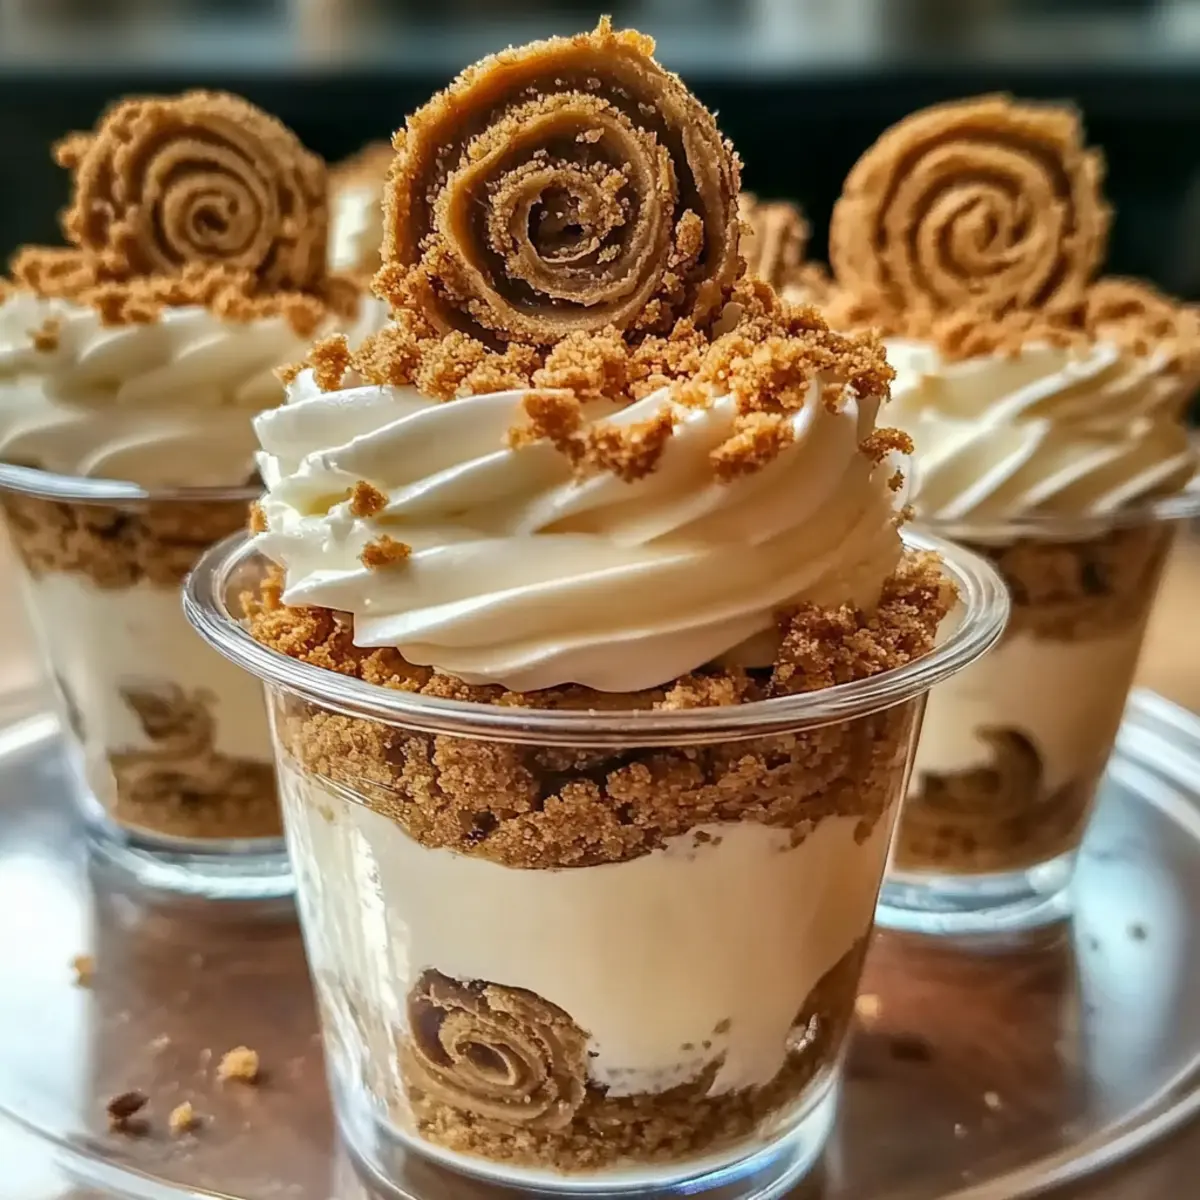
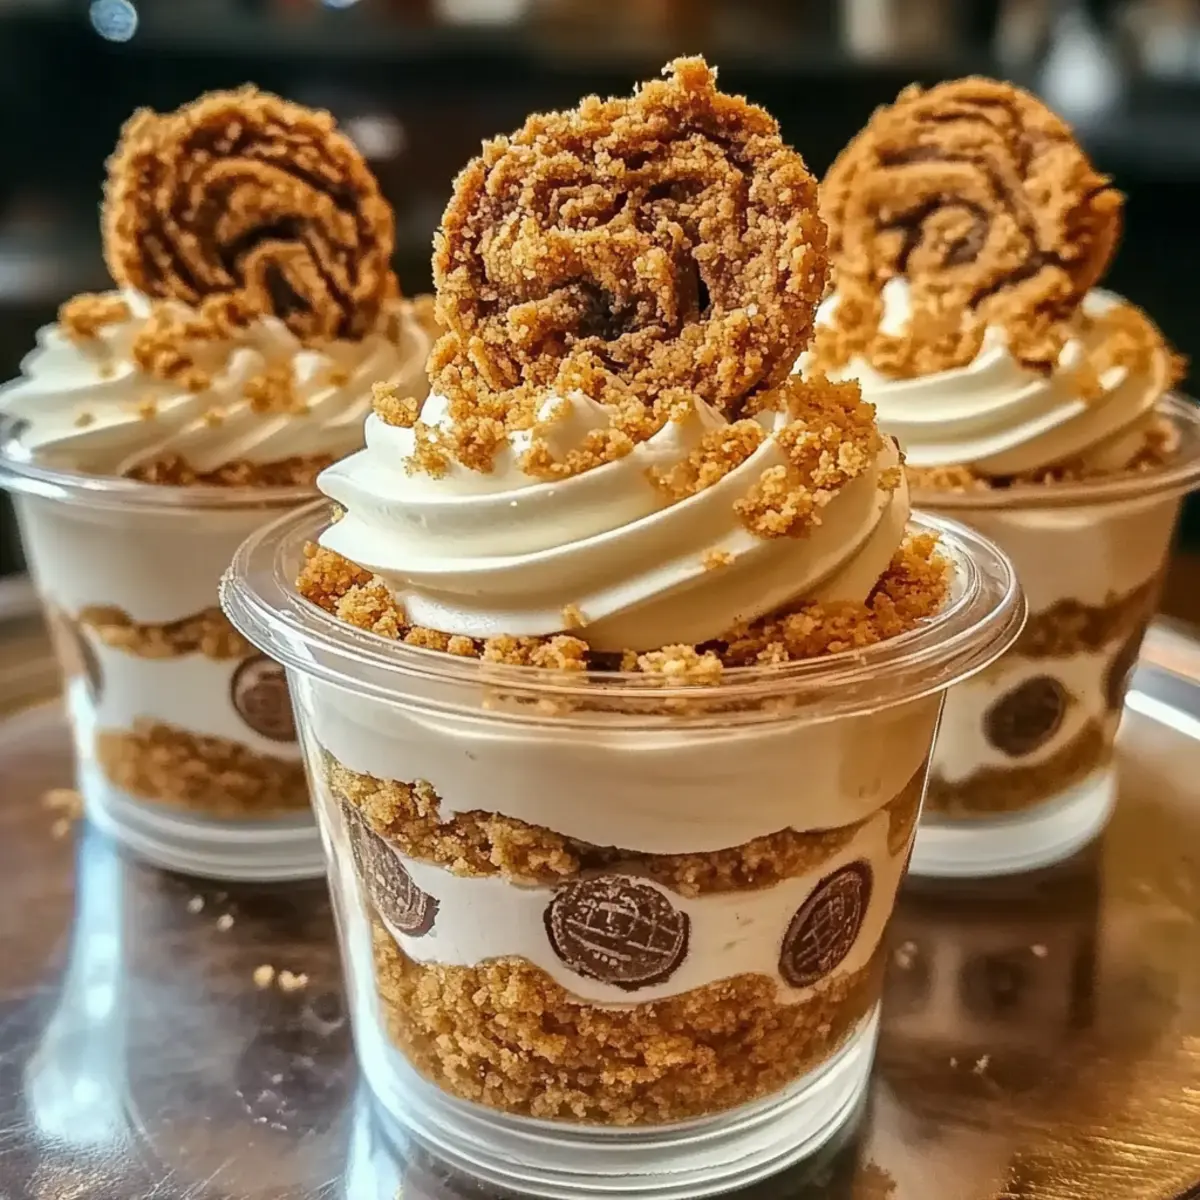
- Extra Cookies for Garnish (optional) – For decorative presentation and added texture, making each cup an eye-catching treat.
These Cookie Butter Cheesecake Cups come together effortlessly, allowing you to savor the luxurious flavors at any occasion!
Step‑by‑Step Instructions for Cookie Butter Cheesecake Cups
Step 1: Prepare the Cookie Crust
In a small bowl, combine the Biscoff or Speculoos cookie crumbs with melted butter using a fork until the mixture resembles wet sand. Spoon the crust mixture evenly into the bottom of serving cups, pressing it down firmly with the back of a spoon to create a solid base. Set these aside while you make the cheesecake filling.
Step 2: Whip the Cream
In a separate mixing bowl, use an electric mixer to whip the heavy cream at medium speed until soft peaks form, about 3-5 minutes. Make sure to keep an eye on it, as you want a light, fluffy texture. Once whipped, gently set the bowl aside, allowing the cream to maintain its volume as you prepare the cheesecake mixture.
Step 3: Mix the Cheesecake Filling
In a large mixing bowl, beat together the softened cream cheese, powdered sugar, cookie butter, and vanilla extract using an electric mixer until the mixture is smooth and creamy, about 2-3 minutes. This rich blend will serve as the luxurious filling for your Cookie Butter Cheesecake Cups, so be sure to scrape down the sides of the bowl for even mixing.
Step 4: Combine the Mixtures
Gently fold the whipped cream into the cookie butter mixture using a spatula. Start by adding one-third of the whipped cream to the cheesecake filling, folding it in carefully to lighten the mixture. Then gradually add the remaining whipped cream, being cautious not to deflate the fluffiness of the cream. This folding technique ensures a light and airy texture for each cheesecake cup.
Step 5: Layer the Cheesecake Filling
Using a spoon, carefully layer the cheesecake filling over the cookie crust in each cup, filling them about halfway. Drizzle a little extra melted cookie butter on top of the filling for added flavor and a beautiful presentation. The contrast of the creamy cheesecake and rich cookie butter will be a delightful foundation for the next layer.
Step 6: Add More Layers
Repeat the layering process by adding another layer of the cheesecake filling over the drizzled cookie butter in each cup, ensuring to fill them to the top. This double layer of creaminess creates a beautiful contrast and a satisfying bite full of flavor. Smooth the tops with a spatula or back of a spoon for an even finish.
Step 7: Garnish for Presentation
To elevate your Cookie Butter Cheesecake Cups, add a sprinkle of extra cookie crumbs on top or place a whole cookie for garnish. This not only adds texture but also enhances the visual appeal, making your dessert a showstopper. Your guests will be drawn to the delightful presentation and eager to taste!
Step 8: Chill Before Serving
Transfer the assembled cups to the refrigerator and chill for at least 1 hour. This step is crucial, as it allows the flavors to meld together and the filling to set properly. Once chilled, the creamy texture will be perfectly achieved, ready to deliver an indulgent experience with every bite.
How to Store and Freeze Cookie Butter Cheesecake Cups
Fridge: Keep the cups in an airtight container in the refrigerator for up to 3 days. The cool environment ensures the creamy texture remains perfectly delightful.
Freezer: If you want to enjoy these treats later, freeze the cheesecake cups without toppings for up to 1 month. Just be sure to wrap them tightly to prevent freezer burn.
Thawing: To enjoy frozen cups, simply transfer them to the fridge to thaw overnight before serving. This gentle thawing method helps maintain their creamy consistency.
Reheating: These dessert cups are served chilled, so no reheating is necessary. Just take them out of the fridge and indulge in the decadent flavors of your Cookie Butter Cheesecake Cups!
What to Serve with Cookie Butter Cheesecake Cups
Elevate your dessert experience with delightful pairings that complement the sweetness of these creamy bites.
-
Fresh Berries: The tartness of fruits like raspberries or blueberries enhances the cheesecake's richness, providing a refreshing contrast. Their vibrant colors also add a beautiful aesthetic to your dessert table.
-
Whipped Cream: A dollop of freshly whipped cream adds a light, airy texture that beautifully balances the dense cheesecake cups. Plus, it can be lightly sweetened or flavored with vanilla for an added touch.
-
Coffee: Pairing your cheesecake cups with a smooth cup of coffee enhances the flavors of the cookie butter, creating a cozy and indulgent experience. The warmth of coffee nicely contrasts the chilled desserts.
-
Chocolate Sauce: A drizzle of chocolate sauce introduces a deliciously rich layer of flavor. This decadence complements the sweet and spiced notes of cookie butter, ensuring each bite is as indulgent as possible.
-
Homemade Ice Cream: A scoop of vanilla or caramel ice cream adds a creamy element that harmonizes with the cheesecake cups. As they melt together, it creates a delightful mixture of flavors and textures.
-
Ginger Snap Cookies: For a spicy kick, serve alongside ginger snap cookies that echo the spiced notes of cookie butter. Their crisp texture provides a crunchy contrast to the smooth cheesecake.
-
Nutella: A side of Nutella for dipping or drizzling adds a luscious hazelnut twist, making this pairing extra indulgent. Its creamy consistency pairs perfectly with the cookie foundation.
-
Tea: A cup of herbal tea, like chai or chamomile, provides a soothing balance to the richness of the cheesecake cups. This makes for a peaceful ending to a meal and is perfect for a cozy night in.
Variations & Substitutions for Cookie Butter Cheesecake Cups
Feel free to get creative and make these Cookie Butter Cheesecake Cups your own with these fun variations!
-
Dairy-Free: Substitute cream cheese with a dairy-free alternative and use coconut cream instead of whipped cream for a creamy consistency. This allows everyone to enjoy the goodness without dairy!
-
Nutty Delight: Replace cookie butter with almond or hazelnut spread to add a rich, nutty flavor to your dessert. This twist brings a whole new level of richness, perfect for nut lovers!
-
Spicy Kick: Add a pinch of cinnamon or a dash of nutmeg to the cheesecake filling for a warm, spiced flavor. It’s a subtle yet delightful way to elevate the taste, making each bite even more comforting.
-
Fruity Twist: Mix in pureed strawberries or raspberries into the cheesecake filling for a fruity burst. This fruity freshness complements the rich cheesecake beautifully, creating a refreshing balance in every cup.
-
Chocolate Lovers: Drizzle melted chocolate over the layers for a decadent chocolatey finish. Adding condensed chocolate adds a lovely richness and smooth texture, making it an irresistible treat for chocolate enthusiasts.
-
Switch It Up: Use crushed graham crackers or Oreos instead of cookie crumbs for the crust. Experimenting with different base flavors allows you to find the combination that truly sings to your taste buds!
-
Party Style: Instead of individual cups, layer the cheesecake filling in an 8x8-inch pan. This serves as a beautiful communal dessert, perfect for gatherings. Cut into squares for easy serving when your friends come over.
You can effortlessly create delightful variations to match your mood or occasion. And while you’re at it, don’t forget to check out these delicious options, like Matcha Cookies Soft for another sweet go-to!
Expert Tips for Cookie Butter Cheesecake Cups
-
Room Temperature Cream Cheese: Ensure your cream cheese is at room temperature to prevent lumps in your filling. This crucial step leads to a perfectly smooth cheesecake.
-
Lightly Fold the Cream: When adding whipped cream to the cheesecake mixture, fold gently to keep the light, airy texture. This helps maintain that delightful creaminess in your Cookie Butter Cheesecake Cups.
-
Chill Time is Key: Allow your cheesecake cups to chill for at least one hour before serving. This step is vital for achieving the ideal texture and flavor infusion.
-
Creative Topping Options: Feel free to customize your presentation! Sprinkle with extra cookie crumbs or add decorative whole cookies for a personal touch that elevates your dessert.
-
Make Ahead Convenience: These cheesecake cups can be made up to 24 hours in advance, making them a stress-free option for gatherings. Store them in the fridge until you're ready to serve!
Make Ahead Options
These Cookie Butter Cheesecake Cups are a fantastic choice for meal prep, saving you time and hassle during busy weeks! You can prepare the cookie crumb crust and cheesecake filling up to 24 hours in advance—simply assemble the crust and filling, and refrigerate the cups covered. For best results, keep the whipped cream separate until you're ready to serve; this helps maintain its fluffiness. When it's time to indulge, just layer the whipped cream over the chilled cheesecake filling and garnish with extra cookie crumbs or cookies for that gorgeous finish. This way, you'll have delightful, ready-to-enjoy desserts on hand that are just as delicious as when freshly made!
Cookie Butter Cheesecake Cups Recipe FAQs
How do I select the right cookie crumbs for the crust?
Absolutely! For the perfect crust, opt for Biscoff or Speculoos cookie crumbs, which provide that delightful buttery flavor. If you can’t find them, gingersnap crumbs are a fantastic substitute that adds a lovely spice to your dessert.
What is the best way to store Cookie Butter Cheesecake Cups?
You can keep these cupcakes in an airtight container in the fridge for up to 3 days. Just ensure they are well-covered to protect that creamy texture, so they stay as delightful on day three as they are on day one!
Can I freeze the Cookie Butter Cheesecake Cups?
Yes, you can! Freeze the cheesecake cups without toppings for up to 1 month. To do this, wrap each cup tightly with plastic wrap or place them in freezer-safe bags to prevent freezer burn. When you’re ready to enjoy them, simply transfer them to the refrigerator to thaw overnight.
What should I do if my cream cheese is lumpy?
No worries! If your cream cheese is lumpy, this usually means it wasn't at room temperature before mixing. To fix it, gently beat the cream cheese in a bowl until smooth before adding the other ingredients. Take your time, as this ensures a silky filling for your Cookie Butter Cheesecake Cups!
Are there any dietary considerations for this recipe?
Very! If you or your guests have dietary restrictions, consider using lactose-free cream cheese and whipped cream for a dairy-free version. You could also adapt the recipe by using gluten-free cookie crumbs to make it suitable for those with gluten sensitivities. Enjoy creating delicious options for everyone!
Decadent Cookie Butter Cheesecake Cups for Easy Indulgence
Ingredients
Equipment
Method
- In a small bowl, combine the Biscoff or Speculoos cookie crumbs with melted butter using a fork until resembling wet sand. Spoon into serving cups and press down to create a solid base.
- Whip the heavy cream in a separate mixing bowl with an electric mixer until soft peaks form, about 3-5 minutes.
- Beat together the softened cream cheese, powdered sugar, cookie butter, and vanilla extract in a large mixing bowl until smooth and creamy, about 2-3 minutes.
- Gently fold the whipped cream into the cookie butter mixture using a spatula, starting with one-third and gradually adding the rest.
- Layer the cheesecake filling on the cookie crust in each cup, filling halfway. Drizzle extra cookie butter on top.
- Repeat layering with more cheesecake filling, filling to the top, and smoothing the tops with a spatula.
- Garnish with extra cookie crumbs or a whole cookie on top.
- Chill the assembled cups in the refrigerator for at least 1 hour before serving.

Leave a Reply