
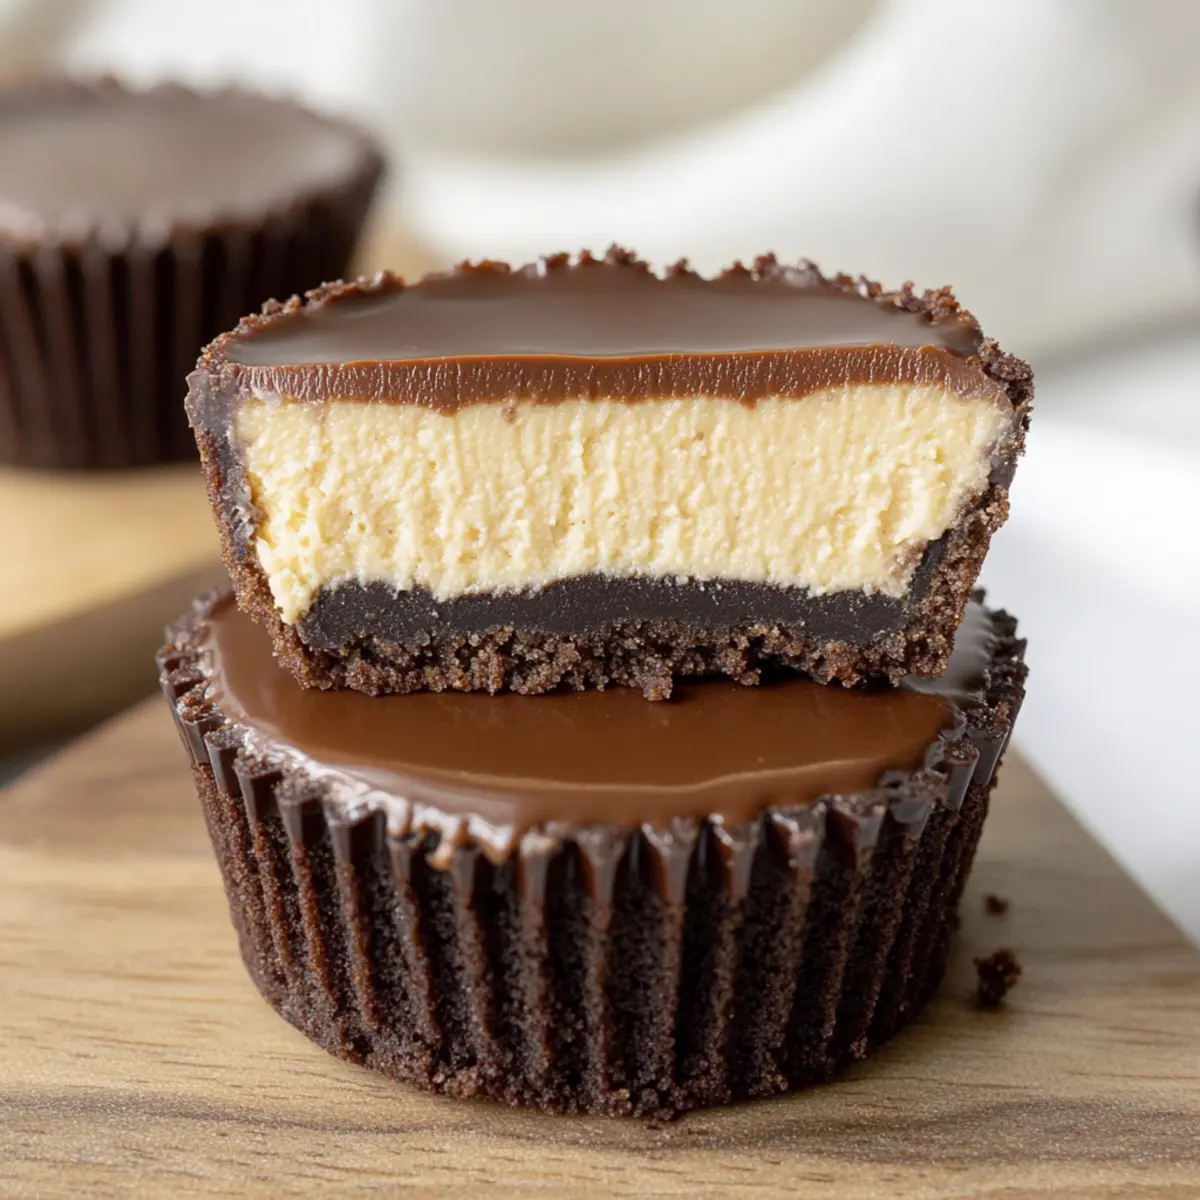
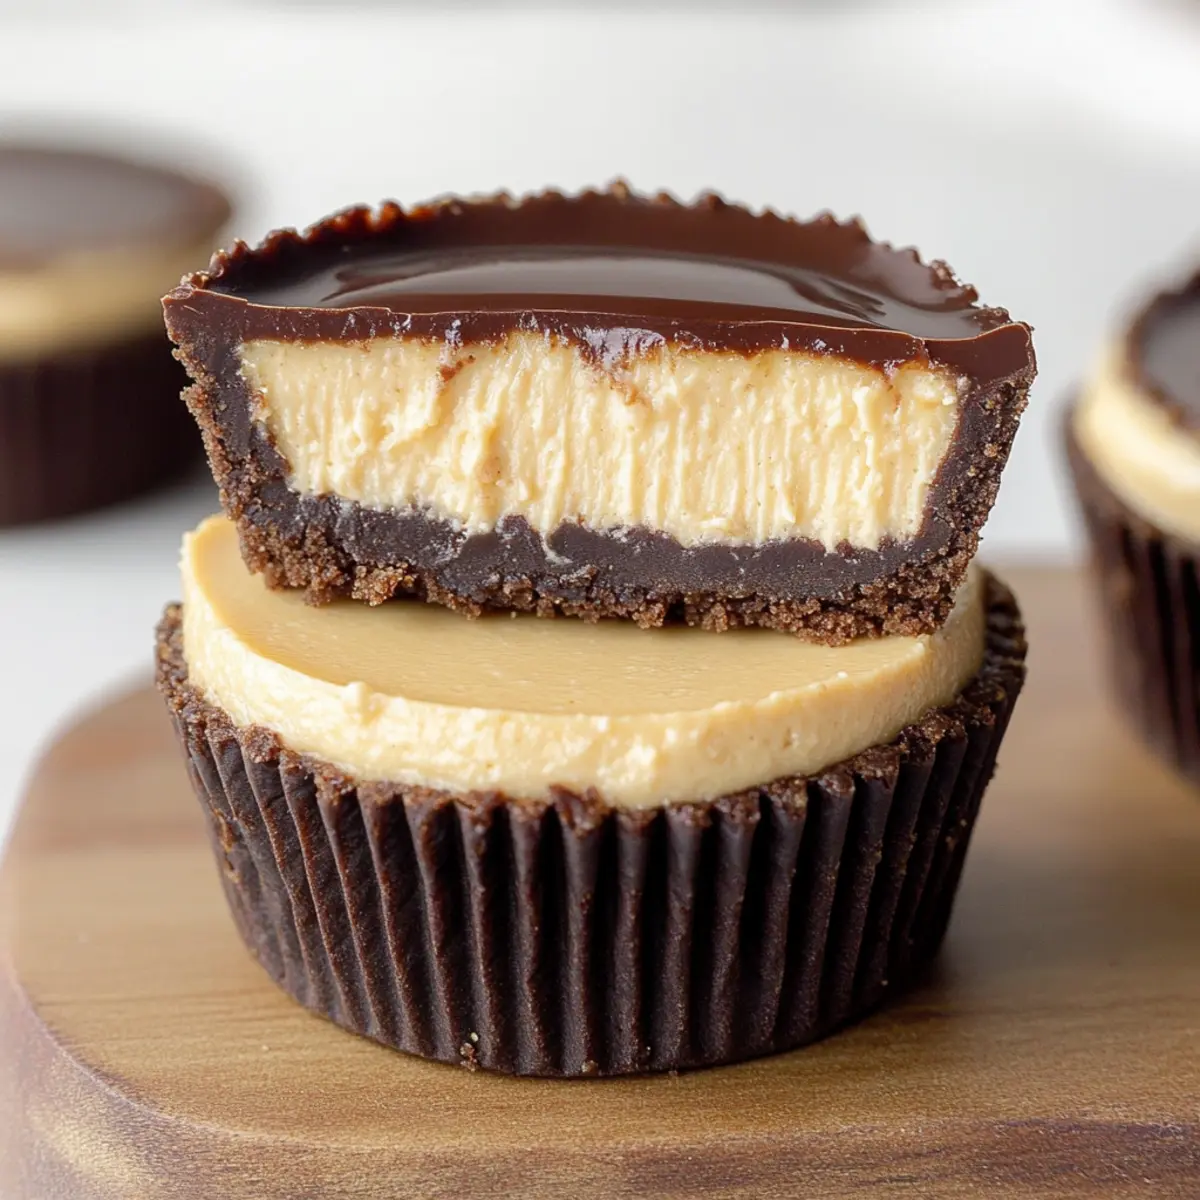
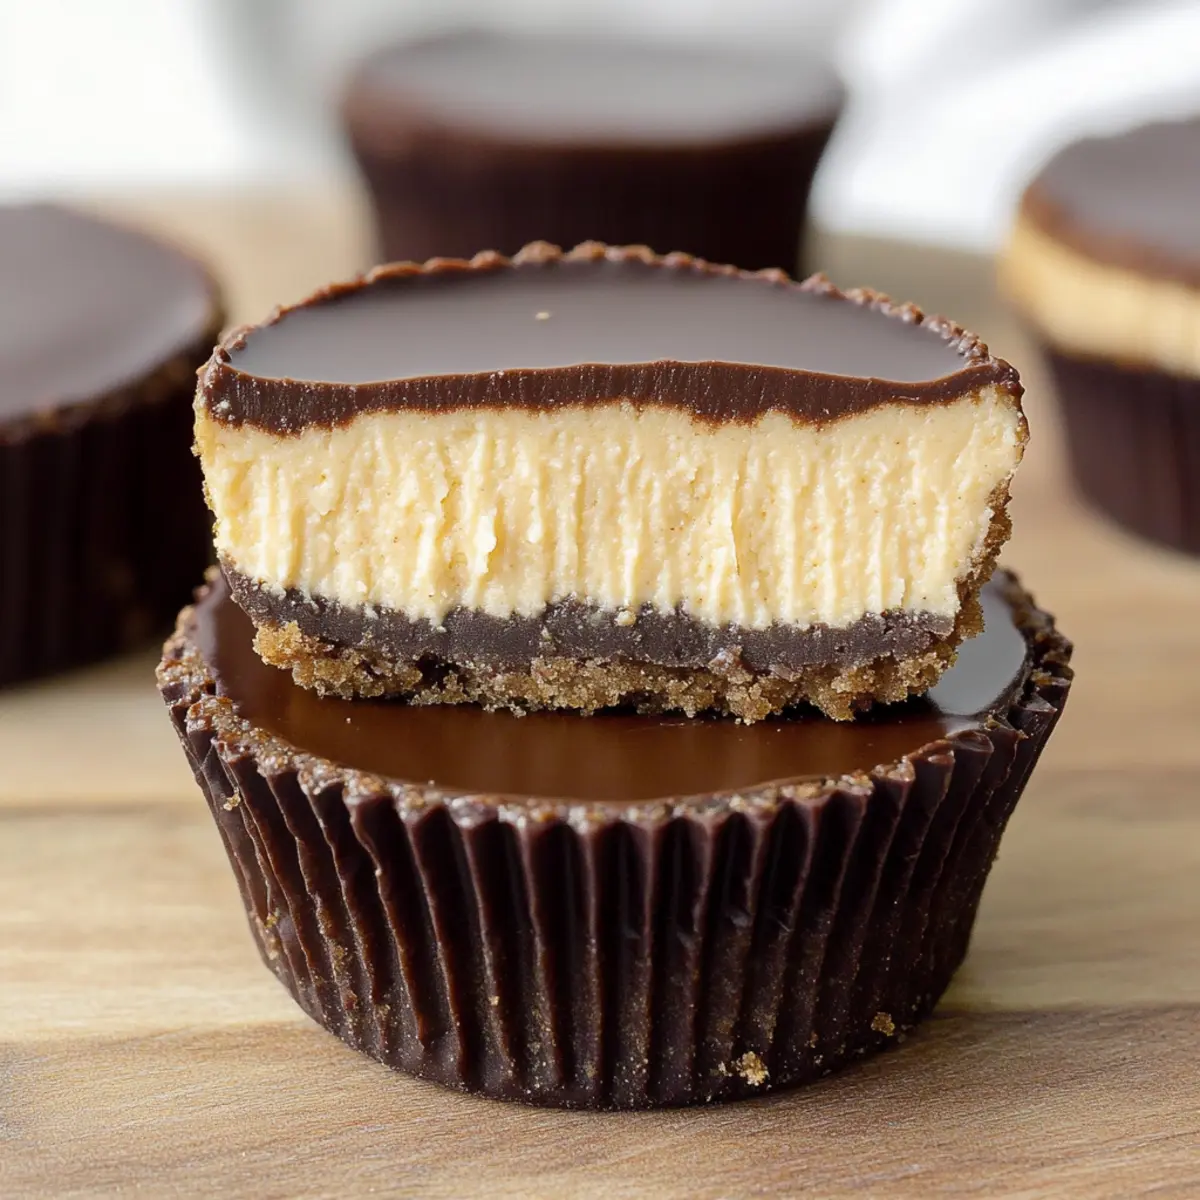
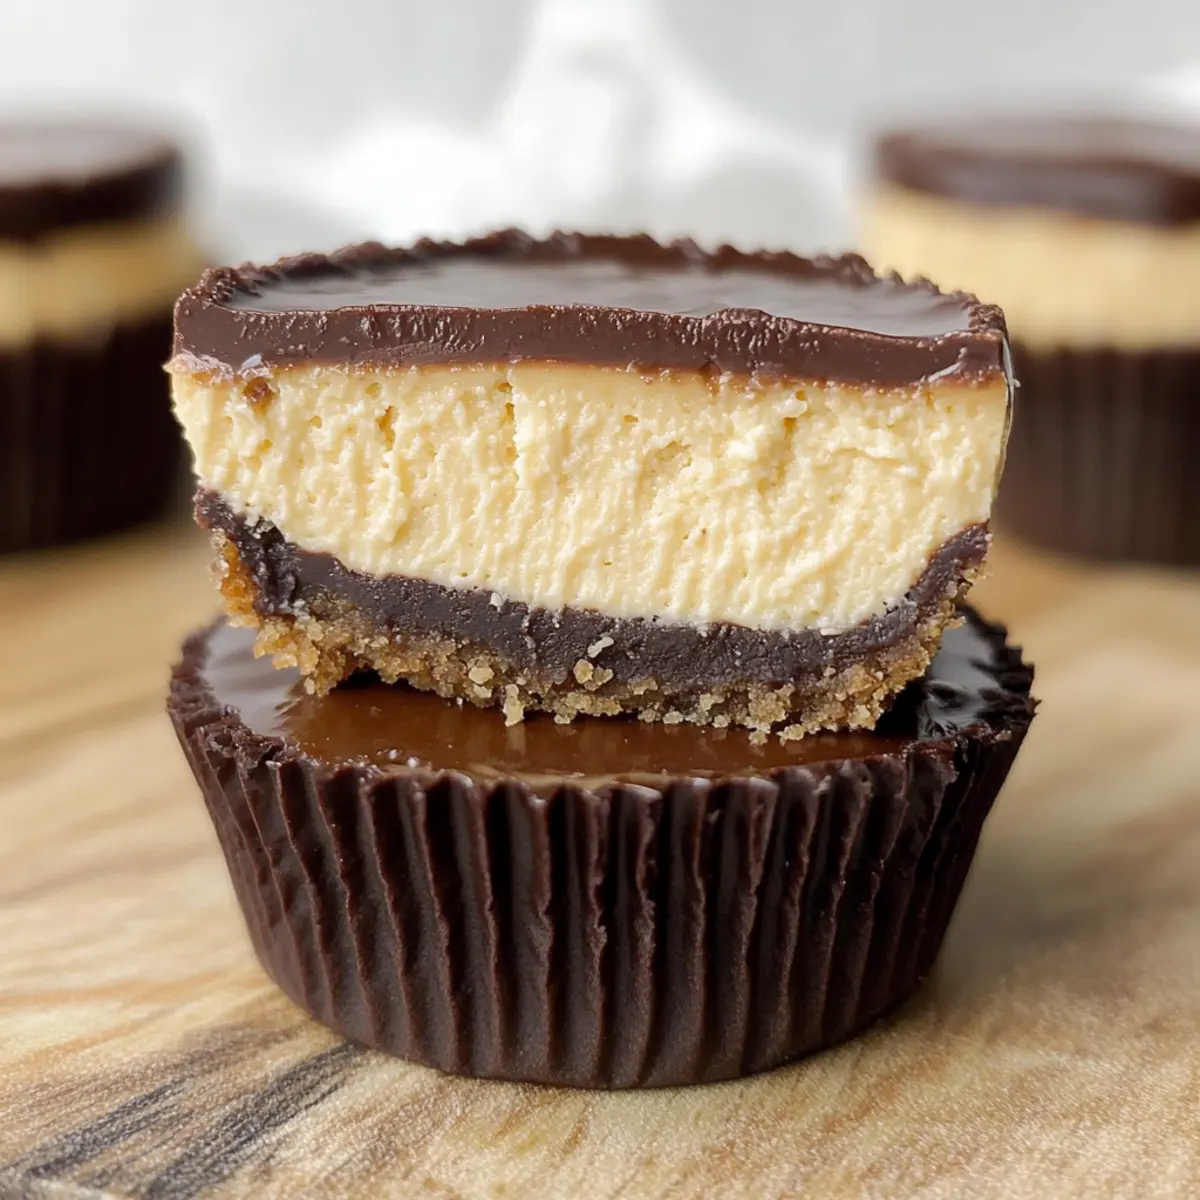
As I pulled the warm, freshly baked mini cheesecakes from the oven, my kitchen filled with the heavenly aroma of chocolate and peanut butter. You know those days when you crave something sweet yet comforting? These Rich Mini Peanut Butter Cup Cheesecakes are here to rescue you. With their chocolate graham cracker crust and creamy peanut butter filling, they are the ultimate dessert indulgence that will thrill any peanut butter lover. Best of all, they’re quick to whip up and perfect for sharing with family or friends. Just imagine a sweet treat that transforms an ordinary evening into a special occasion! Are you ready to embark on a delightful culinary adventure? Let's dive into this irresistible recipe!
Why are these cheesecakes a must-try?
Decadent Flavor: The rich combination of chocolate and creamy peanut butter delivers a taste explosion that’s hard to resist.
Easy to Make: With straightforward steps, even novice bakers can achieve impressive results in no time!
Perfect for Sharing: These mini delights are ideal for parties or family gatherings, ensuring everyone gets their own delicious treat.
Customizable Options: Feel free to switch up the toppings or crust for a unique spin—like adding an Oreo base if you’re feeling adventurous!
Quick Chilling: Only two hours of refrigeration needed transforms these cakes into an impressive dessert, perfect for last-minute cravings.
Once you master this recipe, you might also enjoy exploring other delightful creations like my Crockpot Butter Chicken or sweet treats like Mini Tropical Pavlovas!
Mini Peanut Butter Cup Cheesecake Ingredients
For the Crust
• Chocolate Graham Cracker Crumbs – This gives the base crust a delightful chocolate flavor; substitute with regular graham crackers for a different taste.
• Granulated Sugar – Sweetens both the crust and the filling; it’s best to use exactly what's listed for optimal results.
• Unsalted Butter (melted) – Binds the crust ingredients together and enhances flavor; feel free to use margarine if needed.
For the Cheesecake Filling
• Cream Cheese (room temperature) – The key to a creamy cheesecake filling, make sure it's at room temperature for smooth blending.
• Large Eggs (room temperature) – They contribute structure and a creamy texture, ensuring the perfect consistency.
• Creamy Peanut Butter – This is what gives our mini cheesecakes their signature flavor; natural peanut butter can be used, but it may affect texture.
• Vanilla Extract – Boosts the complexity of flavors; don’t skip this for a rich cheesecake taste.
For the Topping
• Semi-Sweet Chocolate Chips – Used for a decadent topping, these add a rich layer; you can substitute with dark or milk chocolate if you prefer.
• Coconut Oil – Helps achieve that irresistible magic shell consistency; vegetable oil can work as a substitute too.
Step‑by‑Step Instructions for Mini Peanut Butter Cup Cheesecakes
Step 1: Preheat and Prepare
Begin by preheating your oven to 350°F (175°C). Line 18 cups of a standard cupcake or muffin pan with paper liners, ensuring they are secure. This will give your Mini Peanut Butter Cup Cheesecakes a perfect shape and easy removal once baked.
Step 2: Make the Crust
In a medium bowl, combine chocolate graham cracker crumbs, granulated sugar, and melted unsalted butter. Mix until the crumbs are fully coated and resemble wet sand. Firmly press this mixture into the bottom of each lined cup, creating an even layer that serves as the irresistible crust for your cheesecakes.
Step 3: Prepare the Filling
In a large mixing bowl, using an electric mixer, beat the softened cream cheese until it’s smooth and creamy, about 2 minutes. Gradually add the granulated sugar and continue mixing until fully combined. This base is crucial for achieving the rich, creamy texture of the filling in your Mini Peanut Butter Cup Cheesecakes.
Step 4: Combine Ingredients
With the mixer on low, add the large eggs one at a time, mixing just until incorporated after each addition. Then, add the creamy peanut butter and vanilla extract, blending until your mixture is smooth and uniform. Take care not to overmix to keep your filling velvety and minimize air bubbles.
Step 5: Fill the Cups
Carefully distribute the cheesecake batter evenly over your prepared crusts, filling each cup about 2/3 full. Gently tap the pan on the counter to remove any air bubbles that may have formed, ensuring a smooth surface for your Mini Peanut Butter Cup Cheesecakes.
Step 6: Bake to Perfection
Place the muffin pan in the preheated oven and bake for 17-19 minutes. You’ll know they’re done when the edges look set but the centers jiggle slightly. Once baked, turn off the oven and crack the door open to let them cool gradually—a technique to prevent cracking.
Step 7: Cool Down
After about 30 minutes, remove the cheesecakes from the oven and allow them to cool fully at room temperature. Once cooled, transfer the pan to the refrigerator for an additional cooling period, which helps solidify the filling and improve the texture for your Mini Peanut Butter Cup Cheesecakes.
Step 8: Make the Topping
For the decadent topping, combine semi-sweet chocolate chips, creamy peanut butter, and coconut oil in a microwave-safe bowl. Melt this mixture in 30-second increments, stirring in between until smooth and well blended. This luscious topping will add a rich layer of flavor to your cheesecakes.
Step 9: Assemble and Chill
Once the cheesecakes are completely cooled, pour the melted chocolate topping over each one, ensuring an even coat. Return the pan to the refrigerator and chill for at least 2 hours to allow the topping to set before indulging in your Mini Peanut Butter Cup Cheesecakes.
Mini Peanut Butter Cup Cheesecakes Variations
Feel free to get creative and customize these cheesecakes to suit your taste buds! The beauty of this recipe is its versatility—there's a delicious twist waiting just for you.
-
Oreo Crust: Replace the chocolate graham cracker crust with crushed Oreos for an extra chocolatey experience. The dark, rich flavor pairs beautifully with the peanut butter!
-
Nut Butter Swap: Use almond or cashew butter instead of peanut butter for a unique flavor profile. Each nut butter brings its own delightful twist to the recipe.
-
Add a Splash of Spice: Incorporate a pinch of cinnamon or even cayenne pepper into the filling for a surprising warmth. It’s a lovely way to elevate the flavor!
-
Mini Cheesecake Parfaits: Layer the cheesecake filling and topping in small cups instead of baking them. This no-bake version is perfect for summer gatherings.
-
Gluten-Free Option: Use gluten-free graham crackers or almond flour for the crust to make these mini cheesecakes gluten-free without sacrificing flavor.
-
Fruit Topping: Top with fresh berries or banana slices before adding the chocolate layer for a fruity twist that balances the richness of the cheesecake.
-
Chocolate Ganache: For a more decadent topping, switch to chocolate ganache made from heavy cream and chocolate. It transforms your cheesecakes into an ultra-rich experience.
-
Frozen Treats: For a warm day, freeze the cheesecakes instead of refrigerating them for a delicious frozen dessert. Just let them sit at room temperature for a few minutes before serving.
Once you’ve mastered these variations, you might also want to explore other delightful treats like our Crockpot Butter Chicken or satisfy your sweet tooth with Mini Tropical Pavlovas!
Storage Tips for Mini Peanut Butter Cup Cheesecakes
Fridge: Store your mini cheesecakes in an airtight container in the refrigerator for up to 5 days to maintain their fresh flavor and creamy texture.
Freezer: These delightful treats freeze well! Wrap each cheesecake tightly in plastic wrap and store in a freezer-safe container for up to 1 month.
Thawing: To enjoy your frozen mini cheesecakes, simply thaw them on the countertop for about 30 minutes before serving. This ensures they retain their delicious texture and flavor.
Reheating: If desired, you can gently warm a cheesecake in the microwave for about 10-15 seconds to enhance the dreamy peanut butter and chocolate experience—just be careful not to overheat!
Expert Tips for Mini Peanut Butter Cup Cheesecakes
• Room Temperature Ingredients: Ensure cream cheese and eggs are at room temperature to avoid lumps and achieve a smooth filling.
• Mixing Gently: Avoid overmixing the filling to prevent excess air, which can cause your mini cheesecakes to sink.
• Cooling Technique: Let cheesecakes cool gradually in the oven with the door cracked open; this reduces the chances of cracking and gives them the perfect texture.
• Chill for Flavor: For the best taste and texture, let the cheesecakes chill for a full day before serving; flavors deepen beautifully after resting.
• Watch the Baking Time: Bake until the centers jiggle slightly; overbaking can lead to dry cheesecakes. Aim for that perfect jiggle to keep them creamy!
Make Ahead Options
These Mini Peanut Butter Cup Cheesecakes are an excellent choice for meal prep, making your dessert planning a breeze! You can prepare the crust and filling up to 24 hours in advance; simply store the crust in an airtight container and refrigerate the filling separately. When you’re ready to bake, fill the crusts with the chilled cheesecake batter and proceed with the baking instructions. To maintain their creamy texture and flavor, let them cool completely before adding the rich chocolate topping. After pouring the topping over your cheesecakes, refrigerate for a minimum of 2 hours before serving. With a little foresight, you can enjoy these delightful desserts without any last-minute stress!
What to Serve with Mini Peanut Butter Cup Cheesecakes
Elevate your dessert experience with delightful pairings that enhance the rich flavors of these cheesecakes.
-
Fresh Berries: The tartness of strawberries or raspberries cuts through the richness, adding a refreshing contrast.
-
Whipped Cream: Silky and airy, this classic topping brings a light texture that complements the dense cheesecakes beautifully.
-
Chocolate Drizzle: A drizzle of melted chocolate on top creates an indulgent layer, intensifying the dessert’s chocolate flavor.
-
Coffee or Espresso: The robust flavors of coffee provide an aromatic balance, making each bite of cheesecake even more enjoyable.
-
Vanilla Ice Cream: A scoop of creamy vanilla ice cream brings a cool and refreshing element that contrasts wonderfully with the warm flavors.
-
Salted Caramel Sauce: A drizzle of salted caramel adds a sweet and salty depth, enhancing the peanut butter’s luscious texture.
-
Nutty Crumble Topping: Crushed nuts mixed with brown sugar create a flavorful crunch, adding texture and a delightful nutty flavor.
-
Chocolate Affogato: Pouring hot espresso over a scoop of chocolate ice cream creates a divine dessert experience that pairs decadently with the cheesecakes.
-
Chai Tea: The warm spices of chai tea add a cozy touch, beautifully balancing the sweet richness of your mini cheesecakes.
Mini Peanut Butter Cup Cheesecakes Recipe FAQs
What type of peanut butter should I use?
For these mini cheesecakes, creamy peanut butter works best as it gives a smooth texture to the filling. While you can opt for natural peanut butter, which is healthier, keep in mind that it may alter the texture slightly, making it less creamy. Some find that the oils in natural peanut butter can separate, so always stir well before using!
How long can I store mini cheesecakes in the refrigerator?
You can store your mini peanut butter cup cheesecakes in an airtight container in the refrigerator for up to 5 days. Just make sure they are well covered to prevent them from absorbing any unwanted odors or moisture that might affect their delightful flavor.
Can I freeze these cheesecakes?
Absolutely! These mini cheesecakes freeze wonderfully. Just wrap each cheesecake tightly in plastic wrap and keep them in a freezer-safe container for up to 1 month. When you're ready to enjoy them, let them thaw on the countertop for about 30 minutes for the best texture and flavor.
How can I prevent my cheesecakes from cracking?
To minimize cracking, allow the cheesecakes to cool gradually in the oven by turning off the oven and cracking the door open for 2-3 minutes after baking. This helps prevent sudden temperature changes that can cause the surface to crack. Additionally, be gentle when mixing your filling to avoid incorporating too much air, which can cause sinking during baking.
Can I make these cheesecakes gluten-free?
Yes! To make gluten-free mini peanut butter cup cheesecakes, simply substitute the chocolate graham cracker crumbs with gluten-free graham cracker alternatives or crushed gluten-free cookies. This way, you can enjoy these treats without worrying about gluten sensitivities.
Are these cheesecakes suitable for parties?
Indeed! Mini peanut butter cup cheesecakes are perfect for gatherings. Their individual portion sizes make them easy to serve, and their rich flavor appeals to guests of all ages. Plus, you can decorate them with different toppings or sprinkles to make them even more festive!
Irresistible Mini Peanut Butter Cup Cheesecakes You’ll Love
Ingredients
Equipment
Method
- Preheat your oven to 350°F (175°C) and line a cupcake pan with paper liners.
- In a medium bowl, mix the chocolate graham cracker crumbs, granulated sugar, and melted butter until combined. Press the mixture into the bottom of each lined cup.
- Beat the softened cream cheese until smooth, then add granulated sugar and mix until fully combined.
- Add eggs one at a time, mixing gently, then add peanut butter and vanilla extract, blending until smooth.
- Distribute the cheesecake batter evenly over the crusts, filling each cup about 2/3 full.
- Bake for 17-19 minutes, until edges are set but centers jiggle slightly. Cool in the oven with the door cracked open.
- Allow them to cool at room temperature, then refrigerate to solidify the filling.
- Melt chocolate chips with peanut butter and coconut oil in 30-second increments, mixing until smooth.
- Pour the topping over cooled cheesecakes and chill for at least 2 hours before serving.

Leave a Reply