
As I wandered through the whimsical corridors of Hogwarts in my imagination, the idea of crafting Vegan Harry Potter Letter Hand Pies sparked a delightful craving. These enchanting pastries have quickly become my secret weapon for festive gatherings, boasting a sweet cherry filling wrapped in a flaky, buttery crust. Not only are they easy to make, but they also deliver that magical touch that instantly impresses guests—whether at a holiday celebration or a cozy movie night. Unleash your inner wizard as you whip up these charming hand pies with a whimsical chocolate seal and watch everyone's faces light up with nostalgia. Who knew channeling a bit of magic could be this delicious? Ready to dive into the world of Harry Potter with a homemade treat?
Why Are These Hand Pies Special?
Magical appeal: Unleash your creativity with these delightful, retro-themed pastries that transport you straight to Hogwarts.
Easy and fun: This recipe is beginner-friendly, making it a perfect opportunity for families to bond while creating together.
Festive treat: Bursting with sweet cherry filling, these hand pies are ideal for holiday celebrations or themed parties.
Versatile options: Feel free to switch up the filling with different fruit jams or even add a dash of spice, making each batch uniquely yours.
Crowd-pleaser: Impress your guests at your next gathering with a charming culinary surprise that fits both kids and adults, perfect for sharing magic and smiles!
Harry Potter Letter Hand Pies Ingredients
For the Pastry
- Plain flour – Provides structure and base for the pastry; gluten-free flour can be substituted for a gluten-free option.
- Caster sugar – Adds sweetness to the pastry; reserve some extra for sprinkling on top for texture and extra sweetness.
- Dairy-free block butter – Ensures a rich, buttery flavor and flaky texture; avoid margarine, which may contain unwanted additives.
- Ice-water – Binds the dough without making it wet, critical for maintaining the pastry’s texture during baking.
For the Filling
- Cherry jam/conserve – Serves as the sweet filling that adds flavor and moisture; can be replaced with other fruit jams based on preference.
For the Topping
- Dairy-free milk – Used for brushing the pastry, giving it a golden finish during baking.
- Dairy-free chocolate – Creates the edible wax seal for decoration, adding a touch of authenticity; use either white or dark chocolate.
- Edible glitter (optional) – Enhances the festive appearance of the chocolate seal, adding a touch of sparkle.
- Icing sugar (optional) – A dusting for a sweet finish that adds visual appeal.
Step-by-Step Instructions for Harry Potter Letter Hand Pies
Step 1: Prepare the Pastry
In a large mixing bowl, combine plain flour and caster sugar. Using a pastry cutter or your fingertips, incorporate cold dairy-free butter until the mixture resembles breadcrumbs. Gradually add ice-water, stirring until a dough forms. Shape it into a disc, wrap it in cling film, and chill in the refrigerator for 30 minutes to set the pastry.
Step 2: Roll & Cut
Preheat your oven to 170°C (fan). On a lightly floured surface, roll out the chilled dough between pieces of grease-proof paper into a large rectangle approximately 2-3 mm thick. Using a sharp knife, cut the dough into 12cm diamond shapes. Keep the cut shapes on a lined baking tray, ready for filling.
Step 3: Fill
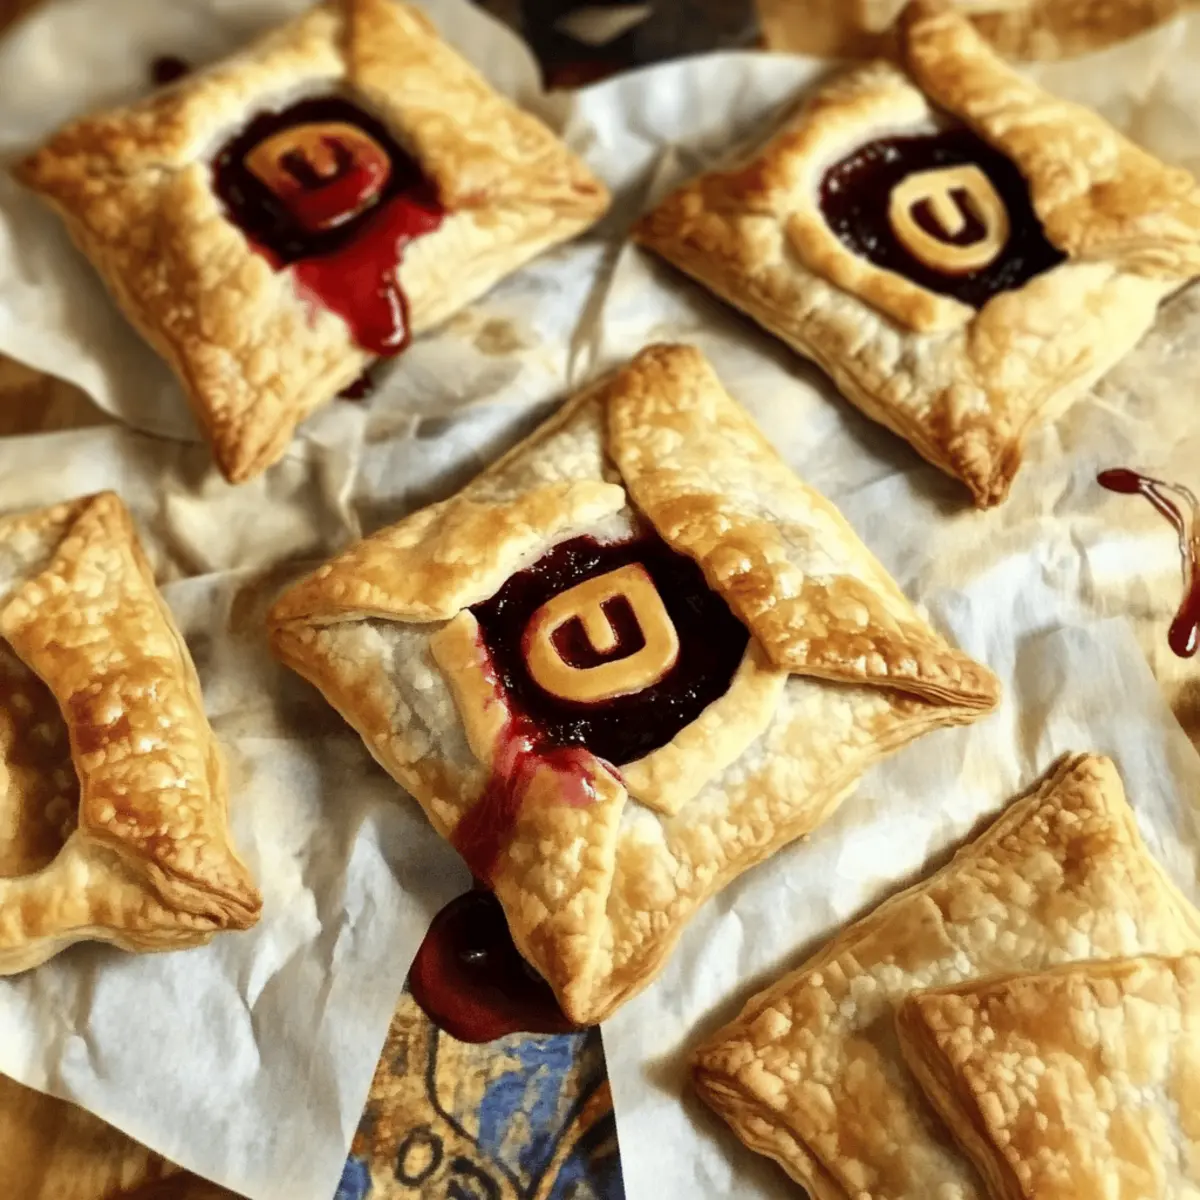
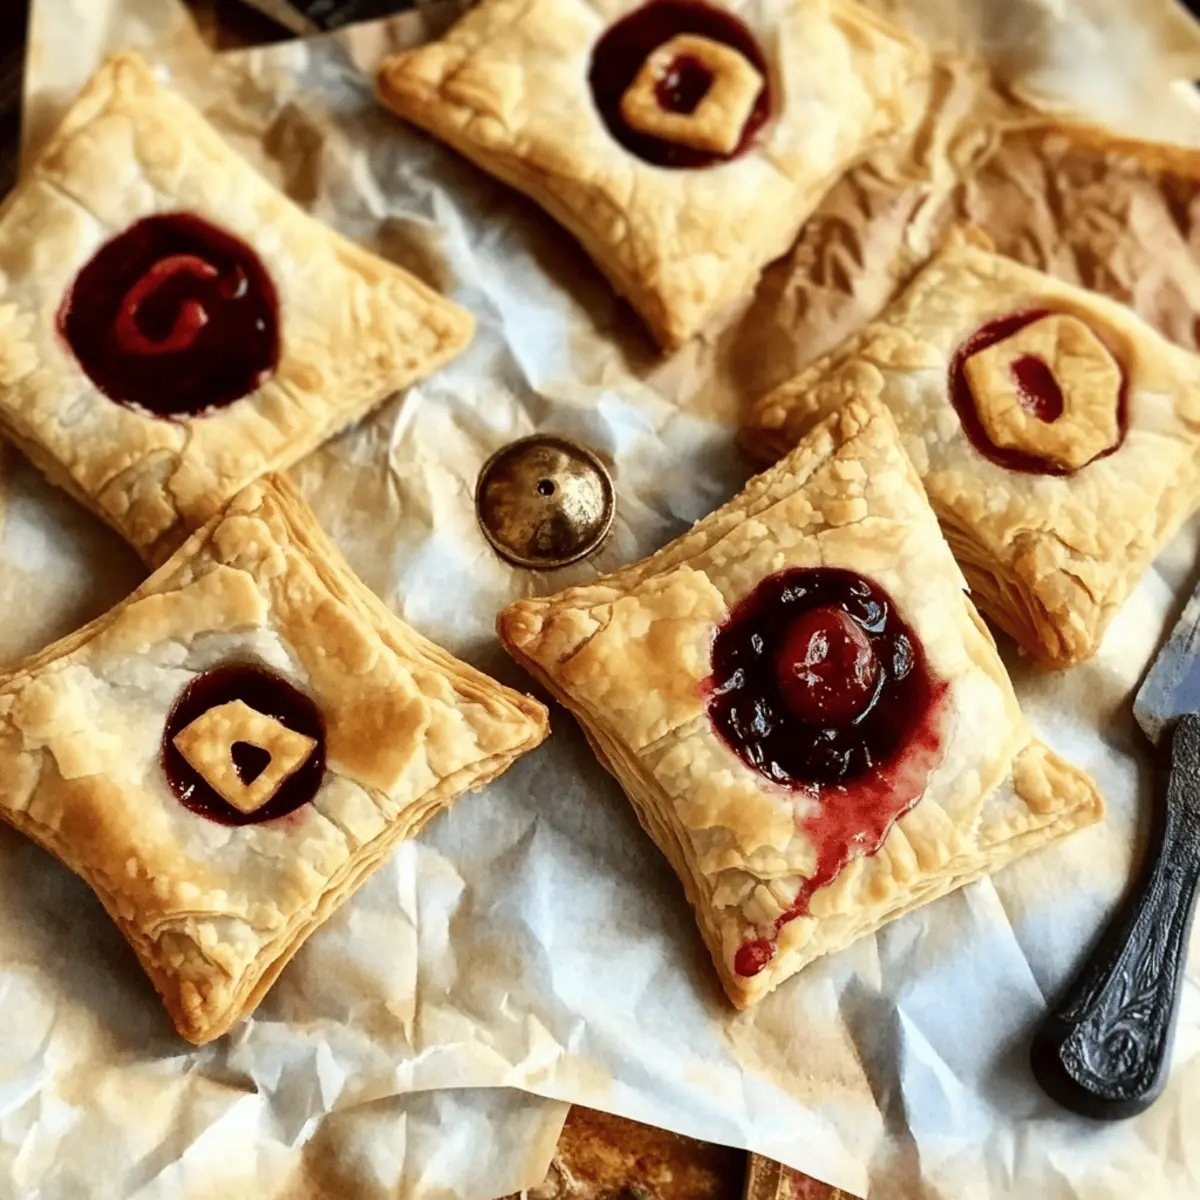
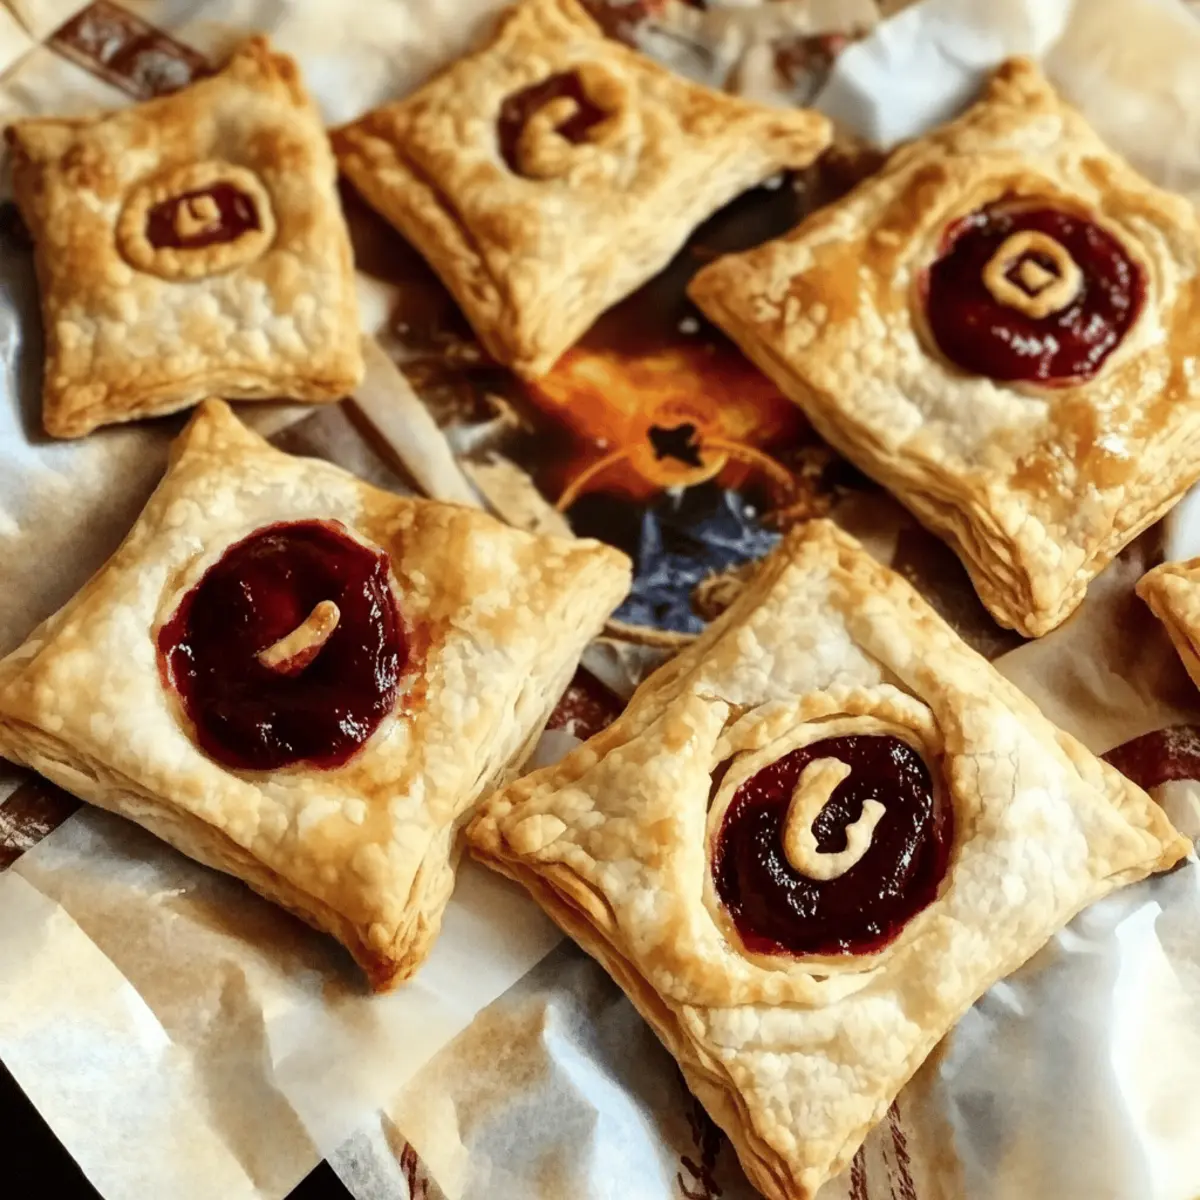
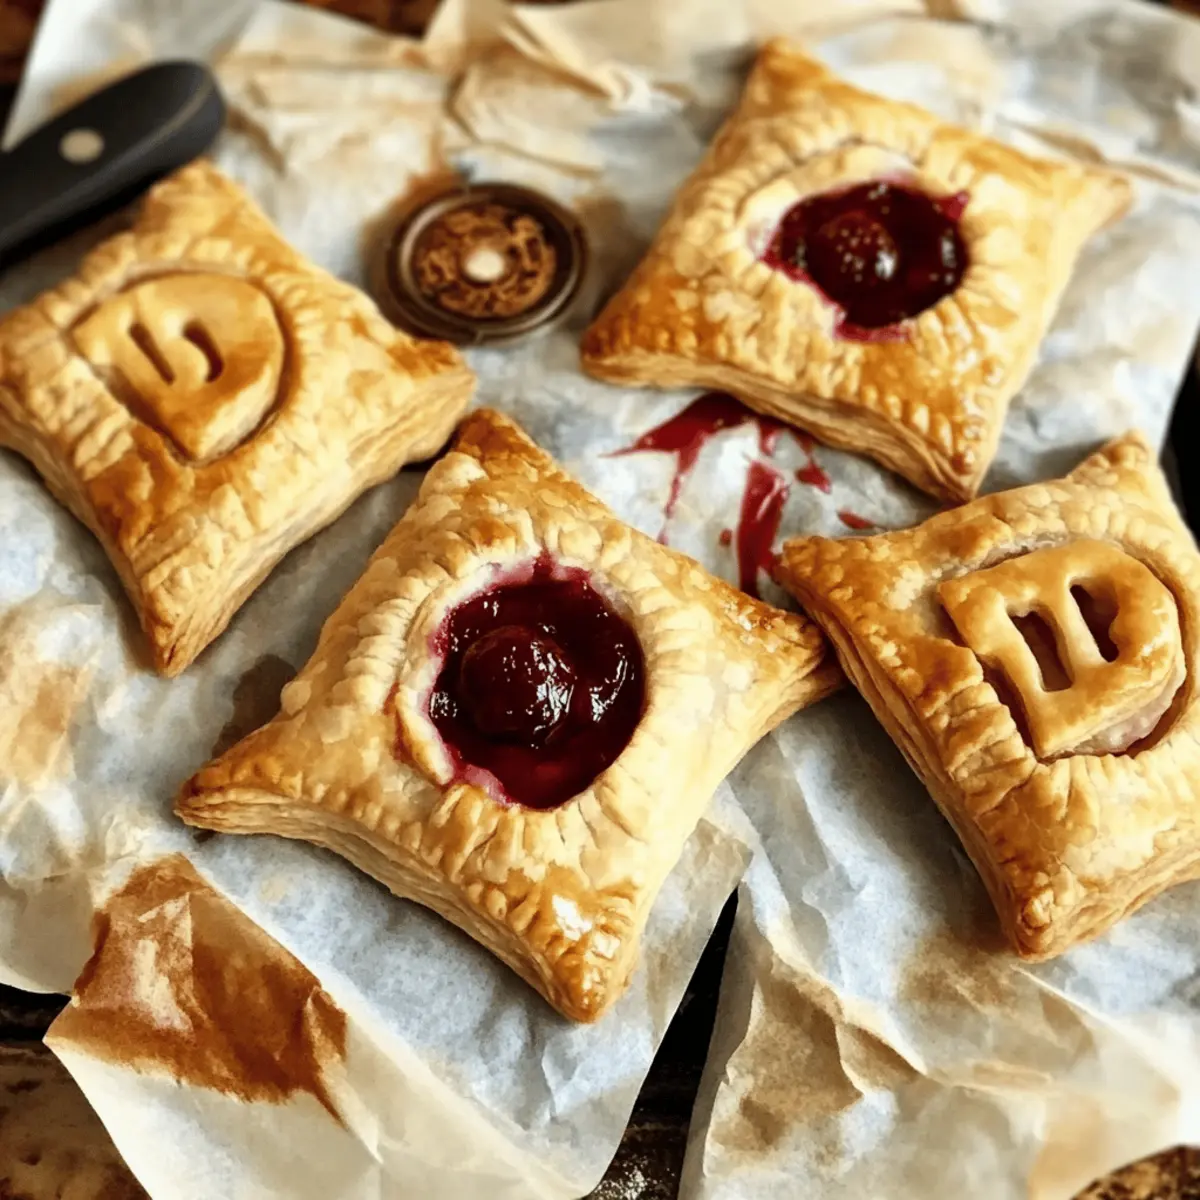
Take each diamond shape and place a spoonful of cherry jam at the center. Be careful not to overfill, as this might cause spilling during baking. Then, use a brush to lightly coat the edges with dairy-free milk to help seal the pastries together. This step is essential for keeping the filling inside your Harry Potter Letter Hand Pies.
Step 4: Shape
Fold the corners of each diamond toward the center to create a letter envelope shape, pressing gently to seal. Use a fork to crimp the edges firmly, ensuring no filling leaks out while baking. After sealing, brush the tops with more dairy-free milk and sprinkle with a little caster sugar to achieve a lovely golden color during baking.
Step 5: Bake
Arrange your prepared pastries on the lined trays, spacing them evenly to allow for expansion. Pop them into the preheated oven and bake for 20-25 minutes, or until they are golden brown and delightful in appearance. Allow them to cool on a wire rack; they will firm up as they cool.
Step 6: Make Chocolate Seal
As the hand pies cool, melt the dairy-free chocolate using a bain-marie until smooth and glossy. Spoon small blobs of melted chocolate onto grease-proof paper and stamp them with a frozen letter stamp to create charming seals. If desired, sprinkle some edible glitter on top for a magical touch, embracing the whimsical spirit of these Harry Potter Letter Hand Pies.
Step 7: Decorate & Serve
Once the hand pies are completely cooled, carefully attach the chocolate seal to the top of each pastry, ensuring they adhere well. These charming Vegan Harry Potter Letter Hand Pies are now ready to be served! Present them on a decorative platter and enjoy with family and friends, sharing the magic of this delightful homemade treat.
Make Ahead Options
These Vegan Harry Potter Letter Hand Pies are perfect for meal prep enthusiasts! You can prepare the pastry dough and refrigerate it for up to 24 hours; just remember to wrap it tightly in cling film to maintain its freshness. If you want to take your prep even further, assemble the unbaked pastries and freeze them for up to a week. When you're ready to enjoy these delightful treats, simply bake them straight from the freezer, adding a few extra minutes to the baking time for perfectly golden hand pies. This way, you'll have a magical dessert ready with minimal effort, capturing that delicious charm whenever you need it!
Expert Tips for Harry Potter Letter Hand Pies
-
Cold Butter is Key: Ensure your dairy-free butter is very cold to achieve that perfectly flaky pastry texture; warm butter will lead to a dense crust.
-
Don't Overfill: When adding cherry jam, just a spoonful is enough; overfilling can cause the filling to spill out during baking, ruining the hand pies.
-
Chill the Dough: Always chill your pastry dough before rolling it out; this helps maintain its structure and prevents it from sticking.
-
Sealing Tips: For a secure seal, crimp the edges with a fork firmly; this not only looks nice but also prevents any filling from leaking out.
-
Golden Finish: Brush the tops of the hand pies with a dairy-free milk wash before baking for a beautiful golden brown color.
-
Customize Your Fillings: Feel free to experiment! Swap the cherry jam for other favorite flavors for your own twist on these Harry Potter Letter Hand Pies.
Harry Potter Letter Hand Pies Variations
Feel free to let your creativity soar with these magical hand pies, customizing each batch to your family’s taste.
-
Fruit Swap: Substitute cherry jam with raspberry or apricot preserves for a delightful twist on flavor.
-
Spice it Up: Add a pinch of cinnamon or a splash of vanilla extract to the pastry dough for extra warmth and depth.
-
Gluten-Free: Use a gluten-free flour blend in place of plain flour for a deliciously inclusive option for those with dietary restrictions.
-
Nutty Crunch: Incorporate finely chopped nuts like almonds or walnuts into the filling for added texture and a nutty flavor.
-
Chocolate Decadence: Add a layer of vegan chocolate spread inside before filling with jam for a rich, indulgent treat.
-
Berry Medley: Combine multiple fruit jams together, such as blackberry and blueberry, for a mixed berry flavor sensation.
-
Zesty Infusion: Mix in a teaspoon of lemon or orange zest into the filling for a refreshing citrus note that brightens each bite.
-
Extra Chocolate: Drizzle melted dairy-free chocolate over the cooled hand pies for a decadent finishing touch that your guests will love.
These variations ensure your Harry Potter Letter Hand Pies remain a crowd-pleaser at any gathering. Whether you go with a fruit swap or a zesty infusion, you can celebrate creativity in the kitchen! For more flavor inspiration, check out our guide on Vegan Baking Tips or consider how you can personalize your delicious hand pies with Creative Jam Choices.
What to Serve with Vegan Harry Potter Letter Hand Pies
These delightful hand pies are perfect for a magical gathering, bringing a touch of whimsy and sweetness to any occasion.
- Crisp Green Salad: A refreshing salad with mixed greens and a tangy vinaigrette balances the sweetness of the cherry filling, creating a lovely contrast.
- Hot Chocolate: Serve them alongside a warm cup of creamy hot chocolate, enhancing the cozy, nostalgic vibe of your Harry Potter movie marathon.
- Herbal Tea: A fragrant herbal tea, like chamomile or mint, complements the pastries' sweetness while providing a soothing beverage option for your guests.
- Roasted Vegetables: The savory, earthy flavors of roasted root vegetables make for a hearty side that contrasts nicely with the fruity pastries.
- Fruit Platter: A vibrant fruit platter with strawberries, blueberries, and oranges adds a fresh, juicy element, providing a balance of flavors and textures.
- Vanilla Ice Cream: A scoop of creamy vanilla ice cream melts into the warm hand pies, offering a delightful dessert experience that will enchant anyone at your gathering.
- Sparkling Cider: Celebrate with a refreshing glass of sparkling cider, which adds a festive touch and pairs perfectly with the whimsical charm of the pastries.
How to Store and Freeze Harry Potter Letter Hand Pies
- Room Temperature: Enjoy your hand pies fresh for up to 2 days at room temperature in a cool, dry place; they’ll taste just like magic!
- Fridge: For best flavor retention, store in an airtight container in the fridge for up to 5 days. They can be enjoyed chilled or warmed slightly.
- Freezer: You can freeze unbaked hand pies for up to a week. Bake directly from the freezer, adding a few extra minutes to the baking time for perfectly flaky results.
- Reheating: To reheat baked hand pies, pop them in a preheated oven at 180°C (350°F) for about 10 minutes until warm and delightful again.
Harry Potter Letter Hand Pies Recipe FAQs
How do I select ripe ingredients for my hand pies?
Absolutely! When choosing your cherry jam, look for brands that have a vibrant color and a short ingredient list—this indicates real fruit without unnecessary additives. If you’re using fresh cherries, opt for those that are plump, firm, and deep red without dark spots, which signify overripeness.
What’s the best way to store my Harry Potter Letter Hand Pies?
For the most flavor, store your hand pies in an airtight container at room temperature for up to 2 days. They can also last up to 5 days in the fridge, and you can enjoy them warm or chilled. Just ensure they’re sealed well to maintain that delightful texture.
Can I freeze my hand pies for later enjoyment?
Yes! I often make a batch to freeze for later. You can freeze the unbaked hand pies for up to a week. Just prepare them as you normally would, then place them on a tray in the freezer until solid. Once frozen, stack them in an airtight container and bake directly from frozen, adding 3-5 extra minutes to the baking time.
What should I do if my pastry dough is too sticky or dry?
Very! If your dough is too sticky, sprinkle a little extra flour during the rolling process, or chill it longer to firm up. If it's too dry, add a teaspoon of ice water gradually and knead gently until it comes together. Remember, overworking the dough may lead to a tougher texture, so be gentle!
Are there any dietary considerations I should be aware of?
Definitely! Since this recipe is vegan, it’s perfect for those avoiding animal products. However, always check the labels on your jam and dairy-free butter for potential allergens like soy or nuts. This ensures that everyone, including family pets, can enjoy the magical flavors safely!
Magical Harry Potter Letter Hand Pies with Sweet Cherry Filling
Ingredients
Equipment
Method
- In a large mixing bowl, combine plain flour and caster sugar. Incorporate cold dairy-free butter until the mixture resembles breadcrumbs. Gradually add ice-water until a dough forms. Shape into a disc, wrap in cling film, and chill for 30 minutes.
- Preheat your oven to 170°C (fan). Roll out the chilled dough into a rectangle approximately 2-3 mm thick. Cut dough into 12cm diamond shapes.
- Place a spoonful of cherry jam at the center of each diamond. Brush edges with dairy-free milk to help seal the pastries.
- Fold corners of each diamond toward the center, press gently to seal. Use a fork to crimp the edges and brush the tops with dairy-free milk, sprinkle with caster sugar.
- Arrange pastries on a lined tray and bake for 20-25 minutes until golden brown. Allow to cool on a wire rack.
- Melt dairy-free chocolate until smooth. Spoon blobs onto grease-proof paper and stamp with a frozen letter stamp to create seals. Optional: sprinkle edible glitter on top.
- Attach the chocolate seal to the top of each cooled pastry. Serve on a decorative platter.


Leave a Reply