
As I stood in my kitchen, the rich aroma of melting chocolate filled the air, instantly transporting me to those joyous childhood birthdays when cake was the undisputed star of the show. Today, I'm excited to share my take on the Blackout Chocolate Cake, a decadent masterpiece that elevates any celebration. Crafted with layers of ultra-moist chocolate goodness and a luscious cream cheese frosting, it promises to be the highlight of your dessert table. Not only is this cake incredibly satisfying to make, but it's also a crowd-pleaser that caters to chocolate lovers of all ages. Whether you're whipping it up for a special occasion or simply indulging in a sweet treat on a cozy evening, this chocolate delight is bound to impress. Curious how to create this chocolate lover's dream? Let’s dive into the recipe!
Why is the Blackout Chocolate Cake irresistible?
Decadent Flavors: This cake features an intense chocolate flavor that will satisfy even the most discerning chocolate lover. Ultra-Moist Texture: Each slice melts in your mouth, thanks to the perfect combination of yogurt and oil. Creamy Frosting: Topped with a rich cream cheese frosting, it adds a delightful tang that perfectly balances the sweetness. Party-Ready: Ideal for celebrations, this cake is sure to be the star of any gathering. For more chocolate indulgence, check out my Chocolate Pudding Cake!
Blackout Chocolate Cake Ingredients
• Get ready to create a chocolate sensation!
For the Cake
- All-Purpose Flour – Provides structure for the cake; substituting with cake flour gives a tender crumb.
- Granulated Sugar – Sweetens the cake; consider using brown sugar for more moisture and flavor.
- Unsweetened Cocoa Powder – Adds a deep chocolate flavor; ensure it’s high-quality for the best taste.
- Baking Powder & Baking Soda – Leavening agents to help the cake rise; check for their freshness!
- Salt – Enhances overall flavor; don’t skip this as it balances the sweetness.
- Eggs – Bind the cake and add moisture; using room temperature eggs leads to a fluffier result.
- Whole Milk Yogurt – Adds richness and moisture; sour cream is a good alternative if needed.
- Espresso Powder – Deepens the chocolate flavor; omit it only if you prefer a milder taste.
- Vegetable Oil – Keeps the cake moist; melted butter works well for a richer flavor.
- Chocolate Chips – Coats the cake for added texture; a mix of semi-sweet and dark is perfect.
For the Frosting
- Cream Cheese – Forms the base of the frosting, giving it creaminess and a slight tang; always use full-fat for the best texture.
- Powdered Sugar – Sweetens and thickens the frosting; sifting before measuring ensures a silky consistency.
- Vanilla Extract – Adds depth of flavor; using pure extract enhances the overall taste.
This Blackout Chocolate Cake is sure to become a beloved favorite in your home, perfect for indulging or celebrating a special moment!
Step‑by‑Step Instructions for Blackout Chocolate Cake
Step 1: Preheat the Oven
Begin by preheating your oven to 350°F (175°C). While the oven warms up, prepare two 9-inch round cake pans by greasing them with cooking spray or lining them with parchment paper. This ensures easy removal of your delicious Blackout Chocolate Cake once it's baked, allowing for a beautifully presented dessert.
Step 2: Mix the Dry Ingredients
In a large mixing bowl, whisk together the all-purpose flour, unsweetened cocoa powder, baking powder, baking soda, and salt. Make sure these dry ingredients are well combined and free of lumps, as even distribution is key to the cake’s rise and flavor. Set this mixture aside while you gather your wet ingredients.
Step 3: Combine the Wet Ingredients
In a separate medium bowl, whisk together the eggs, whole milk yogurt, vegetable oil, and pure vanilla extract until smooth and well blended. This creamy mixture adds richness and moisture to your Blackout Chocolate Cake. With the wet ingredients ready, you can now combine them with the dry ingredients for a luscious batter.
Step 4: Combine Mixtures
Gradually add the dry ingredient mixture to the wet ingredients, alternating with any water, mixing gently until just combined. Be careful not to overmix; a few flour streaks are perfectly fine. The batter will be thick and rich, promising a moist cake loaded with chocolate flavor.
Step 5: Bake the Cake
Pour the prepared batter evenly into the two greased cake pans. Smooth the tops with a spatula, then place them in the preheated oven. Bake for 30-35 minutes, or until a toothpick inserted into the center comes out clean. As the cakes bake, your kitchen will fill with an irresistible chocolate aroma.
Step 6: Cool the Cake Layers
Once baked, remove the cake pans from the oven and let them cool in the pans for about 10 minutes. This allows them to firm up slightly. Carefully transfer the cake layers to wire racks to cool completely. Patience here is essential, as a fully cooled cake is easier to frost and handle.
Step 7: Prepare the Frosting
In a mixing bowl, beat the cream cheese and butter together until light and fluffy. Gradually add in the sifted powdered sugar and unsweetened cocoa powder, mixing until well incorporated. This frosting will be creamy and rich, providing the perfect pairing for your Blackout Chocolate Cake.
Step 8: Assemble the Cake
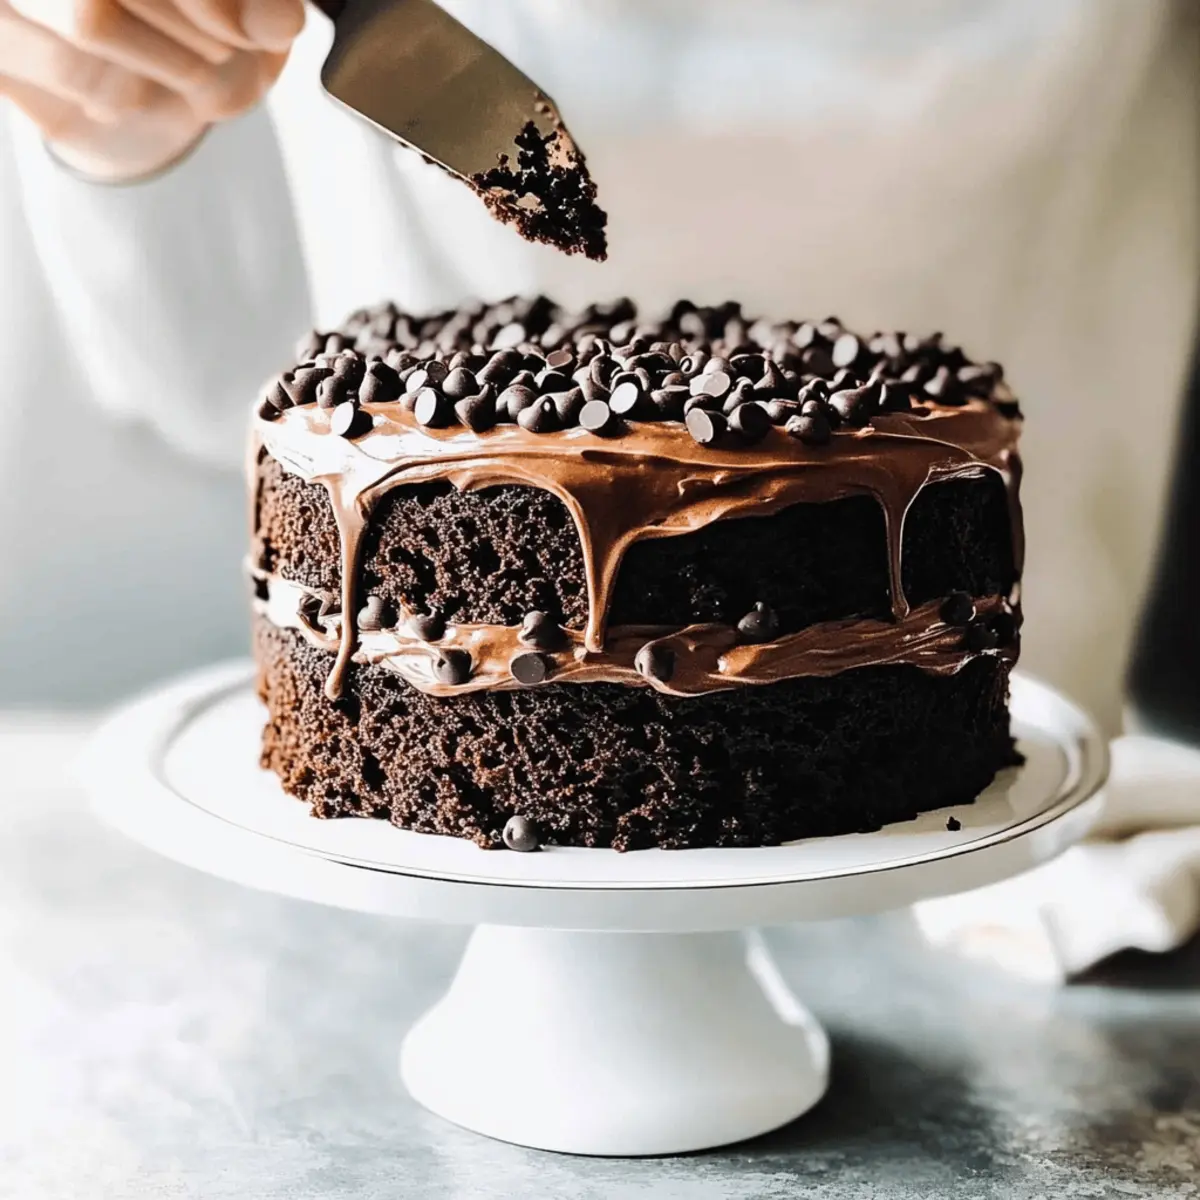
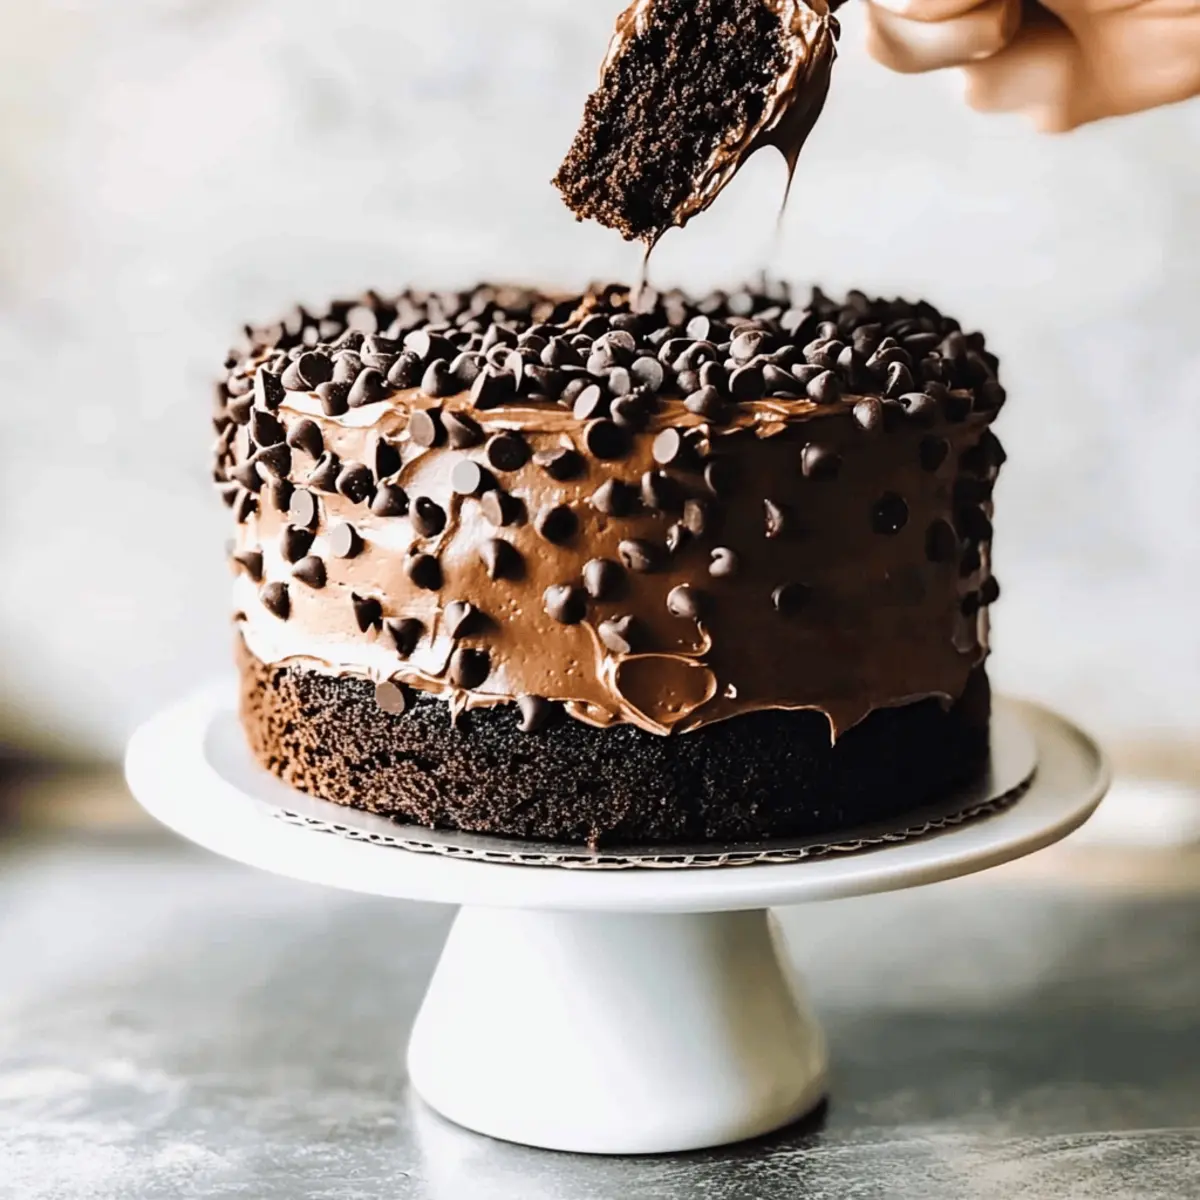
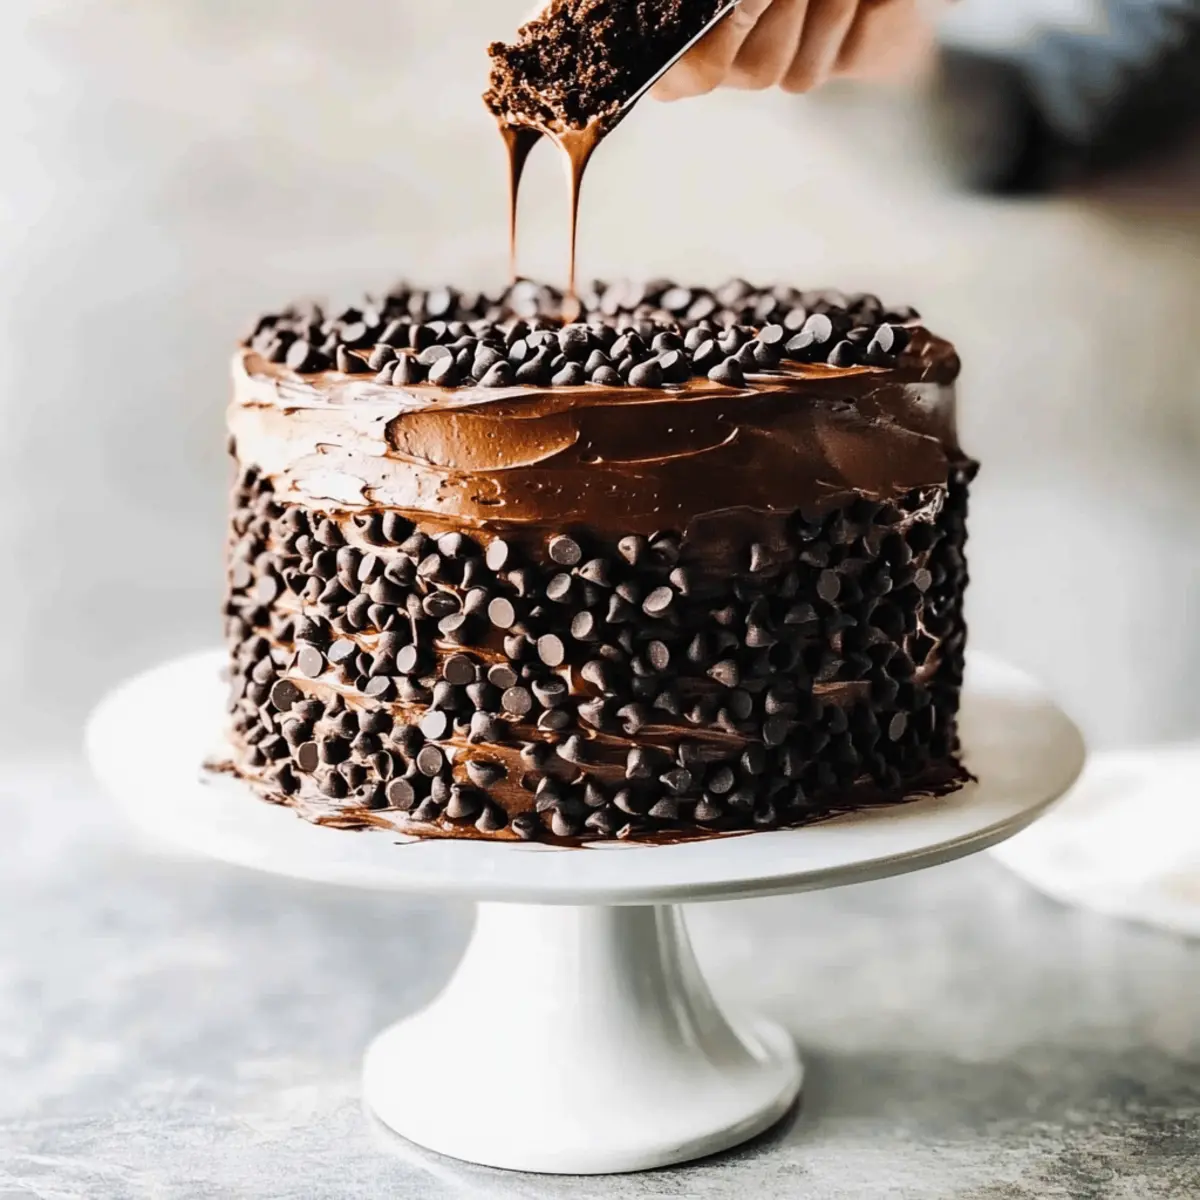
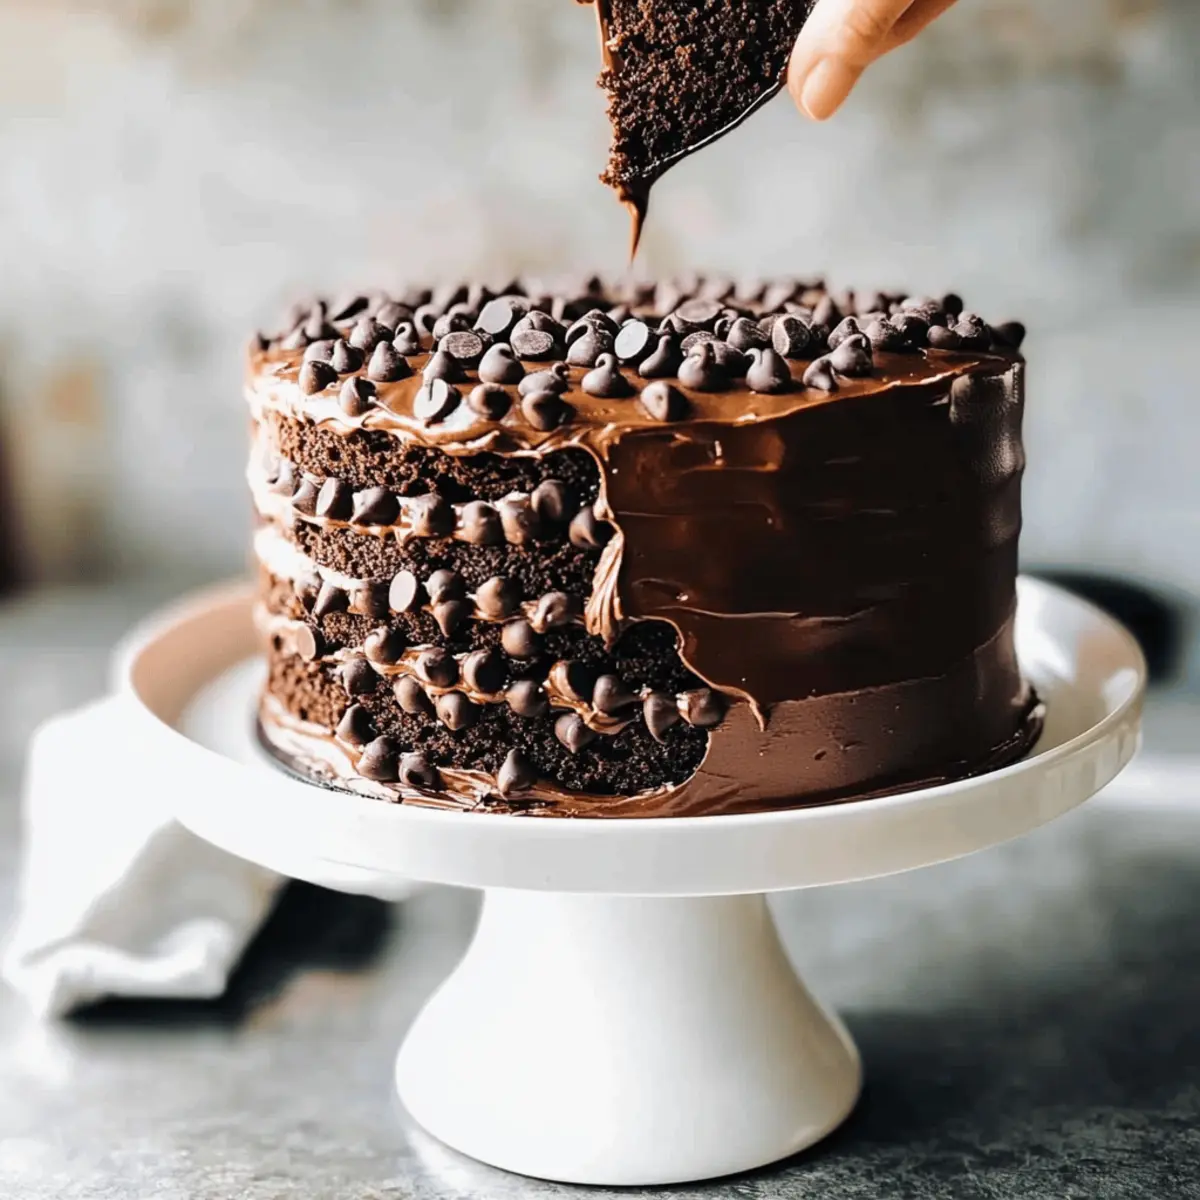
Take one cooled cake layer and place it on a serving plate. Spread a generous layer of frosting on top, then add the second layer over it. Continue to frost the top and sides, ensuring no cake is left uncovered. For a finishing touch, roll the sides in chocolate chips for a delightful texture.
Step 9: Chill or Serve
For easier slicing, consider chilling your assembled Blackout Chocolate Cake in the refrigerator for about 30 minutes. However, it can also be served immediately at room temperature. Either way, this rich and decadent cake is bound to impress your guests and satisfy those chocolate cravings!
How to Store and Freeze Blackout Chocolate Cake
Fridge: Store your Blackout Chocolate Cake in an airtight container in the refrigerator for up to 5 days. This helps maintain its moist texture and fresh flavor.
Freezer: To freeze, wrap individual slices tightly in plastic wrap, then place them in a zip-top bag. Enjoy them within 3 months for optimal flavor.
Thawing: When ready to enjoy, thaw slices in the fridge overnight or let them sit at room temperature for about an hour.
Reheating: If desired, you can gently warm slices in the microwave for about 10-15 seconds to enhance the chocolate's richness before serving.
Blackout Chocolate Cake Variations
Feel free to let your creativity shine by customizing this cake with these delightful twists!
- Gluten-Free: Swap all-purpose flour for a 1:1 gluten-free baking blend for a delicious alternative. Enjoying a gluten-free version of this decadent cake means no one has to miss out on the joy of chocolate!
- Flavored Frosting: Try adding flavored extracts like mint or almond to the frosting for a unique flavor profile. These subtle hints will delight your taste buds, adding an unexpected gourmet touch.
- Nutty Surprise: Fold in chopped walnuts or pecans between layers for a delightful crunch. These added textures create a wonderful contrast, making each bite even more enjoyable.
- Decadent Layers: Craving a little more indulgence? Add a layer of chocolate ganache between the cake layers for an extra chocolatey experience! It’s a wonderful surprise that will leave your guests coming back for seconds.
- Vegan Option: Use a flaxseed egg (1 tablespoon ground flaxseed mixed with 3 tablespoons water) instead of regular eggs and substitute yogurt with almond yogurt. This delicious option ensures everyone can enjoy this treat!
- Spice It Up: Adding a pinch of cayenne or chili powder in the batter will give the cake an unexpected kick. It beautifully enhances the chocolate flavor, turning an ordinary treat into something extraordinary!
- Fruity Twist: Layer in some fresh raspberries or strawberries between the cake layers. The fruit adds a refreshing tartness that perfectly complements the rich chocolatey goodness.
- Ice Cream Delight: Serve slices with a scoop of ice cream or a dollop of whipped cream for an extra special dessert experience. Adding a cold element makes each bite even more heavenly.
For more delightful chocolate ideas, don’t forget to check out my Chocolate Pudding Cake or any of my other chocolate poke cake variations! Happy baking!
Expert Tips for Blackout Chocolate Cake
- Room Temperature Eggs: Using eggs at room temperature is crucial for achieving a fluffy batter and a light texture in your Blackout Chocolate Cake.
- Don’t Overmix: Mix until just combined to avoid a dense cake. Overmixing can lead to gluten development, impacting texture.
- Level Layers: Use a serrated knife to level your cake layers for stable stacking and a beautiful presentation.
- Sift Ingredients: Sifting powdered sugar and cocoa before mixing helps eliminate lumps, ensuring a silky smooth frosting.
- Cool Completely: Let the cake layers cool completely before frosting to prevent the icing from melting and sliding off.
- Chocolate Chip Coating: For the perfect finish, gently press chocolate chips into the frosting on the sides of your cake for added texture and a beautiful appearance.
What to Serve with Blackout Chocolate Cake
When you share this delectable dessert, elevate the experience with delightful accompaniments that dance perfectly alongside the rich flavors of chocolate.
-
Fresh Berries: The tartness of raspberries or strawberries provides a refreshing contrast to the cake's sweetness, brightening each bite.
-
Vanilla Ice Cream: A scoop of creamy vanilla ice cream adds a luscious creaminess that beautifully complements the rich chocolate flavor and cooling sensation.
-
Espresso: A rich cup of espresso can intensify the chocolate experience. The warmth of the coffee enhances the cake's decadent taste, creating a delightful pairing.
-
Whipped Cream: Light and airy whipped cream introduces a cloud-like texture that balances the cake's density, making each slice feel indulgent yet light.
-
Chocolate Ganache: Drizzling warm chocolate ganache over the cake creates an eloquent finish. The glossy shine and rich taste take the dessert to a whole new level.
-
Mint Leaves: Sprinkling mint leaves around the plate adds a lovely burst of freshness. The aromatic quality enhances the overall dessert experience and brings a bright touch.
-
Hazelnut Liqueur: For an adult twist, serve slices alongside a glass of hazelnut liqueur. The nutty flavor enhances the chocolate nuances beautifully.
-
Chocolate-Covered Strawberries: For those special occasions, garnish the plate with chocolate-covered strawberries, adding a romantic flair to your cake presentation.
-
Dessert Wine: Pairing with a sweet dessert wine creates a lovely ending to a meal, enhancing the rich flavors while offering a delightful sip to round out the experience.
Make Ahead Options
These decadent Blackout Chocolate Cake is perfect for meal prep, allowing busy home cooks to save time on special occasions. You can bake the cake layers up to 3 days in advance; simply allow them to cool completely, wrap tightly in plastic wrap, and refrigerate. For the frosting, prepare it up to 24 hours ahead and store it in an airtight container in the fridge. When you're ready to enjoy your cake, take the layers out of the fridge, let them come to room temperature, and frost as usual. This way, you'll have a stunning dessert ready to impress without any last-minute stress, just as delicious as if made fresh!
Blackout Chocolate Cake Recipe FAQs
How do I select the right cocoa powder for the Blackout Chocolate Cake?
Absolutely! Choosing high-quality unsweetened cocoa powder is crucial for achieving that deep, rich chocolate flavor. Look for brands that are labeled “Dutch process” or make sure it has a high cocoa content. You want cocoa that’s dark and aromatic—this makes all the difference in your cake's flavor profile!
How should I store leftover Blackout Chocolate Cake?
Very simply! Place your leftover cake in an airtight container and store it in the refrigerator for up to 5 days. This will keep it moist and flavorful. If you're not finishing it within that time, consider freezing slices wrapped tightly in plastic wrap and then in a zip-top bag, where they'll last for about 3 months.
Can I freeze the Blackout Chocolate Cake? If so, how?
Absolutely! To freeze your cake, let it cool completely, then wrap individual slices tightly in plastic wrap, ensuring no air pockets remain. Place the wrapped slices in a zip-top freezer bag labeled with the date. When you're ready to enjoy a slice, just thaw it in the fridge overnight or at room temperature for about an hour.
What if my cake turns out dry?
If you find your cake is dry, here are a few troubleshooting tips. First, check your oven temperature with an oven thermometer to ensure it’s baking at the right temperature. Next, also make sure to accurately measure your ingredients; too much flour can lead to a drier cake. Lastly, ensuring that you don’t overbake it is essential—start checking for doneness a few minutes before the minimum baking time.
Is the Blackout Chocolate Cake suitable for people with gluten intolerance?
The more the merrier! To make this cake gluten-free, you can substitute the all-purpose flour with a gluten-free baking blend in a 1:1 ratio. Many blends work well, but be sure to check ingredients for any hidden gluten. Additionally, avoid cross-contamination by using separate baking utensils and pans if needed.
Can I use different types of sugar in this recipe?
Definitely! If you're looking for a different flavor profile or added moisture, substituting granulated sugar with brown sugar works beautifully in the Blackout Chocolate Cake. It will enhance the caramel notes, giving the cake a richer flavor. Just remember to adjust the liquid ingredients slightly as necessary because brown sugar contains more moisture.
Irresistible Blackout Chocolate Cake for Ultimate Indulgence
Ingredients
Equipment
Method
- Preheat your oven to 350°F (175°C) and prepare two 9-inch round cake pans by greasing them or lining them with parchment paper.
- In a large mixing bowl, whisk together the all-purpose flour, unsweetened cocoa powder, baking powder, baking soda, and salt.
- In a separate medium bowl, whisk together the eggs, whole milk yogurt, vegetable oil, and pure vanilla extract until smooth.
- Gradually add the dry ingredient mixture to the wet ingredients, alternating with any water, mixing gently until just combined.
- Pour the prepared batter evenly into the two greased cake pans and bake for 30-35 minutes.
- Once baked, let the cakes cool in the pans for about 10 minutes before transferring them to wire racks to cool completely.
- In a mixing bowl, beat the cream cheese and butter together until light and fluffy, then gradually add the sifted powdered sugar and cocoa powder.
- Take one cooled cake layer and spread a generous layer of frosting on top, then add the second layer over it and frost the top and sides.
- For easier slicing, consider chilling your assembled cake in the refrigerator for about 30 minutes.


Leave a Reply