
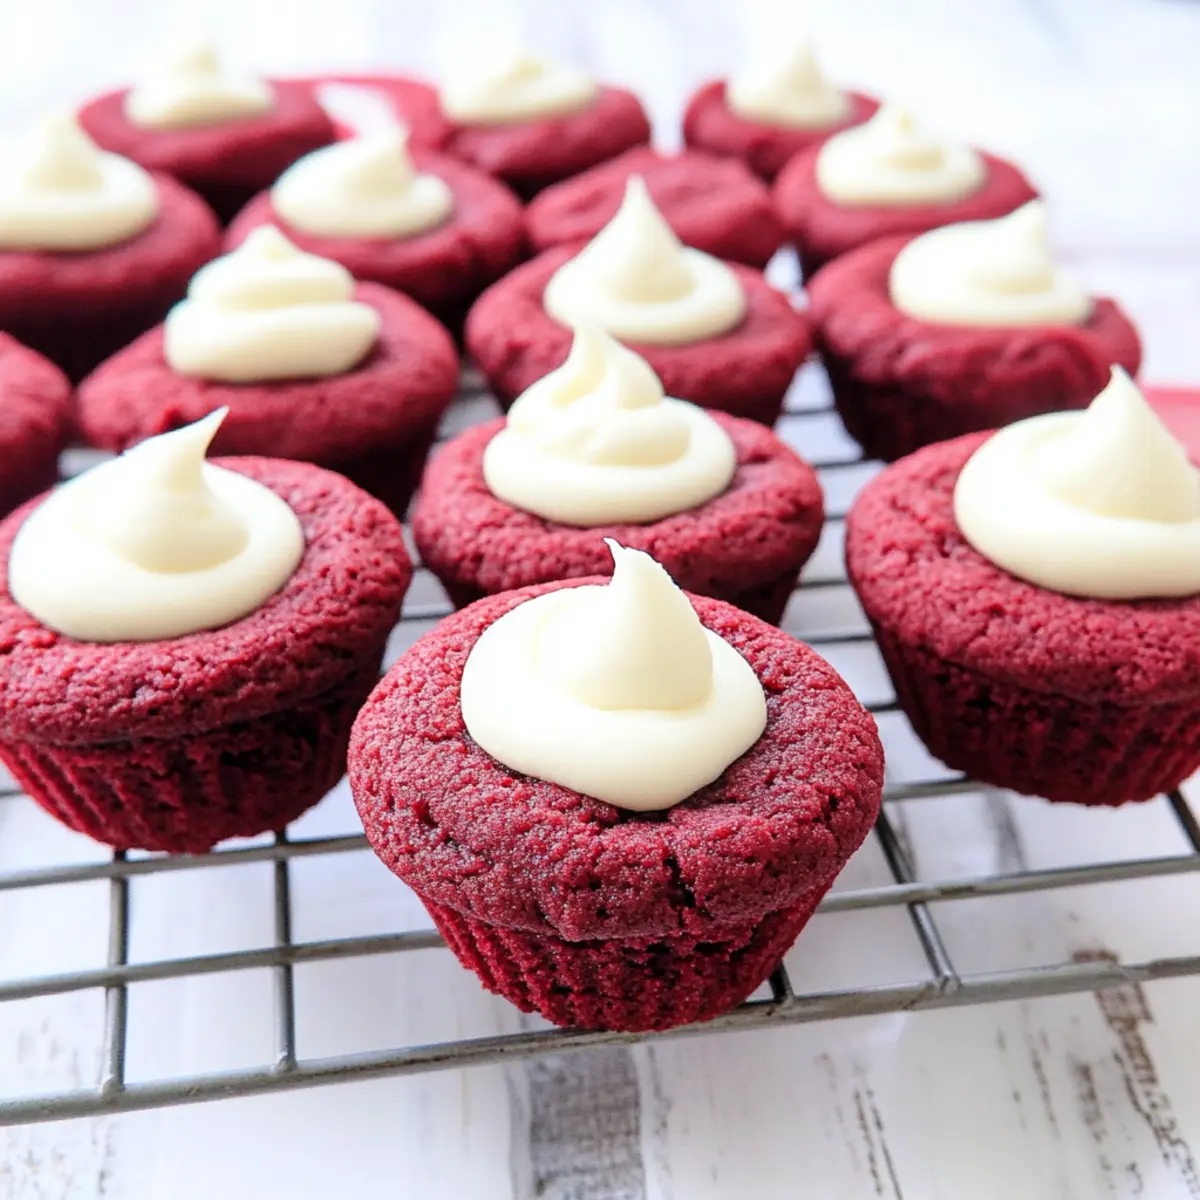
With each tick of the clock, anticipation filled the air as I dove into a whirlwind of colors and flavors. The moment you take a bite of these Red Velvet Cookie Cups, you’re met with a scrumptious, soft crumb enveloped in the delightful tang of creamy cheese frosting. Not only are they an impeccable treat for special occasions like Valentine’s Day, but their charm as a cozy, homemade dessert will have everyone at the table swooning. Plus, they’re surprisingly quick to prepare, making them a go-to for any spontaneous get-together! So, whether you're crafting sweet moments for loved ones or indulging in a quiet evening treat, these cookie cups are here to elevate your dessert game. Ready to create a colorful masterpiece that tastes as good as it looks?
Why are Red Velvet Cookie Cups irresistible?
Irresistible sweetness: These Red Velvet Cookie Cups bring a delightful twist on a classic dessert, bursting with flavor and topped with creamy frosting.
Perfect for sharing: Ideal for Valentine’s Day or birthday parties, these cookie cups are sure to impress friends and family.
Quick and easy: With simple ingredients and a fast preparation time, you’ll have perfect treats ready in no time.
Versatile options: Feel free to mix up the frosting flavors or toppings, like sprinkles or chocolate, to match any occasion.
Homemade goodness: There's nothing like the satisfaction of enjoying a cozy, homemade dessert that elevates any gathering!
Red Velvet Cookie Cups Ingredients
For the Cookie Cups
- All-Purpose Flour – Provides essential structure for the cookie cups.
- Unsweetened Cocoa Powder – Adds a rich and decadent chocolate flavor that enhances the cookies.
- Kosher Salt – Balances the sweetness and elevates the flavors in the cookie dough.
- Baking Soda – Ensures the cookies rise beautifully, creating a light and fluffy texture.
- Butter (softened) – Contributes a rich, buttery flavor and adds moisture to the mix.
- Granulated Sugar – Sweetens the cookie cups and helps in achieving the desired structure.
- Brown Sugar – Imparts depth and moisture, rounding out the sweetness.
- Egg – Acts as a binder for all ingredients; consider using a flax egg for a vegan twist.
- Red Food Coloring – Gives the cookie cups their iconic, vibrant red color; beet juice can be a natural substitute.
- Vanilla Extract – Enhances the overall flavor profile of the cookie.
- White Vinegar – Activates the baking soda, aiding in creating a tender crumb.
For the Cream Cheese Frosting
- Cream Cheese (softened) – The star ingredient that provides a creamy and tangy flavor.
- Butter (softened) – Adds richness to the frosting, ensuring a smooth texture.
- Powdered Sugar – Sweetens and gives the frosting that silky smooth consistency.
- Vanilla Extract – Infuses the frosting with a warm and inviting flavor.
Step‑by‑Step Instructions for Red Velvet Cookie Cups
Step 1: Preheat the Oven
Begin by preheating your oven to 350°F (175°C). This ensures an evenly baked batch of Red Velvet Cookie Cups that rise beautifully. Take a moment to familiarize yourself with your oven settings, and while you’re waiting, gather all your ingredients to keep the process smooth and enjoyable.
Step 2: Mix the Dry Ingredients
In a small mixing bowl, sift together the all-purpose flour, unsweetened cocoa powder, kosher salt, and baking soda. This combines the ingredients and removes any lumps, creating a light and airy texture for your cookie cups. Set this mixture aside as you prepare to work on the wet ingredients, making sure to use a whisk for even blending.
Step 3: Cream the Butter and Sugars
In a large mixing bowl, beat together the softened butter, granulated sugar, and brown sugar until the mixture is fluffy and pale, which usually takes about 3–5 minutes using an electric mixer. This step adds air to your dough, enhancing the overall texture of the Red Velvet Cookie Cups.
Step 4: Incorporate Wet Ingredients
Once your sugars are creamed, add in the egg, red food coloring, vanilla extract, and white vinegar. Mix on medium speed until everything is well combined, creating a vibrant, rich batter. The red food coloring is essential for that iconic look, so ensure it’s evenly distributed throughout the mixture.
Step 5: Combine the Mixtures
Gradually add your reserved dry ingredients to the wet mixture, gently mixing until just combined. Avoid overmixing to maintain the tenderness of the Red Velvet Cookie Cups. A few flour streaks are okay; you want the dough to retain some moisture for delightful cups.
Step 6: Prepare the Muffin Tins
Grease two 24-cup mini muffin tins with cooking spray or line them with paper liners. Make sure each cavity is well-coated to prevent sticking, setting the stage for easy removal of your beautifully baked Red Velvet Cookie Cups after they’re finished in the oven.
Step 7: Fill the Tins
Spoon the cookie dough into each muffin cup, filling them about ¾ full to allow room for rising. You should see a lovely red batter nestled in each cup, promising a delightful treat ahead. Ensure even distribution to ensure all cookies bake uniformly.
Step 8: Bake the Cookie Cups
Place the filled muffin tins in your preheated oven and bake for approximately 13 minutes. Keep an eye on them; the edges should appear set while the centers may still look slightly underbaked. This will ensure they stay soft and chewy once cooled.
Step 9: Create Indentations
Once baked, carefully remove the muffin tins from the oven. While they are still warm, use a spatula to gently press the center of each cookie to create a cup shape. This step is crucial for holding that luscious cream cheese frosting, so take care to shape them evenly.
Step 10: Cool Completely
Allow the cookie cups to cool in the tins for about 5 minutes before transferring them to a wire rack. This cooling process will help them firm up while maintaining a tender interior, making it easier to frost them later on.
Step 11: Make the Cream Cheese Frosting
In a large bowl, blend together the softened cream cheese, softened butter, powdered sugar, and vanilla extract. Use an electric mixer to whip until smooth and creamy, which usually takes about 2-3 minutes. The frosting should be light and fluffy, perfect for topping your Red Velvet Cookie Cups.
Step 12: Pipe the Frosting
Transfer the cream cheese frosting into a piping bag fitted with your preferred tip. Once the cookie cups are completely cooled, pipe a generous swirl of frosting onto each cup, creating a beautiful and inviting top. Your Red Velvet Cookie Cups are now ready for a delightful presentation!
What to Serve with Red Velvet Cookie Cups
Indulge in an unforgettable dessert experience by crafting a delightful spread to accompany these joyous treats!
-
Vanilla Ice Cream: The cool creaminess beautifully complements the rich, chocolatey flavor of the cookie cups, creating a heavenly contrast. A scoop beside your cookie adds a touch of indulgence that’s hard to resist.
-
Coffee or Espresso: This warm beverage enhances the dessert's chocolate notes while the robust flavor balances out the sweetness. A lovely sip of coffee while nibbling on these treats creates a comforting experience.
-
Fresh Berries: Strawberries or raspberries provide a refreshing burst of tartness that cuts through the richness of the frosting. Their juiciness pairs beautifully with the soft cookies, adding a lovely pop of color.
-
Chocolate Drizzle: A drizzle of melted chocolate over the frosted cookie cups creates an elegant presentation. This extra layer of chocolate not only enhances flavor but also makes them a visual delight for any gathering.
-
Sparkling Wine: Celebrate special moments with a bubbly toast! The effervescence of sparkling wine perfectly contrasts the creamy frosting, making every bite feel festive and joyous.
-
Chocolate-Covered Pretzels: The salty crunch of chocolate-covered pretzels adds texture and a surprise twist to your dessert table. Their sweetness plays nicely with the cookie cups’ frosting, providing a balanced snack that guests will enjoy.
-
Milkshakes: A classic pairing, vanilla or chocolate milkshakes bring nostalgia and joy to your dessert experience. Their creamy texture enhances the delightful flavors of the cookie cups, making them a nostalgic treat.
-
Caramel Sauce: A light drizzle of caramel adds a rich, buttery sweetness that elevates each bite. This luxurious addition pairs beautifully with the tangy cream cheese frosting for an indulgent experience.
Make Ahead Options
These Red Velvet Cookie Cups are a dream for busy home cooks looking to save time! You can prepare the cookie dough up to 24 hours in advance; simply mix the ingredients and refrigerate them in an airtight container. For even more convenience, the baked cookie cups can be stored at room temperature for up to 3 days without losing their delightful texture. Just ensure they cool completely before storing to maintain their soft interior. When you're ready to serve, frost them with the cream cheese frosting, which can also be made ahead and kept in the fridge for up to 3 days. Just let it sit at room temperature for about 30 minutes to soften before piping onto your beautiful cookies. This way, you can enjoy your sweet creations with minimal effort on the day of your event!
Red Velvet Cookie Cups Variations
Feel free to explore these delightful twists that will make your Red Velvet Cookie Cups even more special!
-
Frosting Flavors: Add flavors like almond extract or lemon zest for a unique twist on the cream cheese frosting. This is a brilliant way to personalize each cookie cup. Imagine the surprise of your guests when they bite into a zingy lemon treat!
-
Decorative Toppings: Top with festive sprinkles, shaved chocolate, or mini chocolate chips for added texture and visual appeal. A little color and crunch can elevate your cookies from homemade to showstopper!
-
Nutty Addition: Fold in chopped walnuts or pecans into the batter for a crunchy surprise in every bite. This nutty dimension will blend beautifully with the rich flavors, creating a delightful contrast.
-
Gluten-Free Option: Substitute all-purpose flour with a gluten-free blend for a safe alternative that everyone can enjoy. With a perfect texture, these cookies will satisfy gluten-free diners without compromising on flavor.
-
Vegan Swap: Replace the egg with a flax egg to make these cookie cups vegan-friendly. Combine 1 tablespoon of ground flaxseed with 3 tablespoons of water, let it sit to thicken, and mix it in as you would the egg.
-
Chocolate Drizzle: Enhance the cookie cups with a drizzle of melted chocolate over the frosting. The rich chocolate complements the creamy topping, creating an indulgent treat no one will resist!
-
Spicy Kick: Add a pinch of cayenne pepper or cinnamon to the cookie dough for a subtle, warming flavor that perfectly balances the sweetness. A hint of spice can surprise and delight!
Why not also check out my Matcha Cookies Soft or Peaches Cream Cookies for more baking inspiration?
Storage Tips for Red Velvet Cookie Cups
- Room Temperature: Store leftover Red Velvet Cookie Cups in an airtight container at room temperature for up to 3 days to maintain their soft texture and flavor.
- Fridge: If you prefer a firmer frosting, refrigerate the cookie cups in an airtight container for up to 5 days. Allow them to come to room temperature before serving for the best taste.
- Freezer: For longer storage, freeze un-frosted cookie cups in a single layer on a baking sheet, then transfer to an airtight container for up to 2 months. Frost them after thawing for freshness.
- Reheating: To enjoy them warm, microwave refrigerated or frozen cookie cups for about 10-15 seconds; this will revitalize their delightful, soft texture.
Expert Tips for Red Velvet Cookie Cups
- Room Temperature Ingredients: Ensure butter and cream cheese are softened to room temperature for easy mixing and a smooth frosting texture, resulting in perfect Red Velvet Cookie Cups.
- Avoid Overmixing: When combining dry and wet ingredients, mix just until combined to keep the texture tender; overmixing can lead to tough cookie cups.
- Create Perfect Indentations: Use a spatula or the handle of a wooden spoon to gently press centers of the warm cookies to form cup shapes, ensuring they hold the frosting beautifully.
- Monitor Baking Time: Keep an eye on your cookie cups as they bake — look for set edges and slightly underbaked centers for that perfect soft texture upon cooling.
- Storage Advice: Store leftover cookie cups in an airtight container at room temperature for up to three days, ensuring their delightful taste lasts.
- Experiment with Toppings: Feel free to mix frosting flavors or use decorative toppings like sprinkles, adding a personal touch to your Red Velvet Cookie Cups.
Red Velvet Cookie Cups Recipe FAQs
How do I select the best ingredients for my Red Velvet Cookie Cups?
Absolutely! For the best results, choose high-quality unsweetened cocoa powder to enhance the chocolate flavor and fresh eggs to ensure proper binding. Look for a vibrant food coloring, or opt for organic beet juice if you prefer a natural alternative. Using room temperature butter and cream cheese will make your mixing process smoother, creating the perfect texture for both the cookies and frosting.
How should I store leftover Red Velvet Cookie Cups?
Very! Store your leftover cookie cups in an airtight container at room temperature for up to 3 days. If you want to keep them fresher longer, you can refrigerate them for up to 5 days. Just let them come to room temperature before serving to ensure they maintain their delightful flavor and soft texture.
Can I freeze my Red Velvet Cookie Cups?
Absolutely! To freeze, first, allow the un-frosted cookie cups to cool completely. Place them in a single layer on a baking sheet and freeze for about 1-2 hours until firm. Then, transfer them to an airtight container or freezer bag, layering parchment paper between cups if needed, and store for up to 3 months. Frost them after thawing for the best taste and texture!
What should I do if my cookie cups don’t hold their shape after baking?
Oh no! If your cookie cups don’t keep their shape, there may have been a few factors at play. Make sure to press down gently in the center while they’re still warm to create those perfect cup shapes. Overmixing the batter can also cause them to spread too much, so remember to combine only until just mixed. Always keep an eye on the baking time, as underbaking can also lead to a softer structure.
Are Red Velvet Cookie Cups suitable for special diets?
Certainly! If you're looking for vegan options, simply substitute the egg with a flax egg (1 tablespoon of flaxseed meal mixed with 2.5 tablespoons of water, let sit for 5 minutes until it gels). For gluten-free Red Velvet Cookie Cups, replace the all-purpose flour with a gluten-free blend designed for baking. Always check for allergies related to dairy and nuts in your ingredients to ensure they’re safe for everyone!
Red Velvet Cookie Cups: A Sweet Valentine's Day Delight
Ingredients
Equipment
Method
- Preheat your oven to 350°F (175°C).
- Sift together flour, cocoa powder, salt, and baking soda in a mixing bowl.
- Beat together softened butter, granulated sugar, and brown sugar until fluffy.
- Add egg, red food coloring, vanilla extract, and vinegar; mix until combined.
- Gradually mix in dry ingredients until just combined.
- Grease or line 24-cup mini muffin tins.
- Fill muffin cups 3/4 full with cookie dough.
- Bake for approximately 13 minutes, watching for set edges.
- Press the center of each cookie to create a cup shape while warm.
- Cool in tins for about 5 minutes before transferring to a wire rack.
- Blend cream cheese, butter, powdered sugar, and vanilla until smooth.
- Pipe frosting onto cooled cookie cups.


Leave a Reply