
A delightful aroma wafts through the kitchen, transporting me straight to a vibrant Spanish tapas bar. Today, I’m sharing my recipe for Quick and Easy Pan-fried Sardines (Sardinas Fritas), a dish that marries crispy indulgence with simple preparation. In just minutes, you can recreate this authentic experience, making it a perfect choice for those busy weeknights or casual gatherings. Besides being a crowd-pleaser, these pan-fried sardines are also budget-friendly, ensuring that you can savor tasty seafood without breaking the bank. Pair them with a refreshing drink and watch as your loved ones dive into this tasty dish. Curious about how to bring the spirit of Spain to your dinner table? Let’s dive into the details!
Why Choose Pan-fried Sardines?
Quick and Easy: This recipe requires minimal preparation time, making it perfect for busy weeknights when you crave something delicious but don't want to spend hours in the kitchen.
Fresh, Flavorful Experience: The delightful combination of crispy skin and tender meat delivers an authentic taste that will whisk you away to a lively Spanish tapas bar.
Budget-Friendly: Using inexpensive yet flavorful sardines, this dish ensures you can enjoy restaurant-quality seafood without straining your wallet. For more creative ways to enjoy seafood, don't miss out on this delightful Pan Fried Mayo combo!
A Crowd-Pleaser: Serve these pan-fried sardines at your next gathering, and watch your friends and family relish each bite.
Versatile Pairing: They taste incredible with a crisp beer or a chilled white wine, elevating any casual meal into a festive occasion.
Nutritional Powerhouse: Packed with omega-3 fatty acids and essential vitamins, these sardines are not just delicious but also a healthy seafood option!
Pan-fried Sardines Ingredients
• Get ready to savor the flavors!
For the Coating
• Plain Flour – Coats sardines for a crispy texture during frying. Substitution: Can use gluten-free flour for a gluten-free version.
• Rock Salt and Toasted Garlic Salt – Enhances flavor with a savory touch. Substitution: Regular salt can be used if special salts are unavailable.
• Smoked Paprika – Adds depth and a slight smokiness to the dish.
• Pepper – Provides a bit of heat; adjust to personal preference.
For the Sardines
• Sardines (Split open, Butterflied) – Main protein of the dish, offering richness and flavor; choose fresh or high-quality canned sardines.
For Frying
• Extra Virgin Olive Oil – Essential for frying, ensuring a crisp exterior.
For Garnishing
• Lemon Wedges – Freshness and acidity to brighten the dish.
• Parsley – Garnish for added color and flavor.
This Pan-fried Sardines recipe promises to fill your kitchen with delightful aromas and your plate with incredible flavors!
Step‑by‑Step Instructions for Quick and Easy Pan-fried Sardines
Step 1: Prepare the Coating
In a plastic bag or shallow box, combine a generous amount of plain flour, rock salt, toasted garlic salt, and smoked paprika. Shake the bag to mix thoroughly. This seasoned flour blend enhances the pan-fried sardines' flavor and creates a crispy coating.
Step 2: Coat the Sardines
Take a few butterflied sardines and add them to the flour mixture, coating both sides evenly. Shake off any excess flour to ensure a light, crispy crust. Repeat this with the remaining sardines, preparing them for frying.
Step 3: Heat the Oil
In a large frying pan, pour in enough extra virgin olive oil to cover the bottom and heat over medium. Allow the oil to warm for about 2-3 minutes until shimmering—this indicates it's ready for frying. A properly heated oil ensures golden, crispy sardines.
Step 4: Fry the Sardines
Carefully place the coated sardines skin-side down in the hot oil. Fry them for 1-2 minutes until the skin turns a beautiful golden brown. Then, gently flip each sardine using a spatula, cooking for an additional 1-2 minutes until both sides are crisp and flaky.
Step 5: Drain the Sardines
Once cooked, transfer the fried sardines to a plate lined with paper towels to absorb excess oil. This step is crucial for retaining that delightful crunch of the pan-fried sardines, ensuring they don’t become soggy.
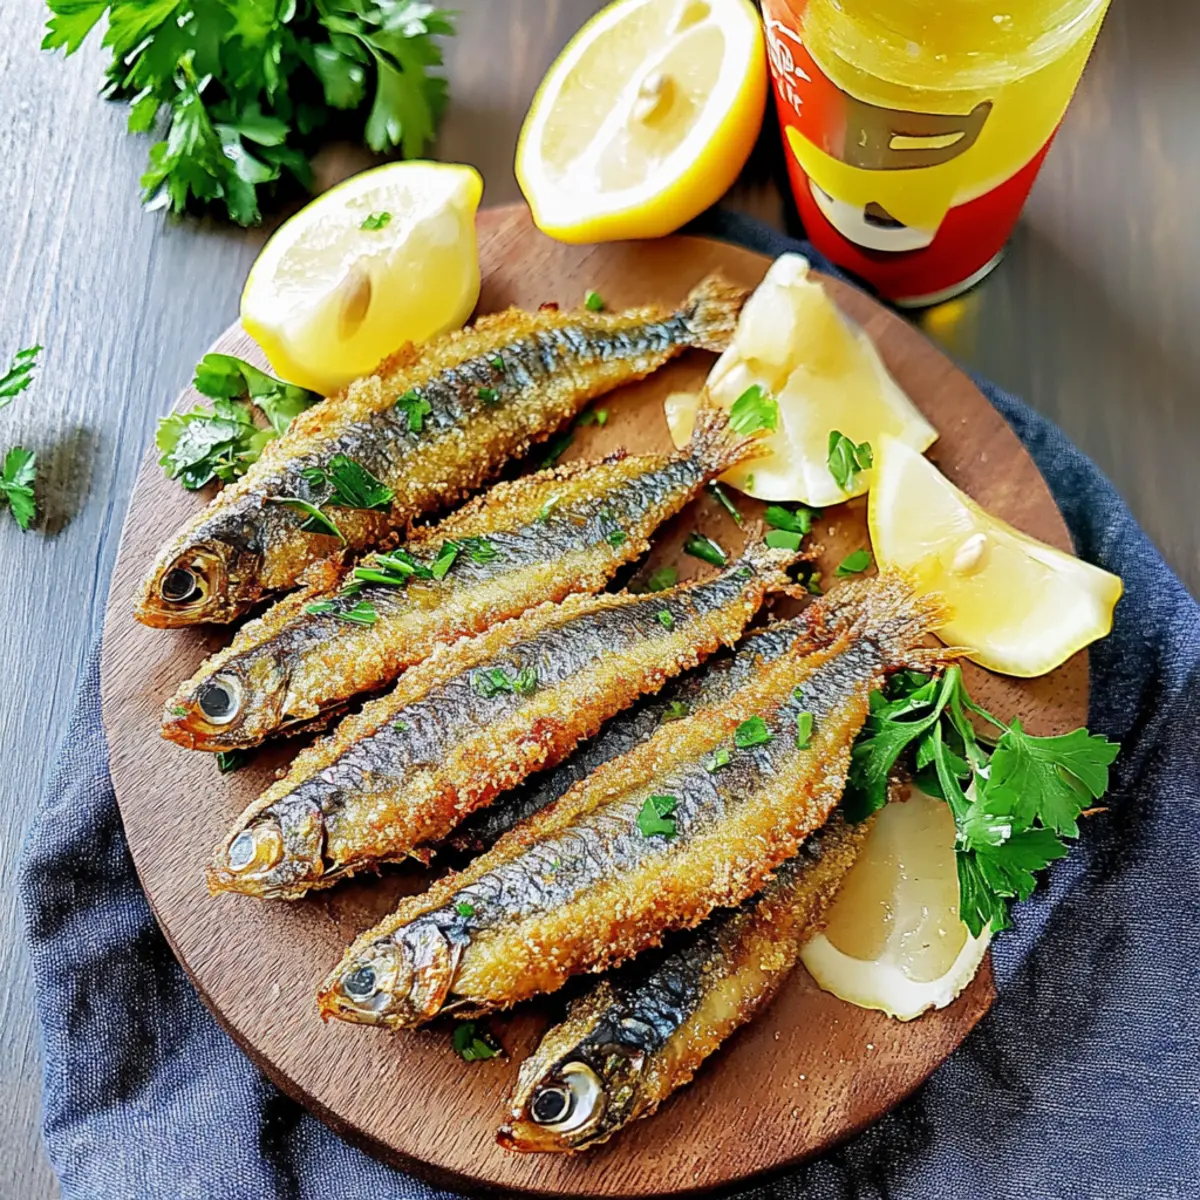
Step 6: Garnish and Serve
To serve, arrange your crispy pan-fried sardines on a platter, garnishing with chopped parsley for a pop of color and freshness. Squeeze fresh lemon wedges over them to enhance the flavors. These delightful bites are best enjoyed hot, paired with your favorite drink!
How to Store and Freeze Pan-fried Sardines
Fridge: Store leftover pan-fried sardines in an airtight container in the fridge for up to 1 day. This will help retain their flavor, but they're best enjoyed fresh.
Reheating: When ready to enjoy leftovers, gently reheat sardines in a frying pan over low heat for 2-3 minutes or until warmed through to regain their crispiness.
Freezer: Freezing is not recommended for cooked sardines, as it can compromise their texture. Enjoy freshly made sardines for the best experience!
Batch Cooking: If you plan to make a larger batch, it’s wise to only coat and fry what you’ll consume immediately. The uncoated sardines can be refrigerated for a day before preparation.
Expert Tips for Pan-fried Sardines
• Hot Oil Is Key: Ensure the oil is thoroughly heated before adding sardines to achieve that coveted crispy crust.
• Don’t Overcrowd: Fry in batches if necessary; overcrowding the pan can cause uneven cooking and sogginess.
• Flavor Boost: For extra flavor, consider marinating sardines in lemon juice, garlic, and spices for about 30 minutes before coating.
• Perfect Flour Ratio: Ensure to shake off excess coating to keep the pan-fried sardines light and crispy, avoiding clumping.
• Fresh vs. Canned: If using canned sardines, opt for high-quality ones in olive oil for the best flavor and texture.
What to Serve with Quick and Easy Pan-fried Sardines?
When you’re ready to elevate your delightful sardine dish, consider these enticing options that will create a memorable dining experience.
-
Crispy Garlic Bread: Perfect for soaking up any leftover juices and adds a delightful crunch to your meal. Serve it warm and watch it disappear!
-
Zesty Salad: A fresh arugula or mixed green salad with lemon vinaigrette adds a refreshing contrast to the richness of the sardines.
-
Chilled White Wine: A crisp, chilled Sauvignon Blanc or Albariño beautifully complements the savory flavors, enhancing the overall experience.
-
Patatas Bravas: These spicy, crispy potatoes offer a delightful texture and a dash of heat, pairing wonderfully with the slightly smoky sardines.
-
Mediterranean Olives: A small bowl of marinated olives provides a salty bite that contrasts nicely with the sardines, enhancing your tapas-inspired meal.
-
Garlicky Aioli: This creamy dip adds richness and flavor variety to the table. A dip of aioli elevates every bite and is oh-so-delicious!
-
Refreshing Gazpacho: Serve a chilled soup to cleanse your palate with every bite, offering a vibrant burst of flavors.
Each of these sides harmonizes beautifully, ensuring your Quick and Easy Pan-fried Sardines shine in a delightful feast!
Make Ahead Options
These Quick and Easy Pan-fried Sardines are fantastic for meal prep! You can coat the sardines in the seasoned flour mixture and refrigerate them for up to 24 hours before frying. This not only saves you time during busy weeknights but also allows the flavors to meld beautifully. To maintain their quality, ensure the coated sardines are placed in a single layer on a plate, covered with plastic wrap, to prevent moisture buildup. When you’re ready to serve, simply heat olive oil in your pan and fry them as directed, and you'll enjoy that deliciously crispy exterior just as if they were freshly made!
Pan-fried Sardines Variations
Feel free to get creative and adapt this recipe to your taste buds and dietary needs!
-
Spicy Twist: Add cayenne pepper to the flour mix to give your sardines an exciting kick!
A little heat can transform this dish into a zesty sensation, perfect for adventurous eaters. -
Herbal Upgrade: Experiment with fresh herbs like cilantro or chives for a fresh flavor lift.
Chopped herbs can add a vibrant visual appeal and freshness that pairs perfectly with fried fish. -
Gluten-Free: Substitute regular flour with a gluten-free flour blend for a celiac-safe version.
This way, everyone can enjoy these delicious bites without worry, maintaining that crispy texture! -
Alternative Proteins: Swap out sardines for small mackerel or anchovies for a different coastal experience.
Each fish offers its distinct flavor profile, giving you the chance to explore new taste dimensions! -
Smoky Variation: Infuse your coating with additional smoked paprika or a touch of liquid smoke for depth.
This enhancement accentuates the seafood's natural richness, making each bite unforgettable! -
Citrus Zing: Toss in some lemon zest to the flour mixture for an extra citrusy punch.
It adds a cheerful brightness that balances well with the bold flavors of the fish. -
Creamy Dip: Pair your sardines with a dollop of Pan Fried Mayo for a creamy contrast.
This adds a luscious texture that complements the crispy skin beautifully! -
Breading Variations: For a crunchier bite, try panko breadcrumbs mixed with the flour instead of plain flour.
Panko provides an airy texture that brings delightful crunch with every delicious bite!
Try these variations to discover your favorite twist on this classic dish, inviting new flavors to your kitchen table!
Pan-fried Sardines Recipe FAQs
What’s the best way to select fresh sardines?
When selecting fresh sardines, look for those with shiny, metallic skin, bright eyes, and a seawater-like scent. The flesh should feel firm and spring back when pressed. Avoid any with dark spots or a sour smell, as these indicate they may be past their prime.
How long can I store leftover pan-fried sardines in the refrigerator?
Store any leftover pan-fried sardines in an airtight container in the fridge for up to 1 day. While they can be kept for this short period, be aware that their crispiness will diminish over time. To enjoy them at their best, I recommend consuming them fresh!
Can I freeze pan-fried sardines?
Freezing cooked sardines is not recommended, as it can change their texture and lead to a less enjoyable experience. However, if you must freeze them, wrap the sardines securely in plastic wrap or place them in airtight containers. You can store them in the freezer for up to 1 month but expect some degradation in quality when reheating.
What’s the best way to reheat leftover sardines?
To regain some of the crispiness of your leftovers, gently reheat sardines in a frying pan over low heat for about 2-3 minutes. This method helps to maintain their delicious crust. Avoid using the microwave, as it will likely result in a soggy texture.
Are pan-fried sardines safe for pets?
Sardines can be a healthy treat for pets in moderation, but you should ensure they are plain, cooked, and free from added spices. Always consult your veterinarian before adding new foods to your pet's diet.
Can I use other types of fish for this recipe?
Absolutely! While this recipe is for pan-fried sardines, feel free to experiment with similar options like small mackerel or anchovies. Just adjust the cooking time slightly, as different fish may cook at varying rates. Enjoy the exploration!
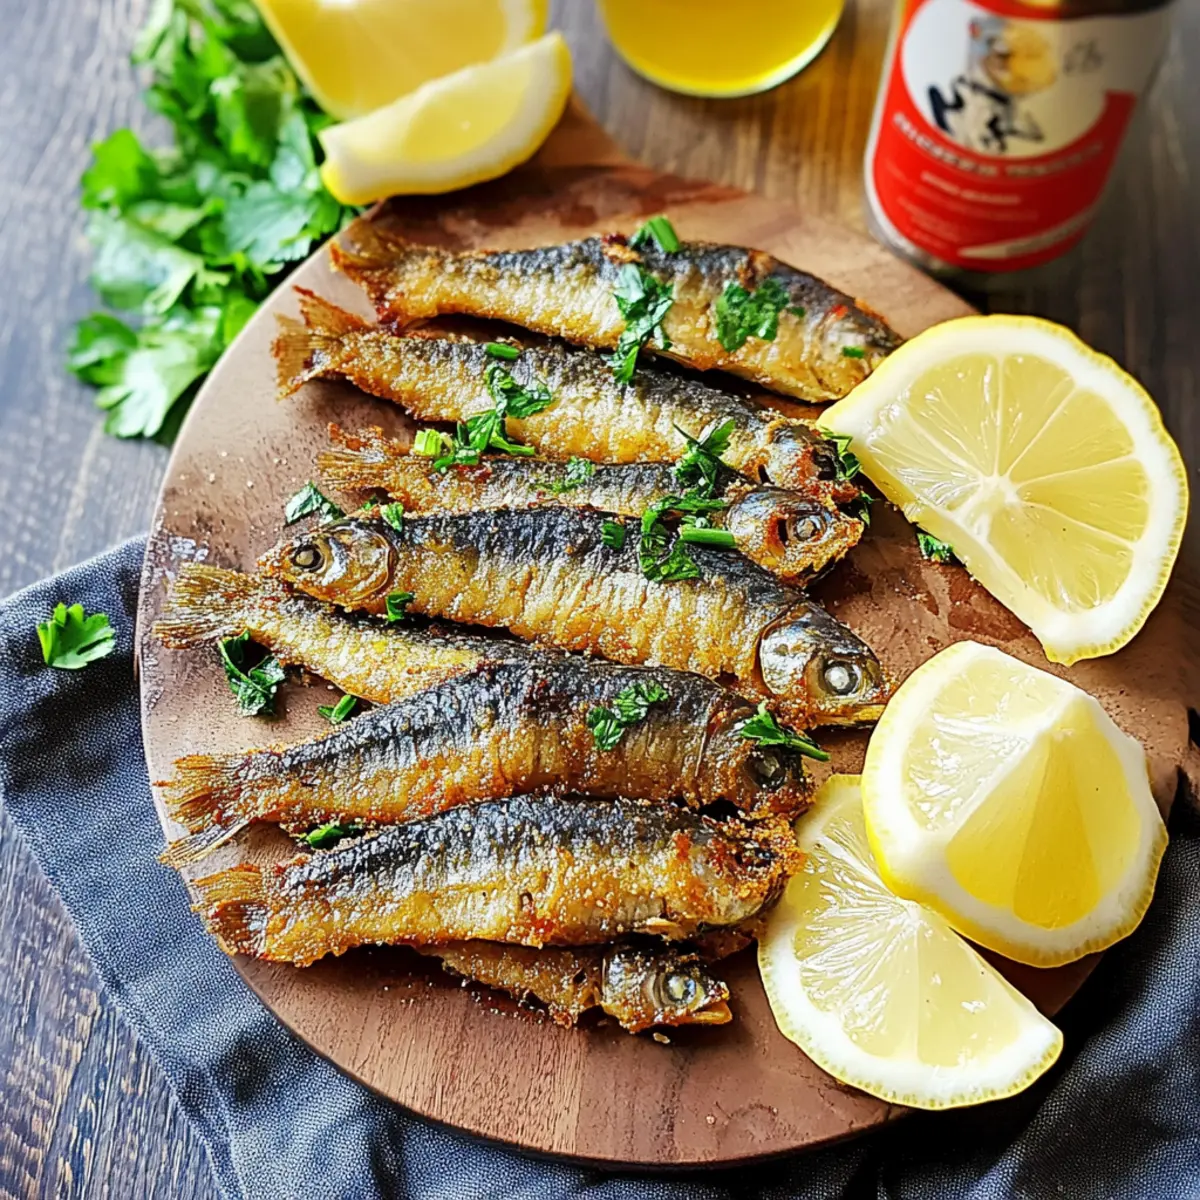
Crispy Pan-fried Sardines to Brighten Your Dinner Time
Ingredients
Equipment
Method
- Prepare the Coating: In a plastic bag or shallow box, combine a generous amount of plain flour, rock salt, toasted garlic salt, and smoked paprika. Shake to mix thoroughly.
- Coat the Sardines: Take a few butterflied sardines and add them to the flour mixture, coating both sides evenly. Shake off any excess flour.
- Heat the Oil: In a large frying pan, pour in enough extra virgin olive oil to cover the bottom and heat over medium for about 2-3 minutes until shimmering.
- Fry the Sardines: Carefully place the coated sardines skin-side down in the hot oil. Fry for 1-2 minutes until golden brown, then flip each sardine and cook for an additional 1-2 minutes.
- Drain the Sardines: Transfer the fried sardines to a paper towel-lined plate to absorb excess oil.
- Garnish and Serve: Arrange the sardines on a platter, garnishing with parsley and squeezing lemon wedges over them.


Leave a Reply