
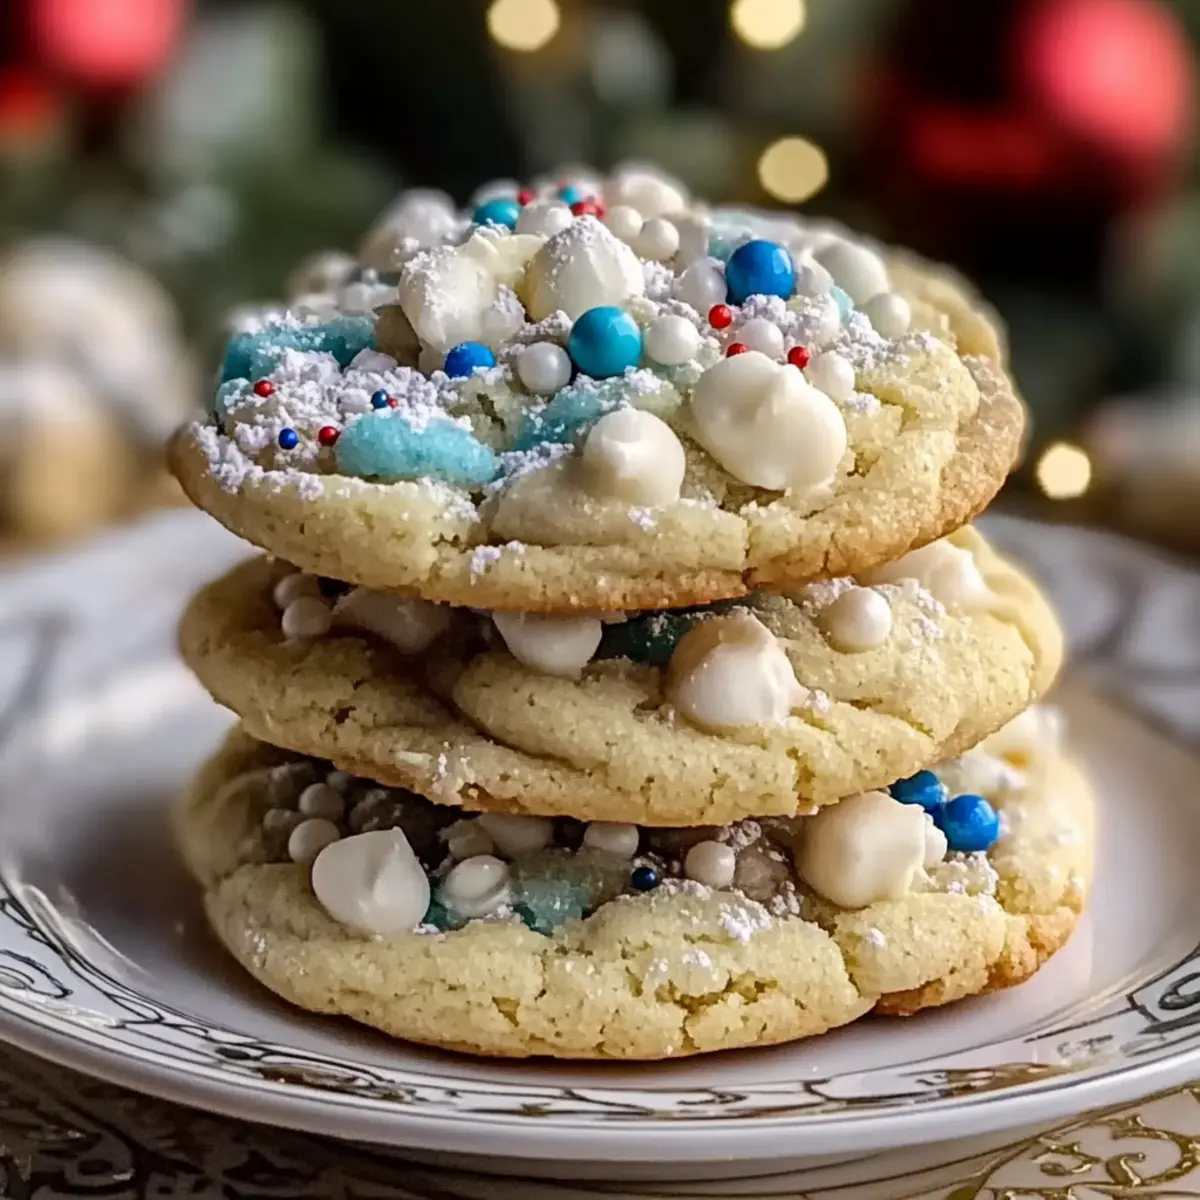
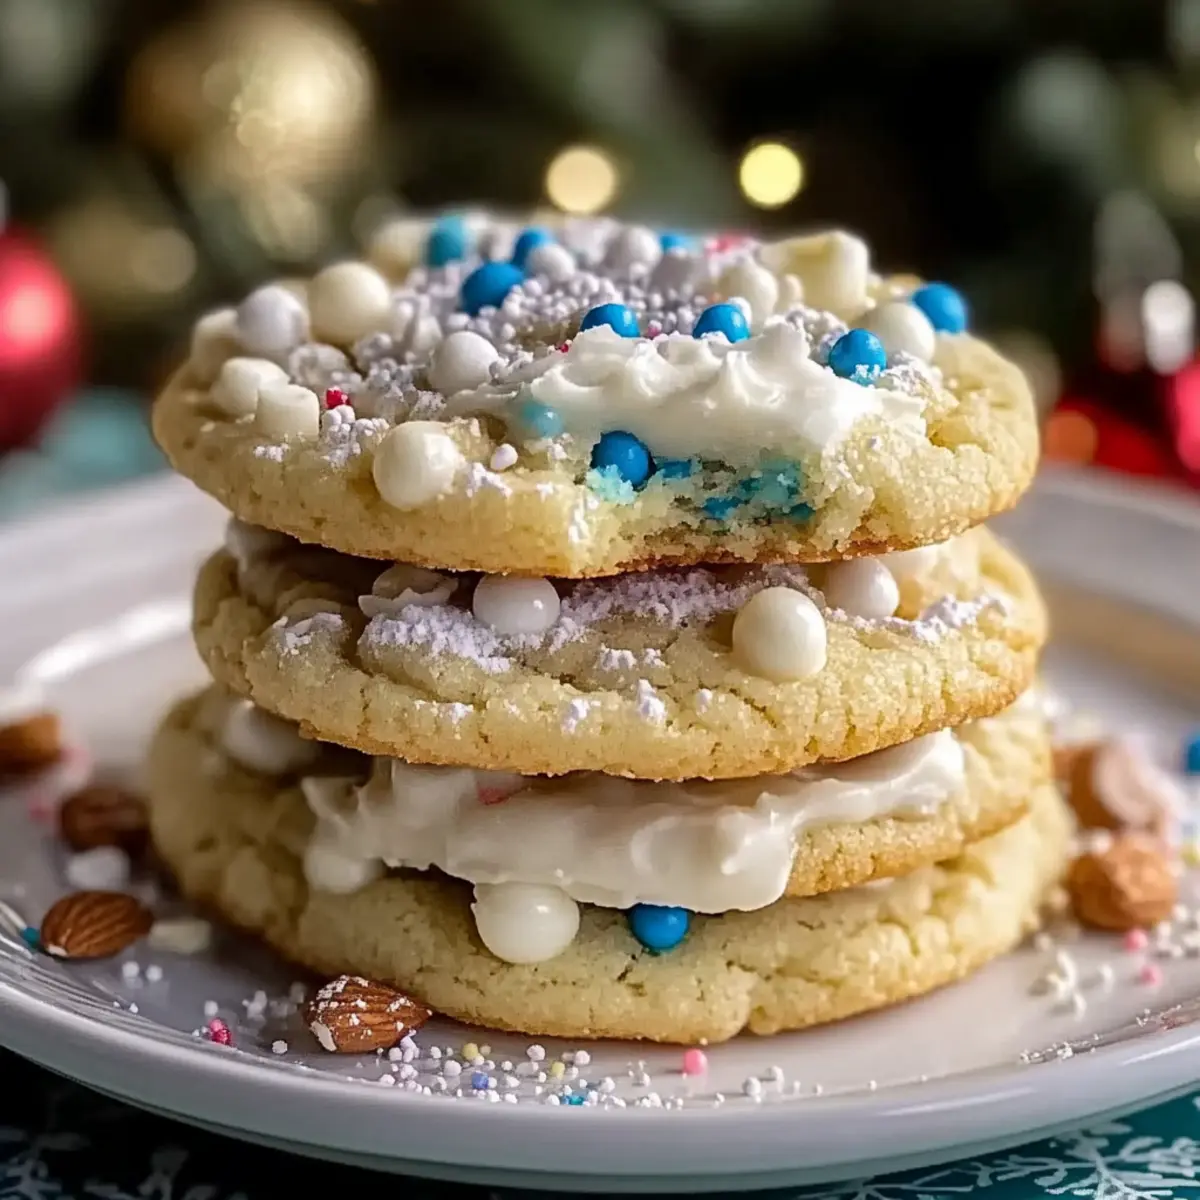
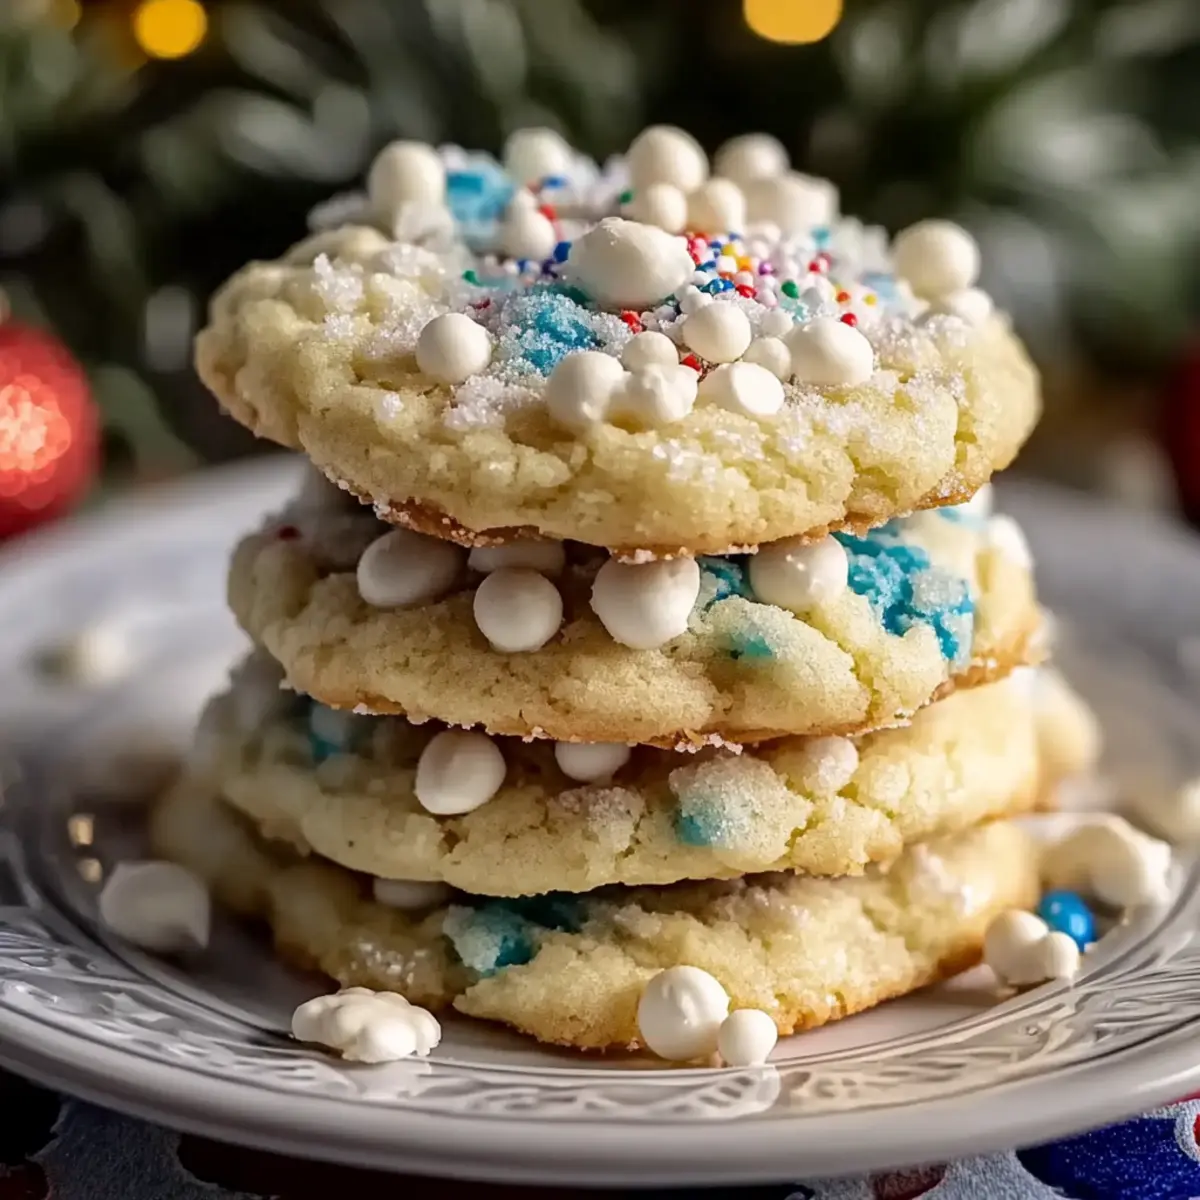
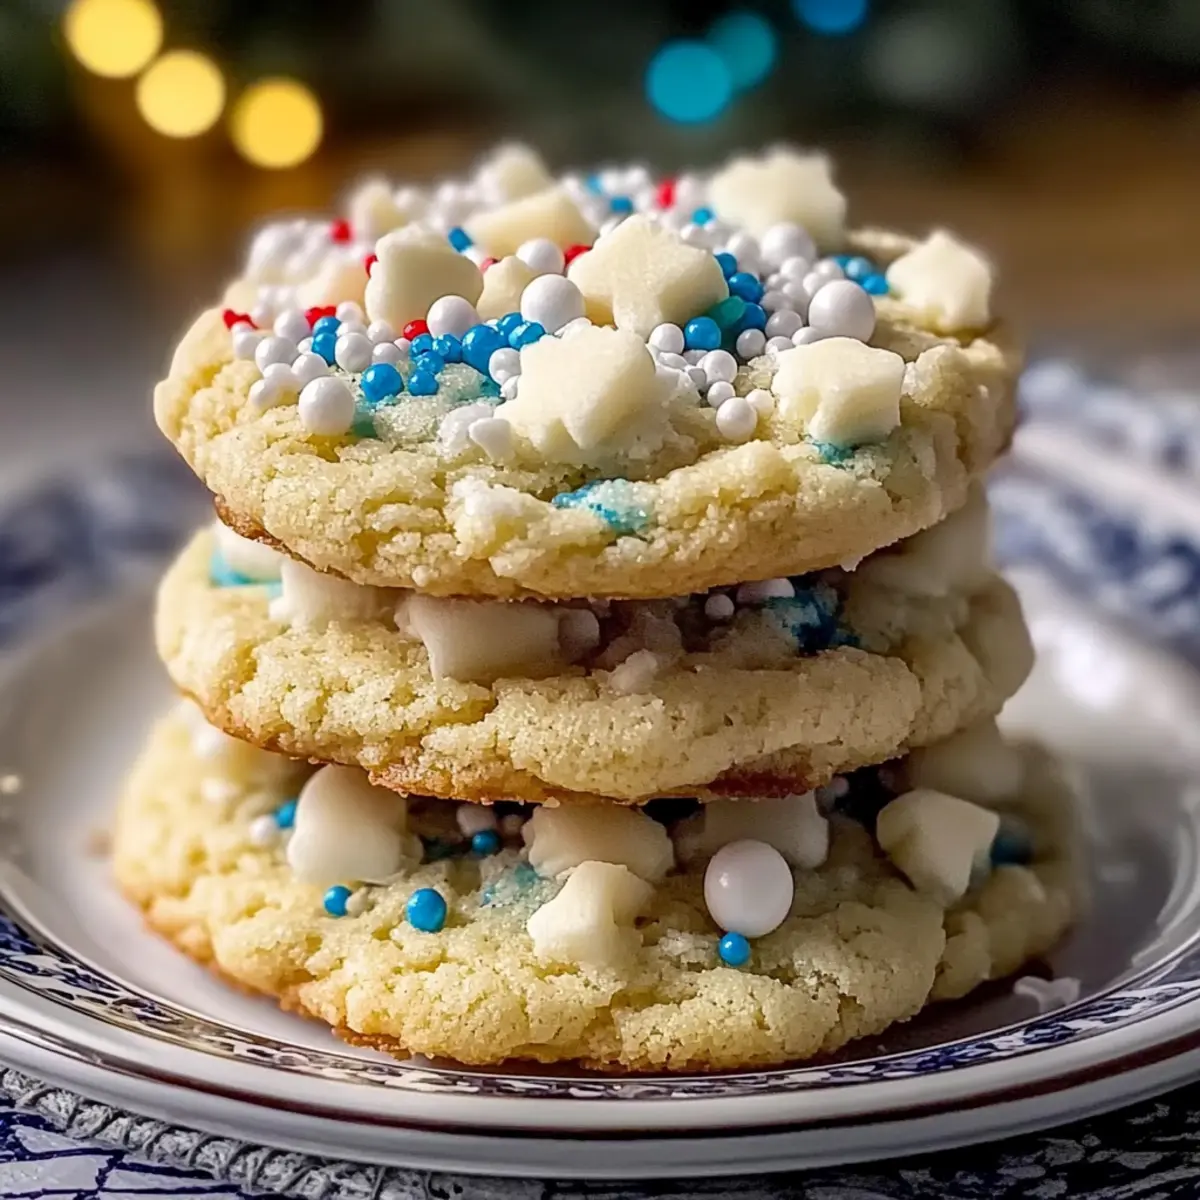
The snow was falling softly outside, blanketing the world in a serene white, and inside my kitchen, a delightful aroma was swirling around—one every home-baker dreams of. I was crafting Winter Blizzard Cookies, a seasonal treat so inviting that they could charm even the Grinch. With a melt-in-your-mouth texture and a festive touch of white chocolate and sprinkles, these cookies are not just another dessert; they’re a heartfelt way to bring warmth and cheer to cold winter nights. Perfect for cozy family gatherings or as thoughtful gifts, their delightful crunch from pecans or walnuts adds a special touch that everyone will love. Are you ready to fill your home with a little bit of holiday magic while indulging in this delicious recipe? Let’s get baking!
Why are Winter Blizzard Cookies irresistible?
Festive Appeal: These cookies are visually stunning, with a dazzling layer of white chocolate and colorful sprinkles that instantly brighten your winter gatherings.
Melt-in-Your-Mouth Texture: A buttery base combined with the perfect nutty crunch creates a delightful experience with every bite.
Easy to Make: This straightforward recipe is perfect for bakers of all levels, well-suited for a cozy afternoon in the kitchen.
Gifting Delight: Pack them up in a festive tin, and you’ve got a thoughtful gift that's sure to impress friends and family. Add them to your holiday lineup alongside other favorites like Matcha Cookies Soft or Eggnog Cookies Soft, and spread the cheer!
Versatile Recipe: Feel free to swap nuts with dried fruits or even use different chocolate coatings to keep things fresh and exciting throughout the season.
Winter Blizzard Cookies Ingredients
For the Cookie Dough
• Unsalted Butter – 1 cup, softened to cream easily and provide richness.
• Powdered Sugar – 1 cup, ensures a melt-in-your-mouth texture; granulated sugar can work in a pinch.
• Vanilla Extract – 1 teaspoon, use pure extract for a deeper, more authentic flavor.
• All-Purpose Flour – 1 ½ cups, gives structure to the cookies; substitutions may require adjustments.
• Chopped Pecans or Walnuts – ¼ cup, adds delightful nuttiness and crunch; for a nut-free option, increase flour by ¼ cup.
• Salt – ¼ teaspoon, enhances sweetness and balances flavors, don’t skip this essential ingredient.
For the Dipping
• White Chocolate Chips – 1 ½ cups, perfect for dipping and decorating; substitute with compound chocolate for a budget-friendly option.
Make your Winter Blizzard Cookies unforgettable this season with these delightful ingredients!
Step‑by‑Step Instructions for Winter Blizzard Cookies
Step 1: Preheat the Oven
Begin by preheating your oven to 350°F (175°C). While the oven warms, line two baking sheets with parchment paper to prevent the cookies from sticking. This step ensures your Winter Blizzard Cookies bake evenly and come out perfectly golden on the bottoms while keeping the tops pale and inviting.
Step 2: Cream Butter and Sugar
In a large mixing bowl, combine 1 cup of softened unsalted butter and 1 cup of powdered sugar. Using an electric mixer, cream them together on medium speed until the mixture becomes fluffy and pale, about 3-5 minutes. This step is vital for achieving that melt-in-your-mouth texture that makes these Winter Blizzard Cookies so irresistible.
Step 3: Mix in Vanilla
Once your butter and sugar are well combined, add in 1 teaspoon of pure vanilla extract. Blend until fully incorporated, which should take another minute. The rich vanilla aroma will fill your kitchen, setting a warm atmosphere as you move on to preparing the dry ingredients for your cookie dough.
Step 4: Prepare Dry Ingredients
In a separate bowl, whisk together 1 ½ cups of all-purpose flour, ¼ cup of chopped pecans or walnuts, and ¼ teaspoon of salt. This step ensures your dry ingredients are evenly distributed, which is crucial for the structure of your Winter Blizzard Cookies. Mixing them separately also helps avoid any clumping during the dough mixing phase.
Step 5: Combine Mixtures
Gradually add the dry mixture into the wet ingredients, mixing on low speed until you form a soft, crumbly dough. This process should take about 1-2 minutes; be careful not to overmix! The final dough might look slightly dry, but it will come together perfectly once you form the cookies.
Step 6: Shape Cookies
With clean hands, roll tablespoon-sized portions of dough into 1-inch balls and place them on the prepared baking sheets, spacing each cookie about 2 inches apart. This spacing allows the cookies to expand while baking without merging into one another. You should have about 20 cookies ready for the oven.
Step 7: Bake
Bake the cookies in your preheated oven for 10-12 minutes, checking them closely. They are ready when the bottoms turn lightly golden while the tops remain pale and soft. Once baked, carefully remove the sheets from the oven and let the cookies cool completely on wire racks to maintain their tender texture.
Step 8: Melt Chocolate
In a microwave-safe bowl, add 1 ½ cups of white chocolate chips. Melt the chips in the microwave in 30-second bursts, stirring after each interval until fully smooth. This will take about 1-2 minutes in total. The melted chocolate will be used for dipping, transforming your Winter Blizzard Cookies into festive delights.
Step 9: Dip Cookies
Once your cookies are cooled, dip each cookie halfway into the smooth melted white chocolate. Allow any excess chocolate to drip off, then place the dipped cookies back onto the parchment paper. Quickly sprinkle them with colorful holiday sprinkles before the chocolate sets to create an appealing winter wonderland look.
Step 10: Allow to Set
Let the decorated cookies cool at room temperature until the chocolate hardens completely, usually about 30 minutes. This final step is essential for ensuring your Winter Blizzard Cookies have a lovely, firm chocolate coating that is ready for serving or gift-wrapping!
Storage Tips for Winter Blizzard Cookies
-
Room Temperature: Keep your Winter Blizzard Cookies in an airtight container at room temperature for up to 1 week. This will maintain their soft texture and delightful flavor.
-
Freezer: For long-term storage, freeze undecorated cookies in a single layer, then transfer them to a freezer-safe bag for up to 2 months. Dip in chocolate when you're ready to serve for freshness.
-
Reheating: To enjoy your cookies warm, gently reheat them in the microwave for about 10-15 seconds. This will refresh their texture, making them taste freshly baked!
-
Decorating Tip: If saving for later, avoid dipping in chocolate until you're ready to serve. This way, you can enjoy that beautiful chocolate coating at its best!
What to Serve with Winter Blizzard Cookies
Imagine cozying up with your loved ones, indulging in delightful treats that perfectly complement the warmth of your Winter Blizzard Cookies.
-
Hot Chocolate: The ultimate winter drink! Pairing with a rich, creamy hot chocolate enhances the festive experience of your cookies.
-
Chai Latte: A spiced chai latte offers warming flavors that harmonize beautifully with the sweetness of white chocolate and nutty undertones.
-
Vanilla Ice Cream: The creaminess of vanilla ice cream provides a delightful contrast, making every bite of cookie even more indulgent.
-
Fresh Fruit Salad: A mix of juicy citrus fruits adds a refreshing burst, balancing the richness of your cookies while brightening up the flavors.
-
Nutty Biscotti: Serve alongside crispy nutty biscotti for an interesting texture contrast and to continue that comforting, cozy feeling.
-
Festive Cheese Board: Don’t shy away from a cheese board – mild cheeses like brie or gouda can cut through the sweetness, creating a lovely balance of flavors.
Let your winter gatherings be filled with joy, flavor, and heartwarming indulgences, complementing the allure of your Winter Blizzard Cookies!
Variations & Substitutions for Winter Blizzard Cookies
Feel free to get creative with these Winter Blizzard Cookies and personalize them with your favorite flavors and textures!
-
Nut-Free Version: Omit nuts and add an extra ¼ cup of flour to maintain dough consistency. This allows everyone to enjoy the cookies without allergens, ensuring no one feels left out during festive gatherings.
-
Sweetener Swap: Replace powdered sugar with coconut sugar for a unique caramel-like flavor and a subtly darker color. It will add a different sweetness that complements the buttery base wonderfully, while keeping everything friendly for those seeking a healthier alternative.
-
Chocolate Variations: Use semi-sweet or dark chocolate instead of white chocolate for a richer flavor profile. Dipping in different types of chocolate can also create a fun festive theme, perfect for serving alongside your favorite holiday treats like Thumbprint Cookies Melt.
-
Fruit Forward Twist: Swap out the nuts for dried cranberries or chopped dried apricots for a sweet, chewy alternative. This fruity surprise adds a delightful pop of color and a little tanginess that brightens every bite.
-
Spice It Up: Add a teaspoon of cinnamon or nutmeg to the dry ingredients for a warm and comforting flavor that pairs beautifully with the white chocolate. This spice twist enhances the cozy vibes of your cookies, making them even more inviting.
-
Flavor Boost: Infuse your butter with a splash of almond extract for a nutty depth that complements the pecans. This subtle addition transforms the cookie experience into something truly sophisticated, perfect for impressing guests at winter gatherings.
-
Theme Sprinkles: Change out the holiday sprinkles for themed ones to match any special occasion throughout the season. Whether it's hearts for Valentine’s or pastel colors for spring, the customization can turn your cookies into festive highlights.
-
Gluten-Free Version: Substitute all-purpose flour with a gluten-free flour blend to accommodate gluten-sensitive friends. This makes sure everyone can indulge in the delightful winter magic without worries.
Explore these variations to make your Winter Blizzard Cookies uniquely yours, and don’t forget to pair them with cozy beverages like hot chocolate or a warm spiced chai for an unforgettable dessert experience!
Expert Tips for Winter Blizzard Cookies
-
Perfect Butter Temperature: Make sure your unsalted butter is at room temperature. Cold butter won't cream properly, leading to denser cookies.
-
Don't Overmix: When combining dry and wet ingredients, mix just until incorporated. Overmixing can develop gluten, making your cookies tough instead of tender.
-
Watch the Bake Time: Keep an eye on your cookies while they bake. They should be soft but set; they’ll firm as they cool.
-
Choco-Dipping Strategy: Dip cookies right after they cool to room temperature. Allow the chocolate to harden at room temperature for the best finish.
-
Storage Essentials: Store your Winter Blizzard Cookies in an airtight container at room temperature. If you want to maintain their freshness longer, flash-freeze them before storing!
Make Ahead Options
These Winter Blizzard Cookies are a fantastic choice for meal prep enthusiasts! You can prepare the cookie dough up to 3 days in advance and refrigerate it in an airtight container; this helps deepen the flavors and ensures your cookies remain just as delicious as if freshly made. Simply scoop the dough into balls and place them on a parchment-lined baking sheet, then freeze until solid before transferring to a freezer bag for longer storage if desired. When ready to bake, allow the dough to thaw in the refrigerator for a few hours, then bake according to the instructions for fresh, warm cookies. This approach not only saves time during busy weeks but also keeps your baking game strong!
Winter Blizzard Cookies Recipe FAQs
What type of nuts should I use for Winter Blizzard Cookies?
You can use either chopped pecans or walnuts for a delightful nutty crunch. If you prefer a nut-free option, simply omit the nuts and add an extra ¼ cup of flour to maintain the dough's texture.
How should I store Winter Blizzard Cookies?
Keep your Winter Blizzard Cookies in an airtight container at room temperature for up to 1 week. If you want to enjoy them longer, consider freezing the undecorated cookies. This keeps them fresh and allows you to dip them in chocolate when you're ready to serve.
Can I freeze Winter Blizzard Cookies?
Absolutely! For longer storage, freeze the undecorated cookies in a single layer on a baking sheet. Once frozen, transfer them to a freezer-safe bag, where they can last for up to 2 months. Make sure to dip them in chocolate after thawing for the best results.
What do I do if my white chocolate seizes while melting?
If your white chocolate seizes, don't worry! Just add a teaspoon of coconut oil or shortening to the bowl and stir until smooth. This will help to loosen and de-clump the chocolate back to a dipping consistency, ensuring your cookies come out beautifully.
How do I know if I've overbaked my Winter Blizzard Cookies?
Overbaking can lead to tough cookies. They should be soft on the top with lightly golden bottoms. If you notice dark spots all over or a hard texture when you pull them from the oven, they may have been in for too long. Aim for a baking time of 10-12 minutes for the perfect soft cookie!
Can I use a different type of chocolate for dipping?
Yes! While white chocolate adds a festive touch, feel free to experiment with dark chocolate or even milk chocolate for your Winter Blizzard Cookies. Just melt it using the same method, and remember to add colorful sprinkles for that holiday cheer.
Winter Blizzard Cookies: Festive Treats for Cozy Gatherings
Ingredients
Equipment
Method
- Preheat your oven to 350°F (175°C) and line two baking sheets with parchment paper.
- Cream together 1 cup of softened unsalted butter and 1 cup of powdered sugar until fluffy and pale, about 3-5 minutes.
- Add 1 teaspoon of pure vanilla extract and blend until fully incorporated.
- In a separate bowl, whisk together 1.5 cups of all-purpose flour, 0.25 cup of chopped pecans or walnuts, and 0.25 teaspoon of salt.
- Gradually add the dry mixture into the wet ingredients, mixing on low speed until you form a soft, crumbly dough.
- Roll tablespoon-sized portions of dough into 1-inch balls and place them on the baking sheets, spacing each cookie about 2 inches apart.
- Bake the cookies for 10-12 minutes until the bottoms turn lightly golden.
- Melt 1.5 cups of white chocolate chips in a microwave-safe bowl in 30-second bursts, stirring until smooth.
- Dip each cooled cookie halfway into the melted white chocolate, then sprinkle with colorful holiday sprinkles.
- Let the cookies cool at room temperature for about 30 minutes until the chocolate hardens.


Leave a Reply