
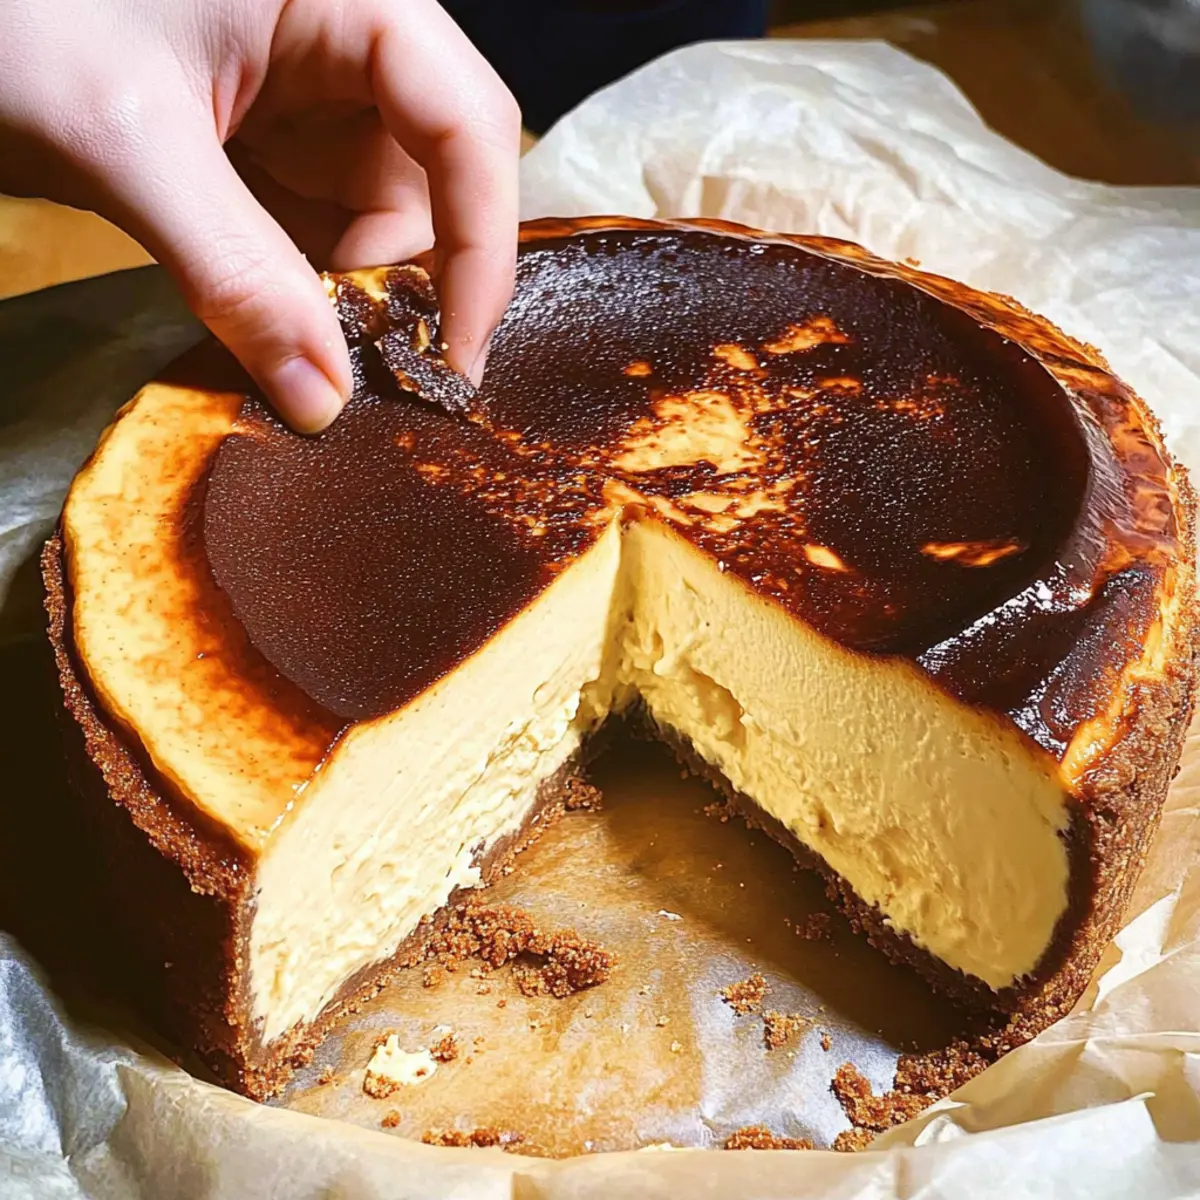
As I stood in my kitchen, the intoxicating aroma of vanilla and caramelized sugar wafted through the air, creating an unshakeable sense of anticipation. Today, I’m thrilled to share my quick and easy recipe for a gluten-free Basque Burnt Cheesecake that combines luscious creaminess with a delightful charred top. This dessert is perfect for those who crave a homemade treat but don't have the time to spend hours baking. With just 40 minutes of prep, it defies traditional cheesecake norms by forgoing a crust, allowing its rich flavors to shine. Whether enjoyed as a cozy family dessert or served at your next gathering, it’s sure to impress and satisfy. Ready to dive into this deliciously unique dessert? Let’s get baking!

Why is Basque Burnt Cheesecake a Must-Try?
Decadent, this gluten-free cheesecake is a feast for the senses with its rich, creamy texture and beautifully caramelized top that elevates any occasion. Quick preparation ensures you can whip it up in just 40 minutes, perfect for busy days. Unique flavor profile offers a delightful twist, combining creaminess with a hint of char, leaving you craving another slice. Versatile serving options allow it to shine on its own or paired with fresh berries or a drizzle of caramel sauce. It's a showstopper that’s sure to impress family and friends while being a fun and approachable baking project for beginners!
Basque Burnt Cheesecake Ingredients
Get ready to create something unforgettable!
- For the Batter
- Cream Cheese (13.5 oz / 380 g) – Provides the creamy base; ensure it is softened for easy mixing.
- Castor Sugar (1/2 cup / 100 g) – Adds sweetness; regular granulated sugar can be used in a pinch, but results may vary in texture.
- Salt (1/8 tsp) – Enhances flavor balance; sea salt is a good alternative for a more refined taste.
- Vanilla Paste/Extract (1/2 tsp) – Adds aromatic flavor depth; use pure extract for the best quality.
- Eggs (3) – Acts as a binder and enriches the texture; ensure they are at room temperature for better incorporation.
- Cornstarch (2 tbsp / 15 g) – Provides lightness and structure; can be substituted with cake flour if necessary.
- Heavy Whipping Cream (5/6 cup / 200 ml) – Contributes to the creaminess and richness; do not use non-dairy substitutes as they will affect consistency.
Enjoy this Basque Burnt Cheesecake made effortlessly with these simple and delightful ingredients!
Step‑by‑Step Instructions for Easy Gluten-Free Basque Burnt Cheesecake
Step 1: Preheat the Oven
Begin by preheating your oven to a sizzling 445°F (230°C). While the oven is warming up, line a 6-inch round cake pan with parchment paper, ensuring the paper extends above the rim to catch the cheesecake’s deliciously bubbly edges. This preparation sets the stage for your Basque Burnt Cheesecake to bake evenly.
Step 2: Cream the Cheese
In a large mixing bowl, take the softened cream cheese and use a spatula to whip it until completely smooth and free of lumps. This should take about 2–3 minutes, achieving a creamy consistency. It’s important to reach this stage before adding other ingredients, ensuring your Basque Burnt Cheesecake has that luxurious texture.
Step 3: Add Sugar and Flavorings
Gradually mix in the castor sugar, salt, and vanilla paste/extract to the whipped cream cheese. Continue whisking until all ingredients are well combined, which should take another 2–3 minutes. You’ll start to notice a lovely sheen forming on the surface of the mixture, signaling that it’s time for the next flavorful additions.
Step 4: Incorporate the Eggs
Crack each egg into the mixture one at a time, whisking thoroughly after each addition. This step is crucial as it blends the eggs into the batter, which binds and enriches it. Aim for a smooth texture without any visible egg streaks, taking about 5 minutes to achieve that perfect creamy consistency in your cheesecake mixture.
Step 5: Sift in the Cornstarch
Carefully sift the cornstarch over the creamy batter and gently whisk until just combined. Avoid overmixing at this stage to keep the batter light and airy, which is essential for the successful outcome of your Basque Burnt Cheesecake. You’re creating a luscious mix full of flavor and texture.
Step 6: Add Heavy Cream
Pour in the heavy whipping cream, stirring it in with a spatula until fully incorporated. This will take about 2 minutes and will give your Basque Burnt Cheesecake its richness. You should see a silky batter come together, ready to transform into a delightful dessert in the oven.
Step 7: Prepare for Baking
Gently pour the prepared cheesecake batter into the lined cake pan. Tap the pan against the counter a few times to release any trapped air bubbles. This step is essential for achieving the desirable smooth surface and even texture in your baked cheesecake, setting the foundation for a perfect bake.
Step 8: Bake the Cheesecake
Place the pan in your preheated oven and bake for approximately 25 minutes. Keep an eye on it during the last few minutes, as the top should be deeply caramelized and dark golden brown while the center remains slightly jiggly. This contrast is key to creating the signature look and texture of a Basque Burnt Cheesecake.
Step 9: Cool and Set
Once out of the oven, allow the cheesecake to cool at room temperature for at least 1 hour. After cooling, transfer it to the refrigerator to chill uncovered for at least 4 hours. This step helps the cheesecake set beautifully, enhancing its creamy texture, a perfect ending to your baking adventure.
Step 10: Serve and Enjoy
Before serving, let the cheesecake sit at room temperature for about 30 minutes for that velvety melt-in-your-mouth experience. With its striking contrast and rich flavor, your Easy Gluten-Free Basque Burnt Cheesecake is now ready to impress friends and family, bringing joy and satisfaction to any gathering!
What to Serve with Easy Gluten-Free Basque Burnt Cheesecake
Elevate your Basque Burnt Cheesecake experience by pairing it with delightful accompaniments that complement its rich flavors and creamy texture.
- Fresh Berries: Juicy strawberries or raspberries add a refreshing contrast, enhancing the cheesecake’s sweetness with their fruity brightness.
- Caramel Sauce: A warm drizzle of caramel creates an indulgent touch, beautifully balancing the cheesecake's richness with a sweet, buttery flavor.
- Whipped Cream: Light and airy, a dollop of freshly whipped cream provides a delightful texture contrast while amplifying the dessert's creaminess.
- Chocolate Ganache: For chocolate lovers, a smooth chocolate ganache makes everything richer, transforming each bite into an indulgent experience.
- Espresso: A shot of espresso or a cup of rich coffee brings out the cheesecake's flavors while offering a warm, comforting contrast to the dessert's sweetness.
- Nuts: Chopped hazelnuts or almonds add a delightful crunch, offering a textural contrast that pairs beautifully with the creamy cheesecake.
- Citrus Zest: A sprinkle of lemon or orange zest brightens the dish, providing a refreshing zing that complements the cheesecake's decadence.
- Ice Cream: A scoop of vanilla bean ice cream serves as a cool counterpart, enhancing the dessert experience while adding a creamy frozen element.
- Mint Leaves: Fresh mint leaves not only add a pop of color but also lend a refreshing herbaceous note that lightens each decadent bite.
Storage Tips for Basque Burnt Cheesecake
Fridge: Store your cheesecake in the refrigerator for up to 3 days. Make sure it's covered with plastic wrap or in an airtight container to maintain moisture and freshness.
Freezer: You can freeze slices of Basque Burnt Cheesecake for up to 2 months. Wrap each slice tightly in plastic wrap, then place in a zip-top freezer bag.
Reheating: When ready to enjoy, allow the cheesecake to thaw overnight in the fridge. For a warm serving, place it at room temperature for about 30 minutes before serving.
Serving: This dessert is best served slightly chilled or at room temperature to enjoy its creamy texture fully.
Basque Burnt Cheesecake Variations
Feel free to unleash your creativity and customize this Basque Burnt Cheesecake so that it’s perfectly suited to your taste!
-
Sour Cream: Substitute a small portion of cream cheese with sour cream for a tangier flavor profile. This twist adds a fun zing that brightens the cheesecake.
-
Lemon Zest: Infuse the batter with lemon zest for a refreshing contrast. The citrus notes will evoke a lovely brightness, making each slice feel like a sunny day.
-
Chocolate Drizzle: Top the cheesecake with melted dark chocolate for a rich finish. A delightful drizzle elevates the presentation and provides a decadent twist.
-
Nutty Crust: For added texture, create a nut-themed crust by using crushed almonds or walnuts mixed with a touch of butter. This addition provides a satisfying crunch beneath the creamy filling.
-
Spicy Heat: Add a pinch of cayenne pepper or a dash of cinnamon to the batter for an unexpected kick. This unique flavor twist may become a new favorite flavor combination!
-
Fruit Puree: Swirl in a berry puree before baking for a beautiful marbled effect. The fruity flavor complements the cheesecake's richness, enhancing its overall impact.
-
Caramelized Sugar Top: For a twist on the signature burnt top, sprinkle a thin layer of sugar before the last few minutes of baking. Blowtorch it for a dramatic caramel finish, blending crunch and creaminess.
-
Flavored Liqueurs: Experiment with a splash of your favorite flavored liqueur in the batter, such as orange or coffee. These infusions can take your cheesecake on an exciting flavor journey.
Feel free to explore these variations, and remember, the best part about baking is making each creation uniquely yours! If you're curious about different flavor profiles, try adding a bit of lemon zest for a bright twist or consider how a chocolate drizzle can elevate your dessert experience. Happy baking!
Expert Tips for Basque Burnt Cheesecake
• Avoid Overmixing: Prevent excessive air by mixing the batter just until combined. This will help maintain the cheesecake’s desired texture.
• Check Baking Time: If you're using a larger pan, adjust the baking time to ensure the cheesecake cooks thoroughly without burning on top.
• Serve Warm: For a gooier texture, serve your Basque Burnt Cheesecake at room temperature rather than straight from the fridge.
• Parchment Properly: Make sure the parchment paper hangs over the sides of the pan. This will prevent sticking and allow for easy removal after baking.
• Chill Thoroughly: Allow the cheesecake to set in the refrigerator for at least 4 hours before serving. This enhances the flavor and gives it the right consistency.
• Flavor Twist: Experiment by adding a teaspoon of lemon zest to the batter for a refreshing twist to your Basque Burnt Cheesecake.
Make Ahead Options
These Easy Gluten-Free Basque Burnt Cheesecake options are a game changer for busy cooks! You can prepare the cheesecake batter up to 24 hours in advance; simply follow all the steps until the baking stage, then cover the mixing bowl with plastic wrap and refrigerate it. To maintain its silky texture, whisk it lightly before pouring it into the prepared pan. If you're ready to bake, pour the chilled mixture into the lined pan and bake as directed. Once baked, this cheesecake can be refrigerated for up to 3 days before serving. Just remember to let it sit at room temperature for about 30 minutes before indulging to ensure it's just as delicious as when freshly made!
Basque Burnt Cheesecake Recipe FAQs
What type of cream cheese should I use?
Absolutely! For the best results, use full-fat cream cheese that's been softened to room temperature. This ensures easy blending and a smooth texture in your Basque Burnt Cheesecake. If you can find it, go for block cream cheese instead of spreadable varieties.
How long can I store the cheesecake, and what's the best way?
You can refrigerate your Basque Burnt Cheesecake for up to 3 days. Store it in an airtight container or cover it with plastic wrap to keep it moist and fresh. If you notice any dark spots on the surface, that's perfectly normal—just rethink your toppings if worried about presentation!
Can I freeze the cheesecake, and if so, how?
Very! To freeze, wrap each slice tightly in plastic wrap and place them in a zip-top freezer bag. Be sure to label the bag with the date! Your cheesecake will last up to 2 months in the freezer. When you’re ready to enjoy, let it thaw in the fridge overnight and sit at room temperature for about 30 minutes for the best texture.
What should I do if the cheesecake cracks while baking?
Don’t worry—common! To avoid cracks in your Basque Burnt Cheesecake, make sure to monitor your oven's temperature and avoid overmixing the batter. If cracks occur, consider topping the cheesecake with fresh berries or a drizzle of caramel sauce for a delicious distraction.
Are there any dietary considerations I should be aware of?
Definitely! If you or your guests have dietary restrictions like gluten intolerance, rest assured that this Basque Burnt Cheesecake is gluten-free as written. However, ensure to check all ingredient labels, especially the cornstarch and vanilla extract, for hidden gluten. Enjoy it safely and deliciously!
Can I substitute any ingredients for dietary reasons?
You can! Swap out some cream cheese for sour cream for a tangier flavor. If you're looking for a lighter option, consider using low-fat cream cheese, though it may alter the texture slightly. Be adventurous; you can incorporate flavored liqueurs or natural extracts to give your cheesecake a unique twist.
Decadent Basque Burnt Cheesecake That Everyone Will Love
Ingredients
Equipment
Method
- Preheat your oven to 445°F (230°C) and line a 6-inch round cake pan with parchment paper.
- In a mixing bowl, whip the softened cream cheese until completely smooth, about 2-3 minutes.
- Gradually mix in the castor sugar, salt, and vanilla paste/extract until combined, another 2-3 minutes.
- Crack in each egg one at a time, whisking thoroughly after each addition until smooth.
- Sift the cornstarch over the mixture and gently whisk until just combined.
- Pour in the heavy cream and stir until fully incorporated, about 2 minutes.
- Pour the cheesecake batter into the lined pan and tap it against the counter to release air bubbles.
- Bake in the preheated oven for approximately 25 minutes until the top is caramelized but the center jiggles.
- Allow the cheesecake to cool at room temperature for 1 hour, then chill in the refrigerator for at least 4 hours.
- Before serving, let it sit at room temperature for about 30 minutes.


Leave a Reply